To make matters even better, you can combine and convert multiple images into one PDF file from iPhone and iPad. And while you can opt for third-party apps, we have solutions to convert pictures to PDF on iPhone without an app. So, let’s get going.
Why Convert Photos to PDFs
Wider compatibility – PDF is a widely accepted document format that is compatible with most operating systems, making it easier to share and access files across multiple platforms.
Compact Size – PDF files are often smaller in size compared to image files, making them easier to upload, download, and store.
More secure – Additionally, PDF files can be secured with passwords or encryption, providing an added layer of security to your documents.
Overall, converting pictures into PDFs is a convenient and efficient way to share and store documents; whether it’s for work, school, or personal use. And thankfully, with the built-in tools available on your iOS device, you can save photos as PDFs quickly, easily, and efficiently.
1. Convert Picture to PDF on iPhone via Printer
Step 1: Launch the Photos app and select the photo. Step 2: Tap the Share button from the bottom left. Step 3: In the Share Sheet, select Print. Step 4: From the print preview page, tap on the Share icon again. Step 5: Here, you’ll observe that the photo is auto-converted into PDF. Now, save it or copy it as per your preference. You can now share it with someone, attach it to your email, copy the file to the clipboard, or save the PDF to your Files app.
2. Convert Multiple Photos to PDF on iPhone
Step 1: In the Photos app, tap Select from the top-right corner. Step 2: Now, select the images you want to save as PDF. Step 3: Tap the Share icon. Step 3: Next up, select Print in the Share Sheet. Step 4: From the print preview page, tap on the Share icon again. Step 5: Here, you’ll observe that the photo is auto-converted into PDF. Now, save or copy it as per your preference. Remember, you can’t rearrange the images once you tap Share. So, consciously select the images in the order you want them in the PDF document. Note: In this method, the page layout of the PDF is pre-defined. Firstly, each photo will occupy an individual page in the PDF, you can’t club them on a single page. And while you can change the page size, the options remain limited.
3. Use the Books App to Turn a Picture Into PDF on iPhone or iPad
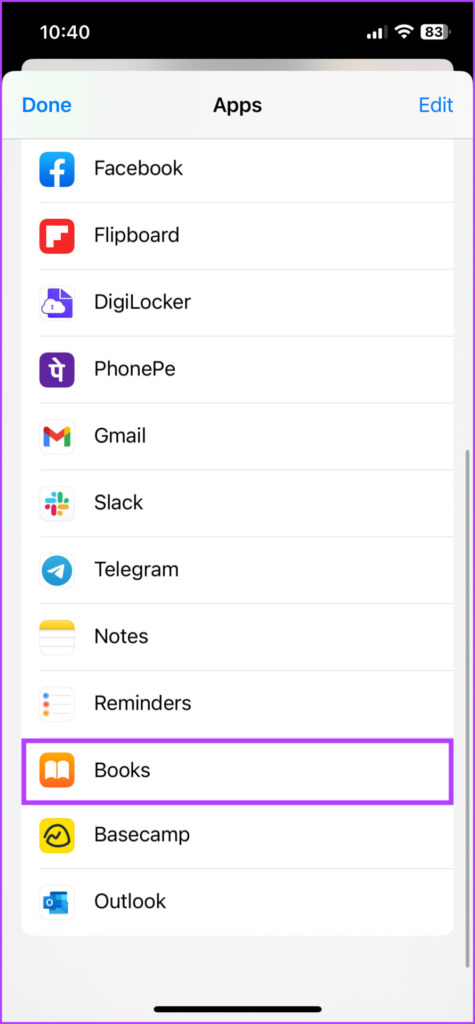
Step 1: In the Photos app, select the Photo or Photos (if you want to save multiple photos as PDF). Step 2: Tap the Share icon and select the Books app. Note: If you can’t see the Books app, swipe right to the three-dot icon and select Books from the options. That’s it. The Books app will instantly save the photo as PDF. Moreover, if your iCloud sync for the Books app is enabled, the PDF will auto-sync across all your Apple Devices and iCloud. To view, share, or rename the PDF, go to the Books app and tap the three-dot icon next to it. Note: While you can’t rearrange pages in the Books app as well, you get a workaround to set more pictures on one page. Tap the three-dot icon → Share PDF → Print → Layout → Pages per Sheet → adjust Pages as per choice → share icon again → Save/Copy files.
5. Save Photos as PDFs on iPhone via the Files App
There are two scenarios where this method will come in handy. First, when your photos are saved in iCloud Drive, Google Drive, etc. which can be directly accessed from the Files app. Then when you’re converting multiple images to PDF. An inherent benefit here is that the Files app converts photos in alphabetical or numerical order. So, you can rename the photos in the order you want them to appear before converting them. Step 1: Open the Files app and the folder with the photos. Step 2: To rename the files, long-press any file and select Rename. Step 3: Once done renaming, tap the three-dot icon → Select. Step 4: Choose the photos you want to save as PDF. Step 5: Next, tap the three-dot icon from the bottom-right corner. Step 6: Here, select Create PDF. You’ll now find the converted PDF file in the same location. You can preview it, move it to another location, or share it with other apps and contacts. Tip: Another benefit of using the Files app is that you can add or delete pages/images from the PDF file with ease.
6. Use the Notes App to Convert Multiple Images to PDF
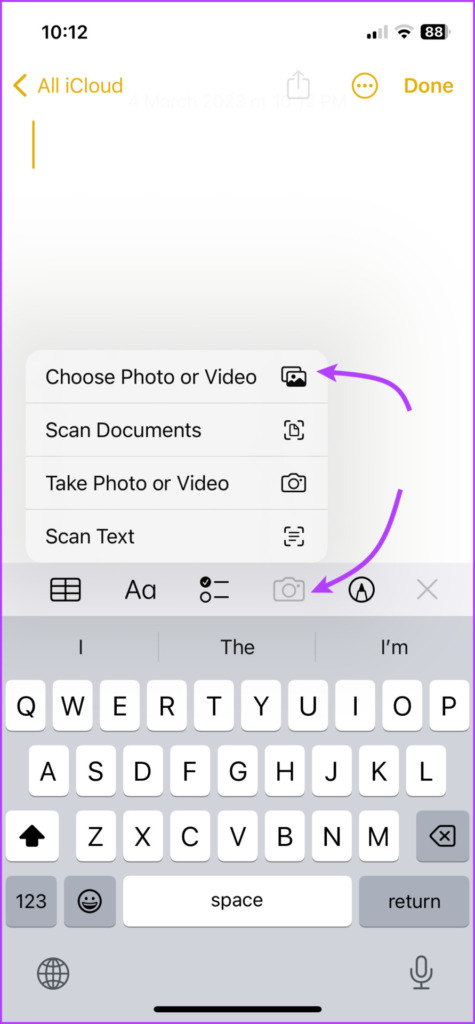
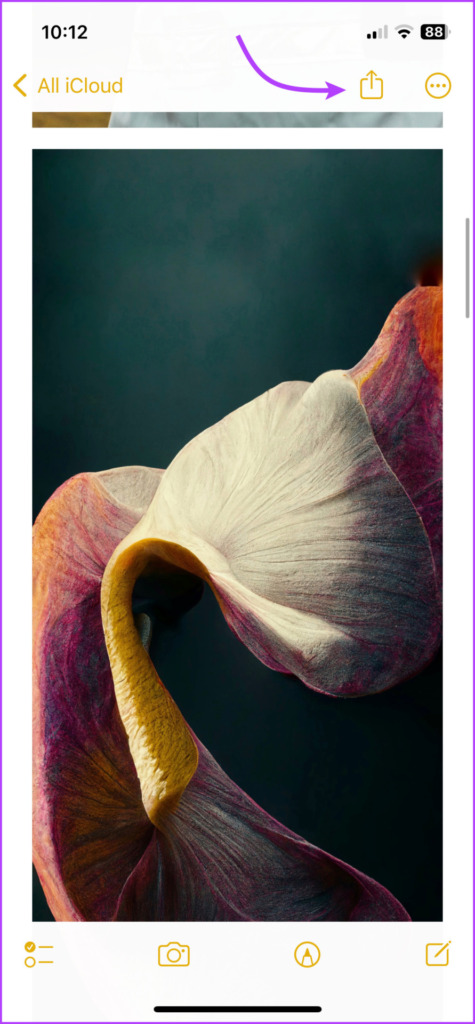
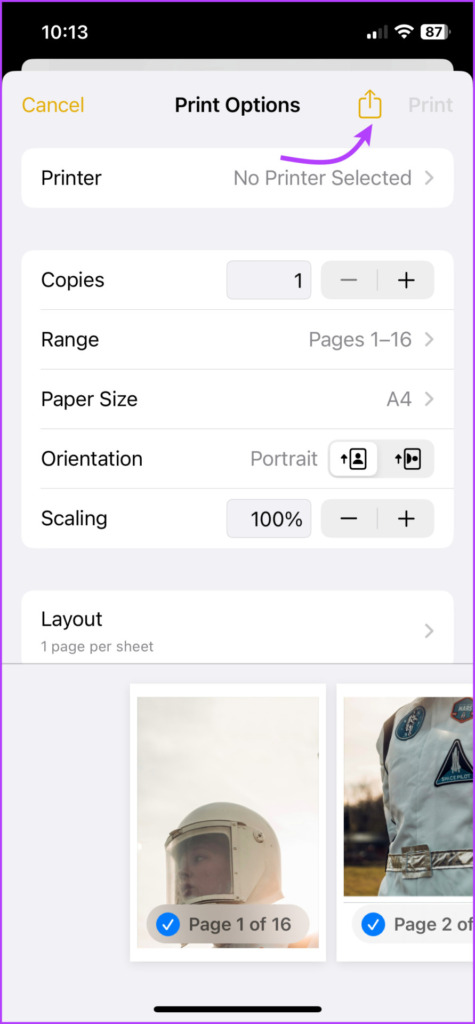
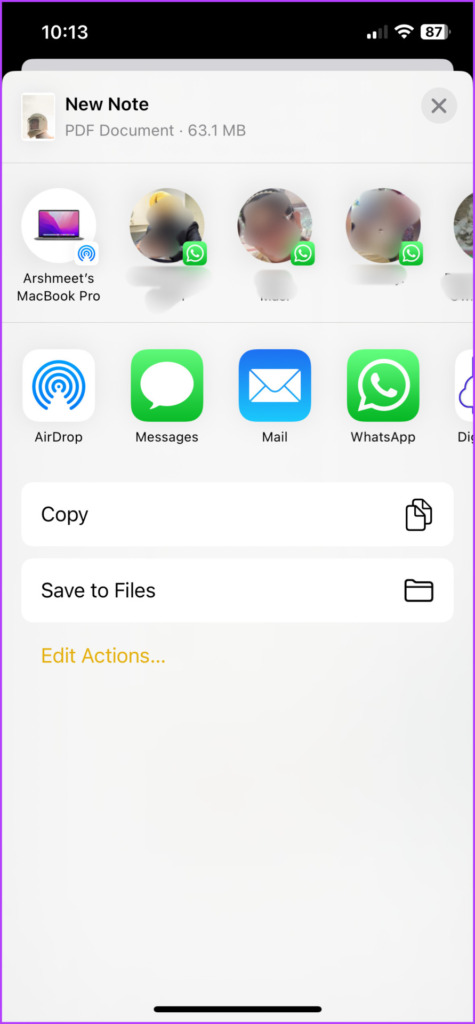
One concurrent problem when converting multiple pictures to PDF on iPhone without an app is that you don’t get to arrange or organize the images. And albeit in limitation, the Notes app offers relief in the matter. Step 1: Launch the Notes app and open a new note. Step 2: Tap the Camera icon and select ‘Choose Photo or Video’. Tip: Here, you can organize the images as per preference. However, unfortunately, you can’t resize the images. Step 3: Once done, tap the Share button. Step 4: From the Share Sheet, select Print. Step 5: In the Print Options page, tap the Share button to share or save the PDF. Another benefit of using the Notes app is that you can add text to the PDF-like image titles, captions, descriptions, etc. You can also use Markup tools to draw or add signatures or more.
Happy PDFing
As mentioned in the article, converting your PNGs, HEICs, and JPGs to PDF has several benefits. And though you don’t necessarily need a third-party app, apps and websites like Canva can come in handy, especially if you want to arrange multiple images in a stylized format. The above article may contain affiliate links which help support Guiding Tech. However, it does not affect our editorial integrity. The content remains unbiased and authentic.









![]()

