Consider a situation where you want to capture a moment before it’s gone, and your iPhone camera keeps freezing to ruin the party. And that is pretty disappointing, to say the least. Hence, take note of these methods to not only fix the issue when it happens but also prevent it from happening in the first place. Here are seven different ways to find a solution when your iPhone camera keeps freezing. Let’s begin by changing a few settings within the camera app.
1. Turn off Smart HDR
A few features on the camera app might be quite demanding and hence, can cause some issues. If there is a lack of processing power, or memory, using such demanding features can make the camera sluggish and eventually crash. Hence, you can try and turn this feature off. Step 1: Open the Settings app and tap on Camera. Step 2: Turn off the toggle for Smart HDR. However, if this doesn’t fix the issue, you can also try disabling Auto HDR on the Camera app.
2. Disable Auto HDR
Similar to the Smart HDR feature, Auto HDR also consumes processing power. Hence, disabling Auto HDR in the Camera app is another fix for the issue. Here’s how you can do it. Open the camera app, and tap on the HDR logo at the top left as shown below. Ensure that the icon is struck off, indicating that the feature is off.
3. Restart iPhone
A simple restart fixes most issues affecting your iPhone. So you can restart your iPhone and check if the iPhone camera app keeps freezing or not. Step 1: Firstly, shut down your device.
On iPhone X and above: Press and hold the volume down and the side button. On iPhone SE 2nd or 3rd gen, 7, and 8 series: Press and hold the side button. On iPhone SE 1st gen, 5s, 5c, or 5: Hold the power button at the top.
Step 2: Drag the power slider to turn off the device. Step 3: Next, turn on your device by pressing and holding the power button on your iPhone. If the iPhone camera still crashes, move on to the next fix.
4. Force Close and Re-open the Camera App
Most times, force closing an application and restarting it again is a fix for most issues. Hence, you can try doing the same for the Camera app. Step 1: Swipe up from the bottom to open the multitasking window. If your iPhone has the physical home button, you need to double-tap it. Step 2: Force close the Camera app by swiping up. Step 3: Reopen the Camera app.
5. Download an Alternative Camera App for iPhone
There’s a wide range of camera apps available for iPhone via the App Store. However, we have a few favorites that are easy to use, feature-rich, and good alternatives. So, go ahead and use these buttons below to install the apps from the App Store. Download Focos Download ProCam 8 Download VSCO: Photo and Video Editor However, not everyone is a fan of using a third-party camera app and wants to use the default application. But if it remains unresponsive despite trying all the above methods to fix it, you can reset your iPhone.
6. Update iPhone
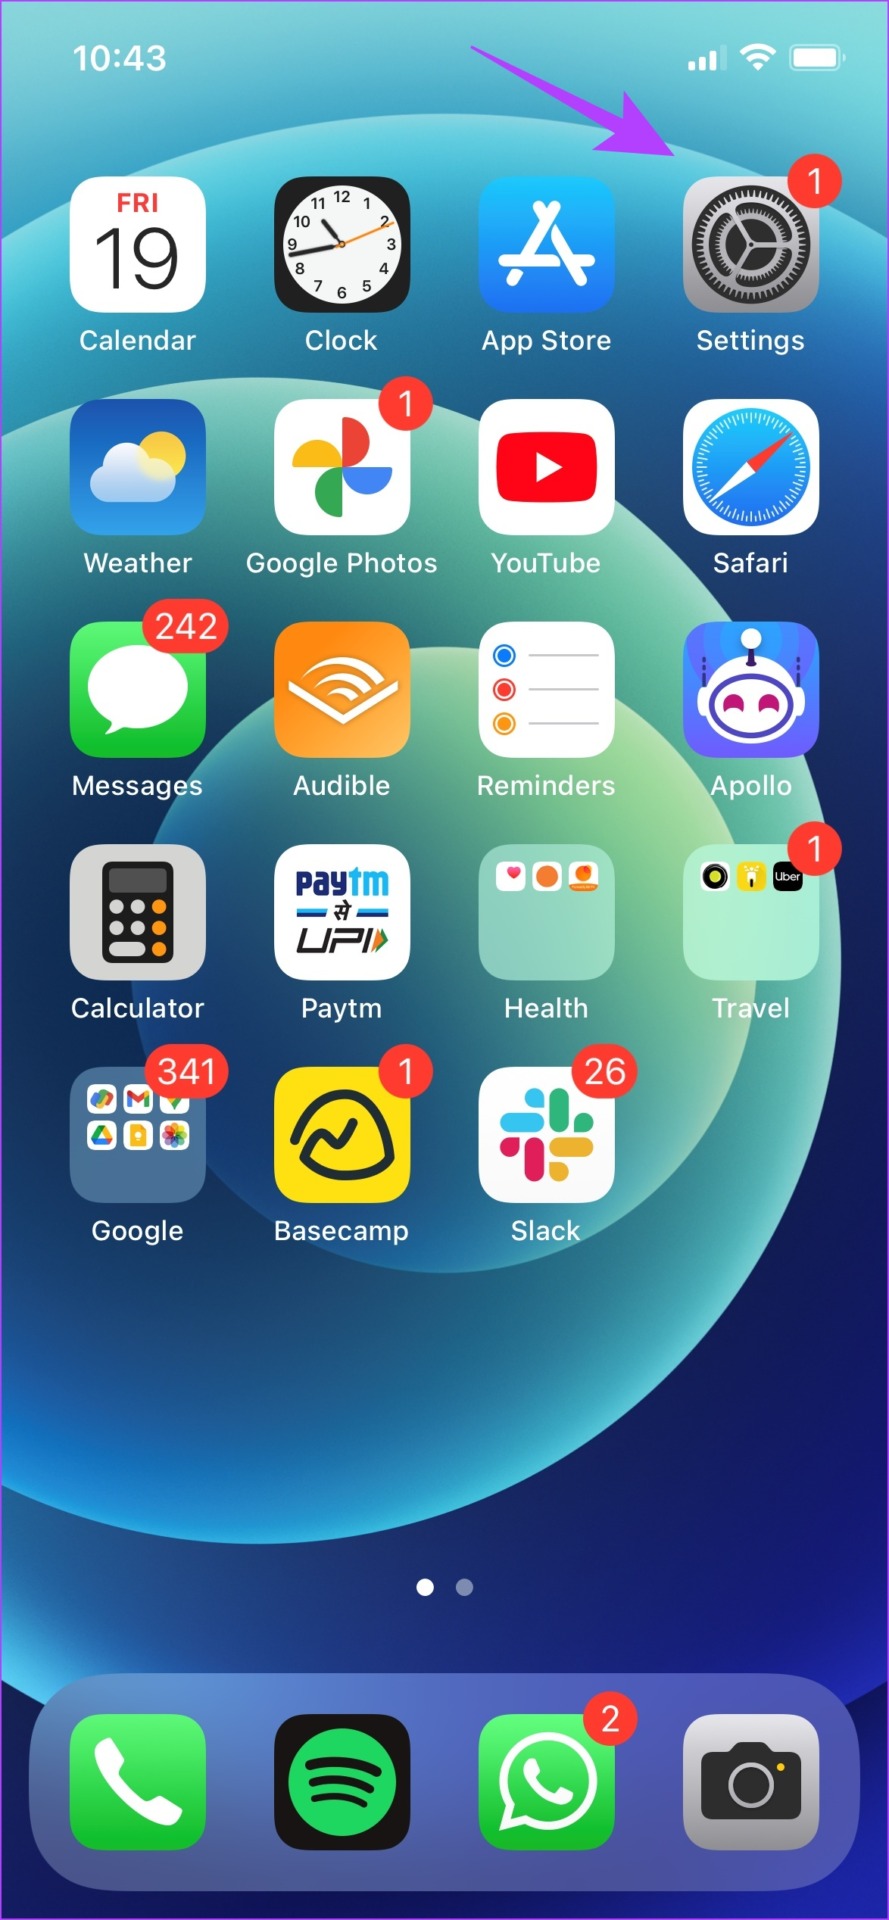
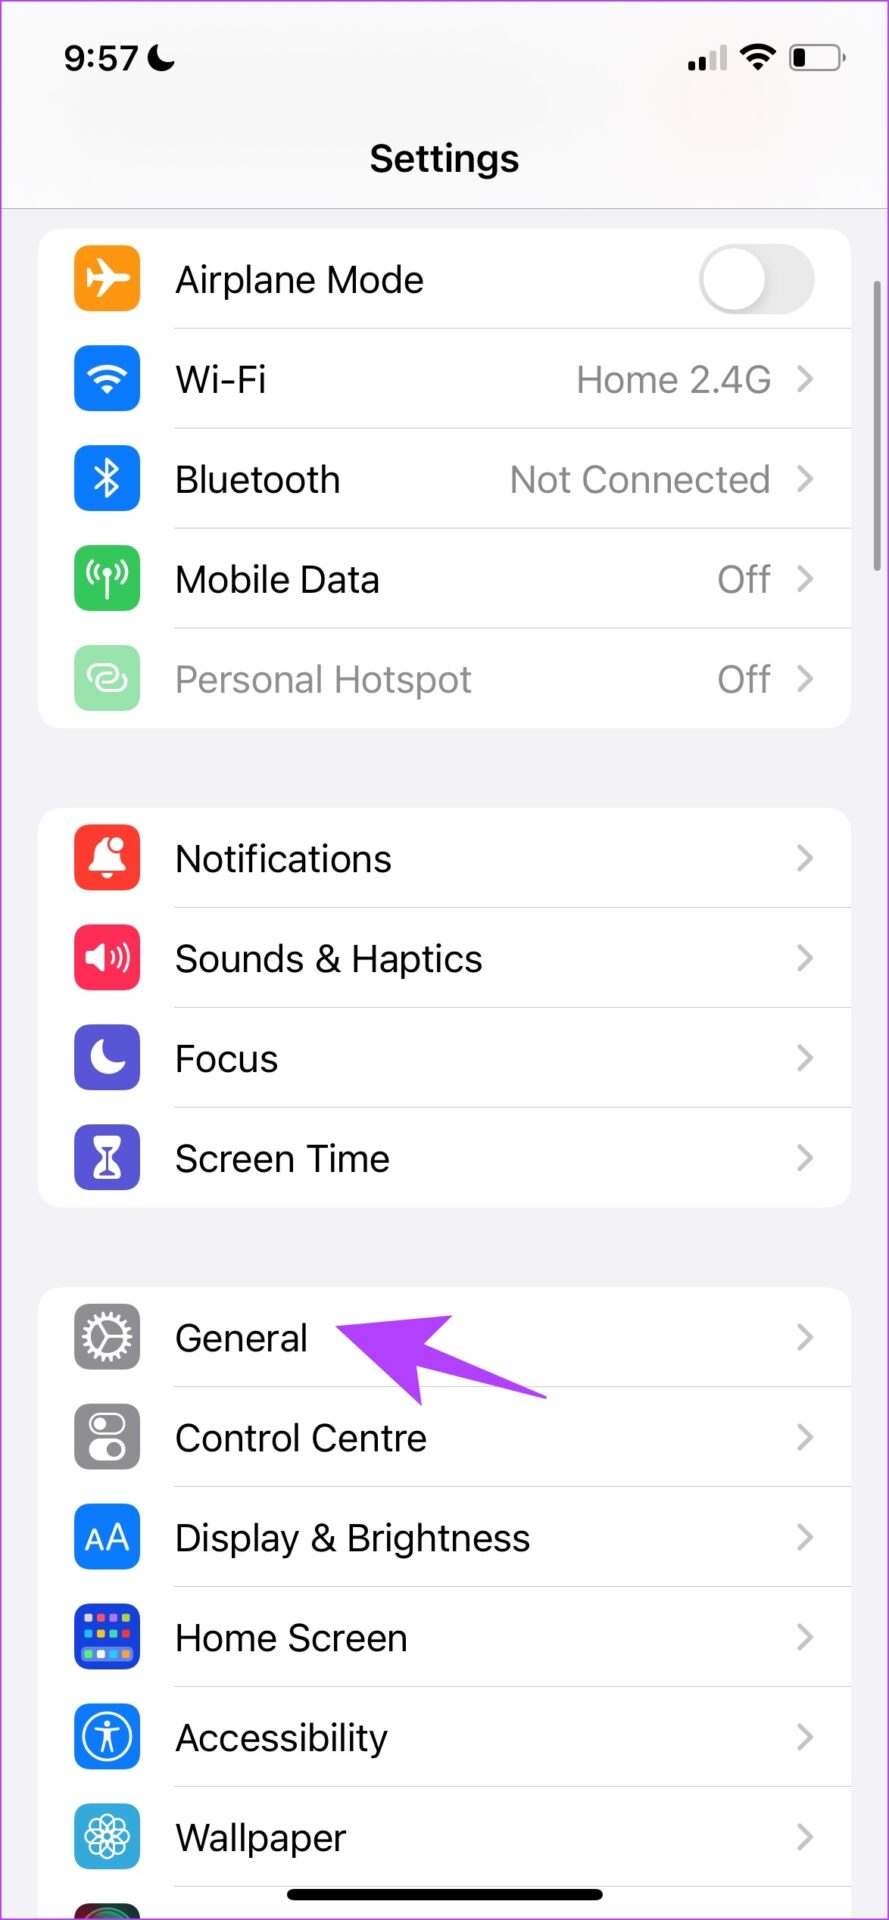
If your iPhone camera keeps freezing due to a widespread bug affecting many other users, Apple will release an update to fix the issue. Here’s how you can update your iPhone. Step 1: Open the Settings app, and select General. Step 2: Select Software Update. Check if there is any new update. If yes, you will find an option to download and install it. Lastly, if none of the above options work, you can try resetting your iPhone.
7. Reset All Settings on Your iPhone
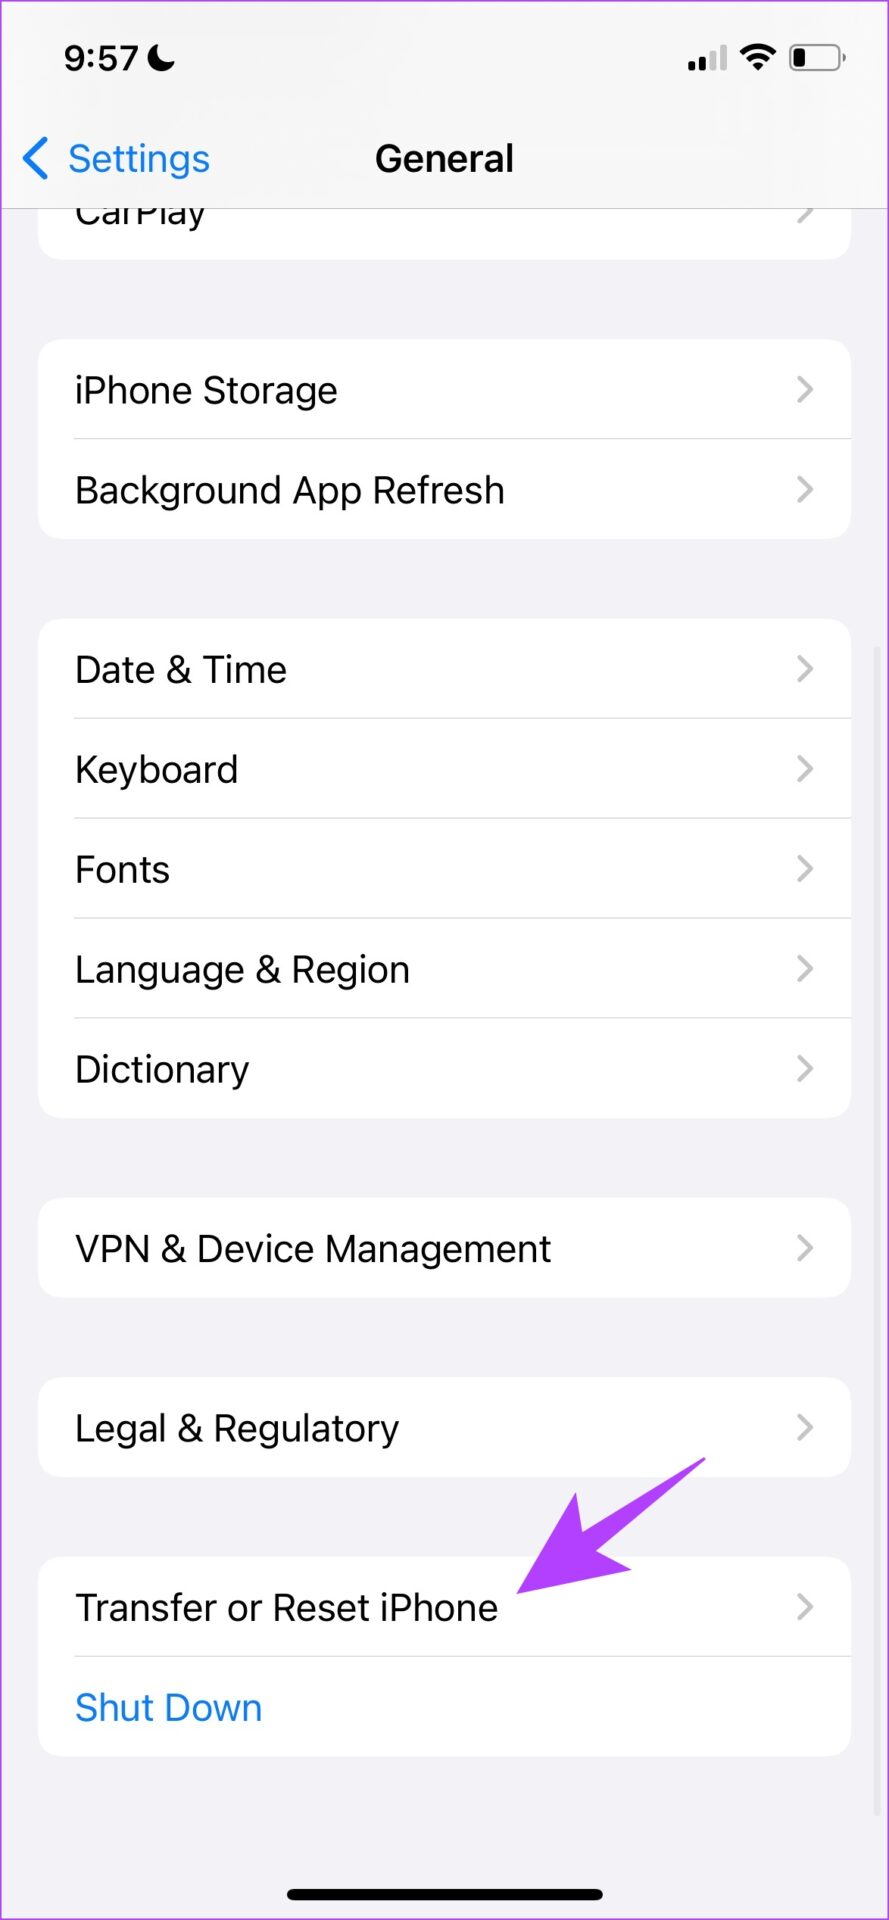
As a last resort, you can try and reset your iPhone. Doing this generally fixes most issues, but requires some time and effort. Here’s how you can do it. Step 1: Open the Settings app and select General. Step 2: Select ‘Transfer & Reset iPhone’ Step 3: Tap on Reset. Step 4: Now, tap on ‘Reset All Settings’ to return all the settings and configurations of your iPhone to their default states. And this marks the end of all the methods we want to suggest so that you can fix an unresponsive and freezing iPhone camera. However, if you have more questions, move on to the next section.
Resume Capturing Photos on iPhone
This is all you need to do whenever your iPhone camera keeps freezing. Here’s hoping we helped you completely fix the issue. With such good cameras at your disposal, issues like this are pretty frustrating and must be fixed as early as possible. So, we recommend you try all the methods listed in this guide. The above article may contain affiliate links which help support Guiding Tech. However, it does not affect our editorial integrity. The content remains unbiased and authentic.


