System Restore keeps taking a snapshot of Windows on your PC to create a ‘restore point’ where everything works fine. We’ll share more about what system restore is, how it works, and how to use it on your Windows 11 PC to undo changes or fix software-related issues.
What Is System Restore and How Does it Work
System Restore is a legacy feature baked into Windows 11 to protect and revert your system to a specific restore point if something goes wrong. It creates a snapshot of your current system state, saved as a ‘restore point’ whenever your computer detects significant changes or you create one manually to ensure your system’s safety. Suppose something went wrong after installing a buggy software update or accidentally changing important system parameters in the registry. In that case, you can use System Restore to restore your PC to a previously working state. Also, the System Restore process does not affect personal files such as your photos or documents. However, it will remove all the apps, drivers, and even updates that you installed on the system after Windows created the system point.
How to Configure and Enable System Restore in Windows 11
By default, Windows doesn’t enable the System Restore feature. You’ll need to turn it on for your Windows computer manually. Here’s how you can enable and configure a System Restore Point manually on your Windows 11 PC: Step 1: Click on Search on the Windows 11 taskbar, type Create a restore point, and select the Open button below the ‘Create a restore point’ result. Step 2: Select the Hard Drive partition for which you want to create a System Restore Point, and click Configure. Step 3: In the next window, select the ‘Turn on system protection’ option to enable System Restore. Adjust the Max Usage slider to allocate the necessary disk space for storing the System Restore Points. Step 4: Click the Apply button to save the newly changed preferences.
How to Create a System Restore Point in Windows 11
After enabling System Restore, it automatically creates a new restore point every week or when you install a system update/application. However, we recommend that you opt for creating System Restore points regularly or before making substantial changes to the registry and system preferences. Here’s how you can manually create a System Restore Point in Windows 11: Step 1: Open the ‘System Properties’ window to create a System Restore Point (check the steps in the previous section). Click on Create. Step 2: In the ‘Create a restore point’ dialog box, name the restore point, and click Create. Step 3: Click on Close to complete the process.
How to Use System Restore on Your PC
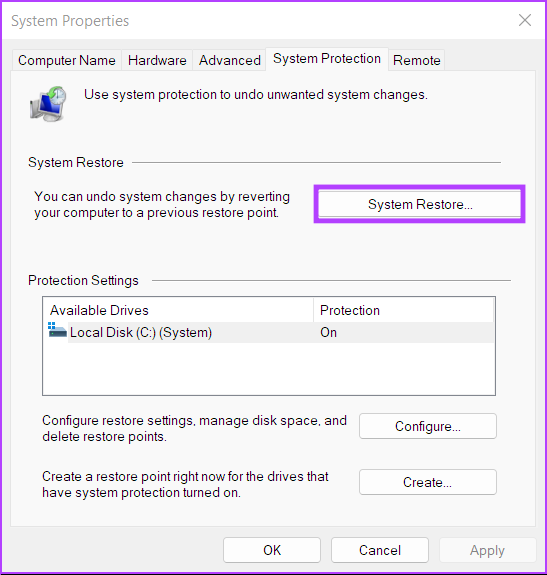
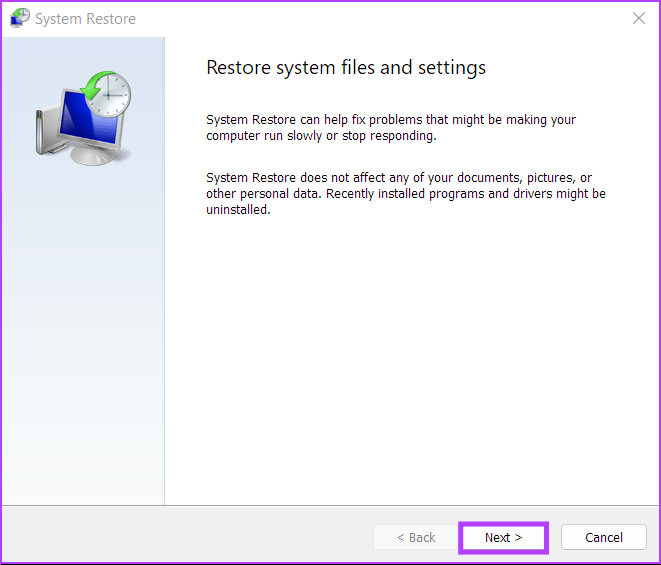
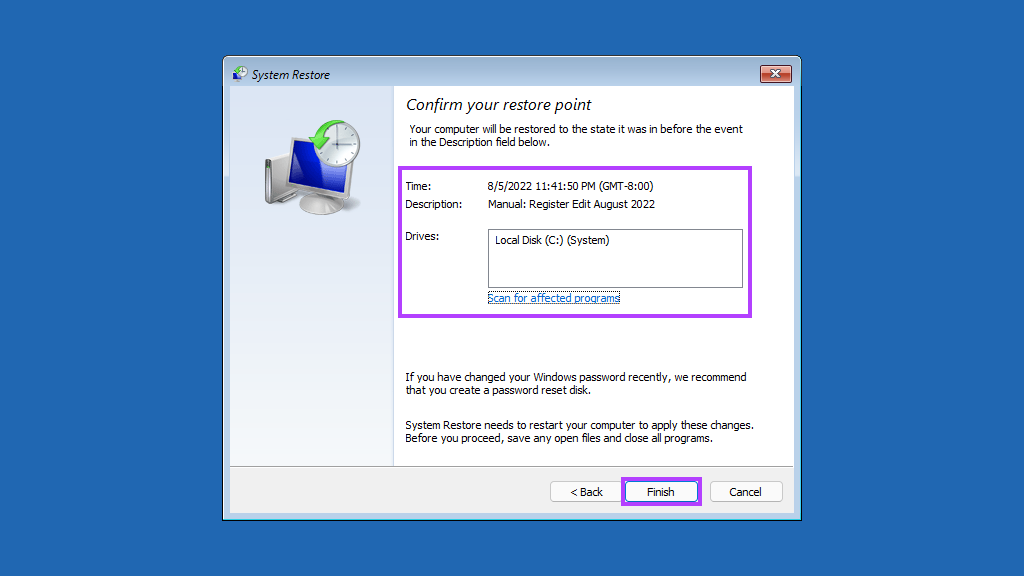
Now that you know how to enable and create a system restore point, here’s how you can use it to restore your Windows PC to an earlier stage if something went wrong, and you can still boot/start your PC: Step 1: Open the ‘System Properties’ window again (follow the steps in the first section), and click on the System Restore button. Step 2: Click Next to commence the restoration process. Step 3: Select a restore point you want to use. (we chose the ‘Registry Edit August 2022’ created for this guide). If required, click on ‘Scan for affected programs’ to see the changes made to the system before the restore point was created. Then, click Next. Step 4: Confirm the restore point you want to revert your system to. Once verified, click on Finish to commence the automated restoration process.
How to Use System Restore When Computer Won’t Boot
If you’re trying to revert from a buggy update, there’s a good chance that you can boot/login into your PC to commence the System Restore process. However, if you can’t boot into your PC, here’s how you can access System Restore from the Advanced startup options. Check our guide on different ways to access Advanced Startup Options in Windows 11 Otherwise, you may follow these steps: Step 1: Start the computer and long-press the power button when you see the Windows logo and wait for your computer to reboot. Step 2: Force reboot your PC up to 4 times until you see the Automatic Repair screen. Then, click on Advanced options.
Step 3: Click on Troubleshoot. Step 4: Select Advanced options. Step 5: Click on System Restore. Step 6: The computer may ask you to enter the Administrator password. After that, click on the Continue button. Step 7: Choose the restore point you want to revert to in the System Restore window. If required, click on ‘Scan for affected programs’ to see the changes made to the System before the restore point was created. Then, click Next. Step 8: Confirm the restore point you want to use. Once verified, click on Finish to start the system restoration process.
Let the System Restore Take Over and Do Its Thing
Give time to your PC to apply all the changes, and it will restart to get Windows up and running. Do note that this process may take half an hour or more, depending on various factors like the size of the restore point, the age of the PC’s hardware, etc. So, try not to turn off your computer or use it while the restoration is in progress. After the restoration process completes, your PC will restart, and a window will appear saying that you’ve successfully restored your PC. The best part of the System Restore is that you don’t have to lose your important files or installed applications. If you’re stuck or have specific queries about System Restore, share them in the comments below.
The above article may contain affiliate links which help support Guiding Tech. However, it does not affect our editorial integrity. The content remains unbiased and authentic.


