But first, you might wonder why you want to add a link to your Instagram content. Simply put, it’s a great way to drive traffic to your website, promote your products and services, and even direct your followers to specific posts and pages. Adding a link to your Instagram story or posts can increase engagement and ultimately lead to more conversions. So, let’s get started with the article!
How to Add a Link to Instagram Story
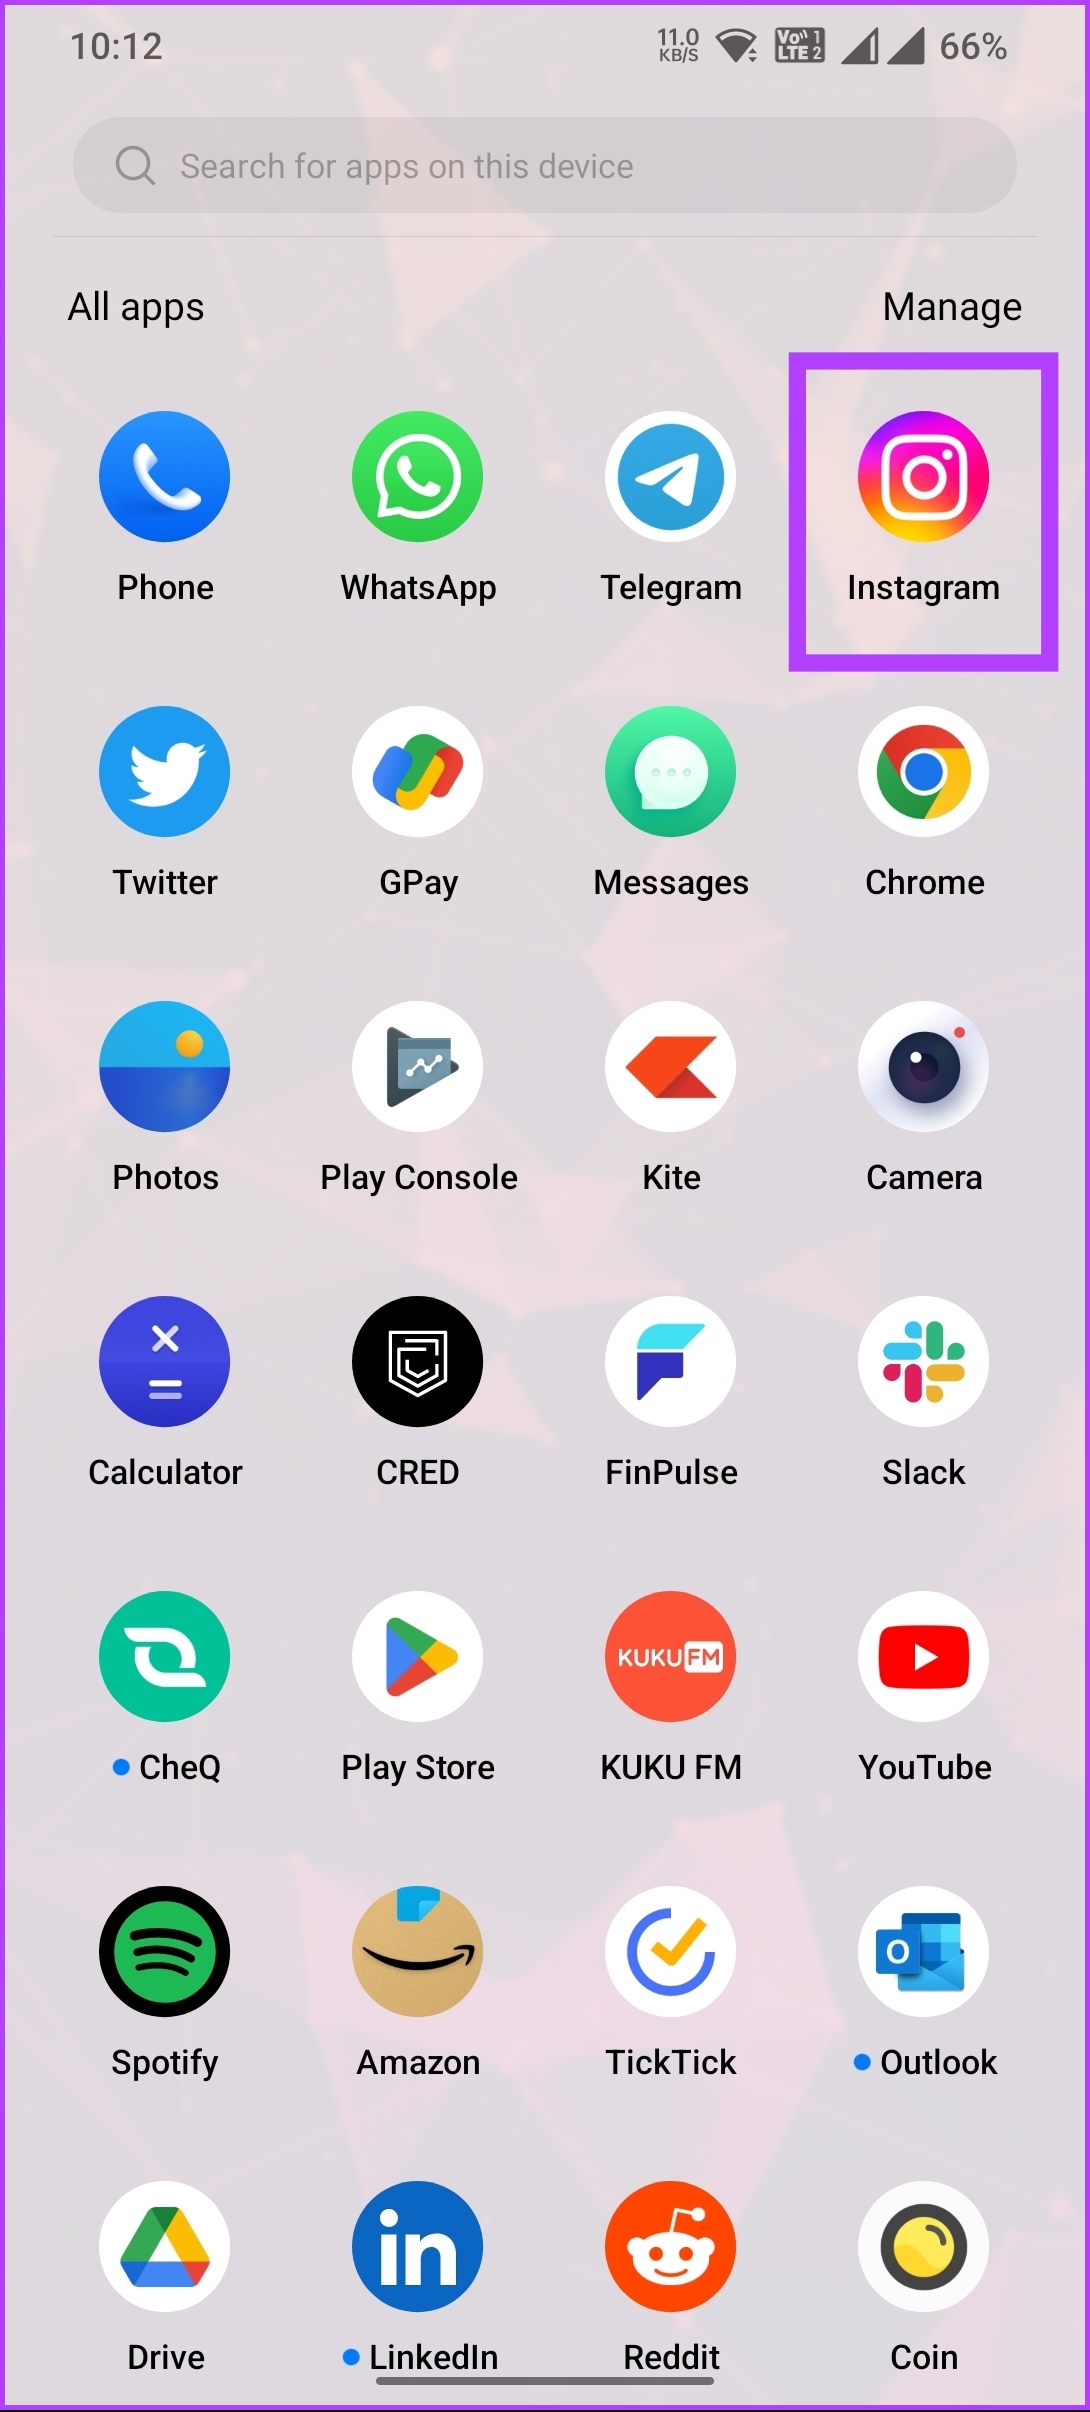
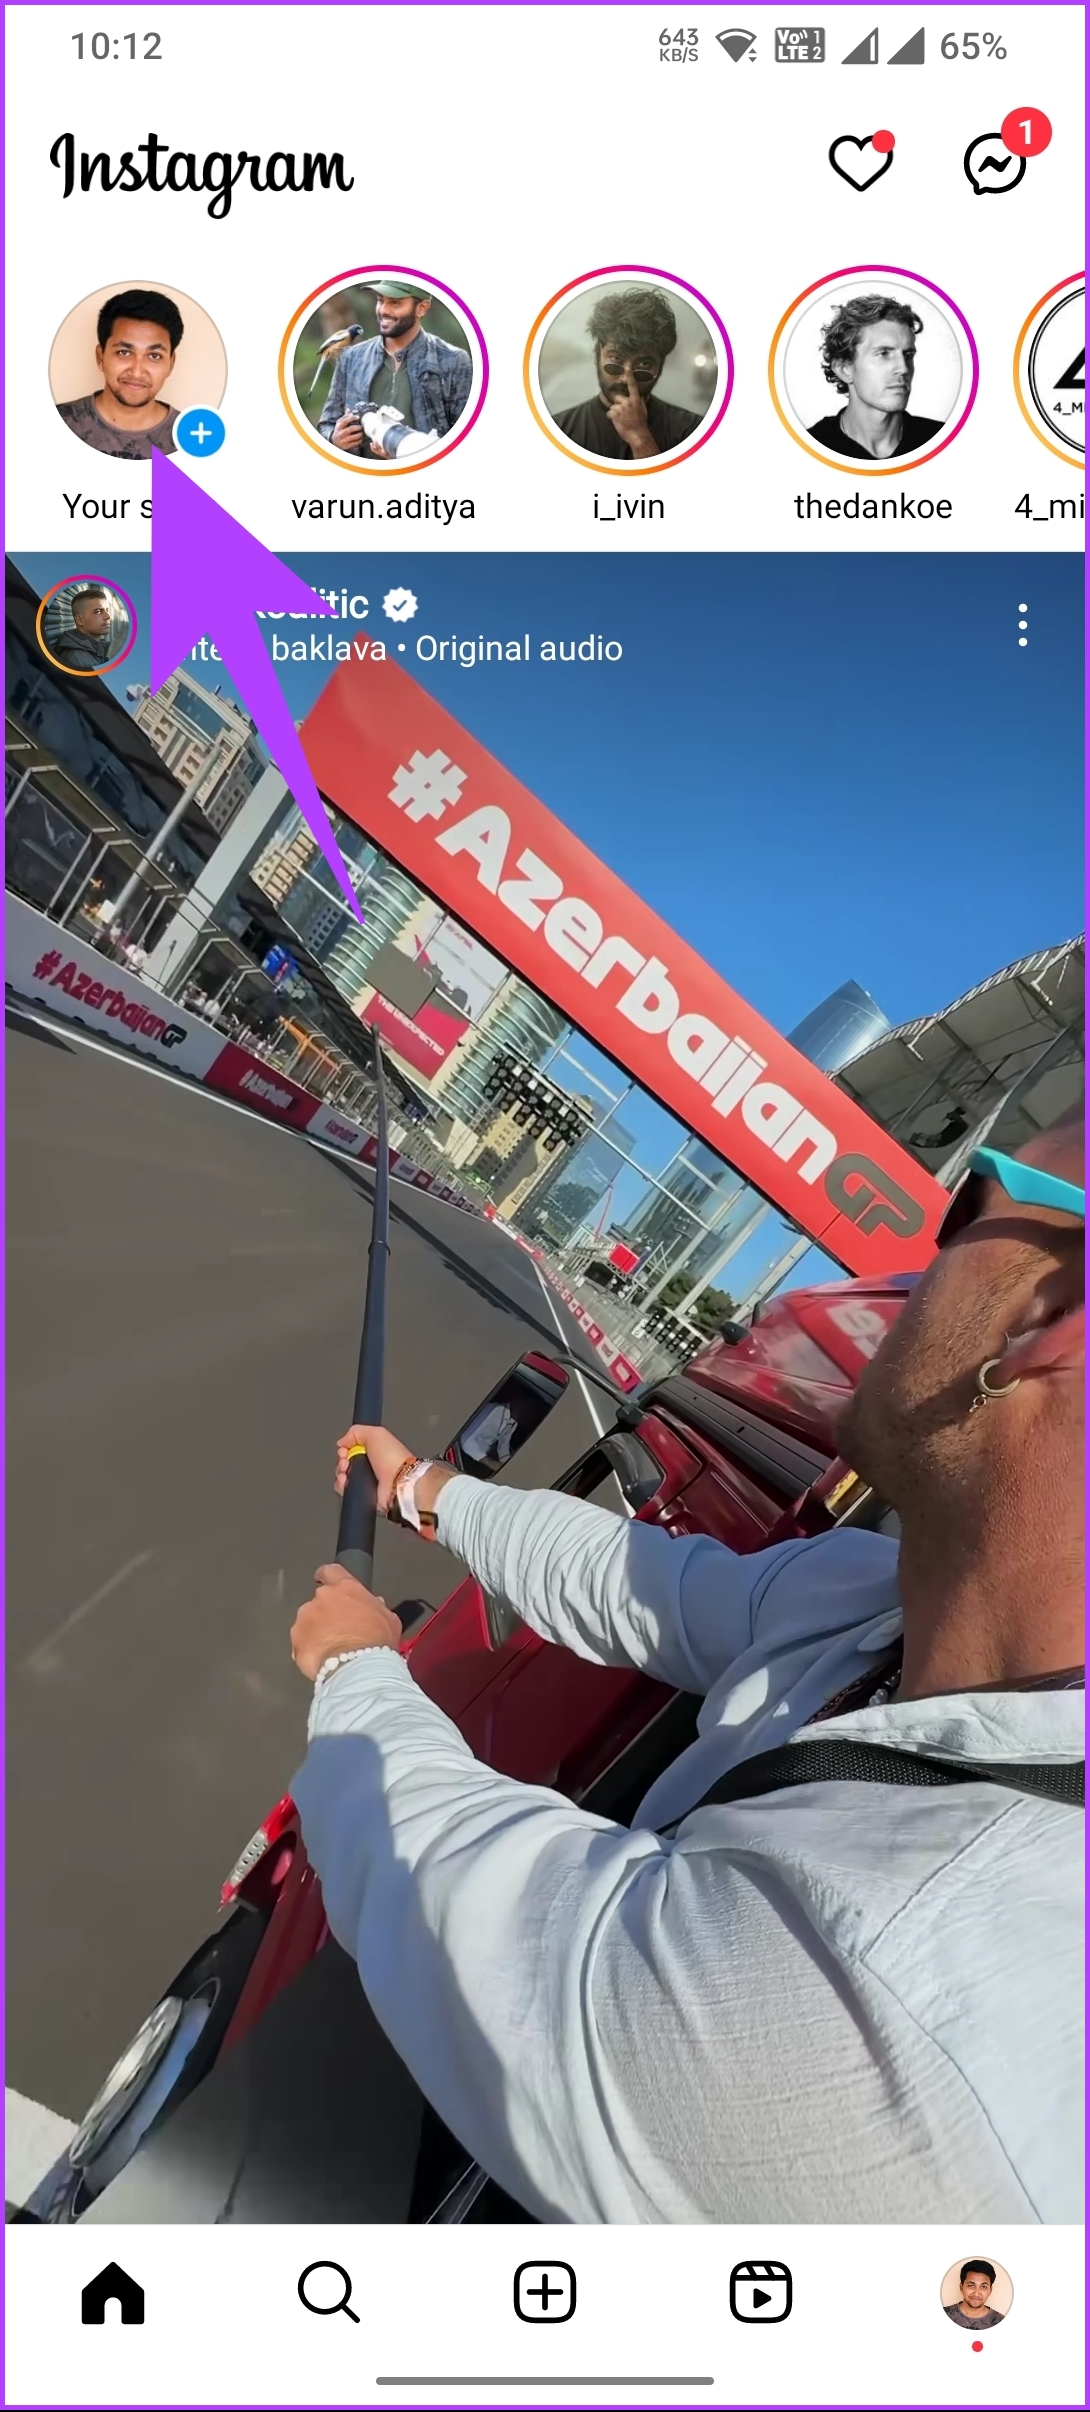
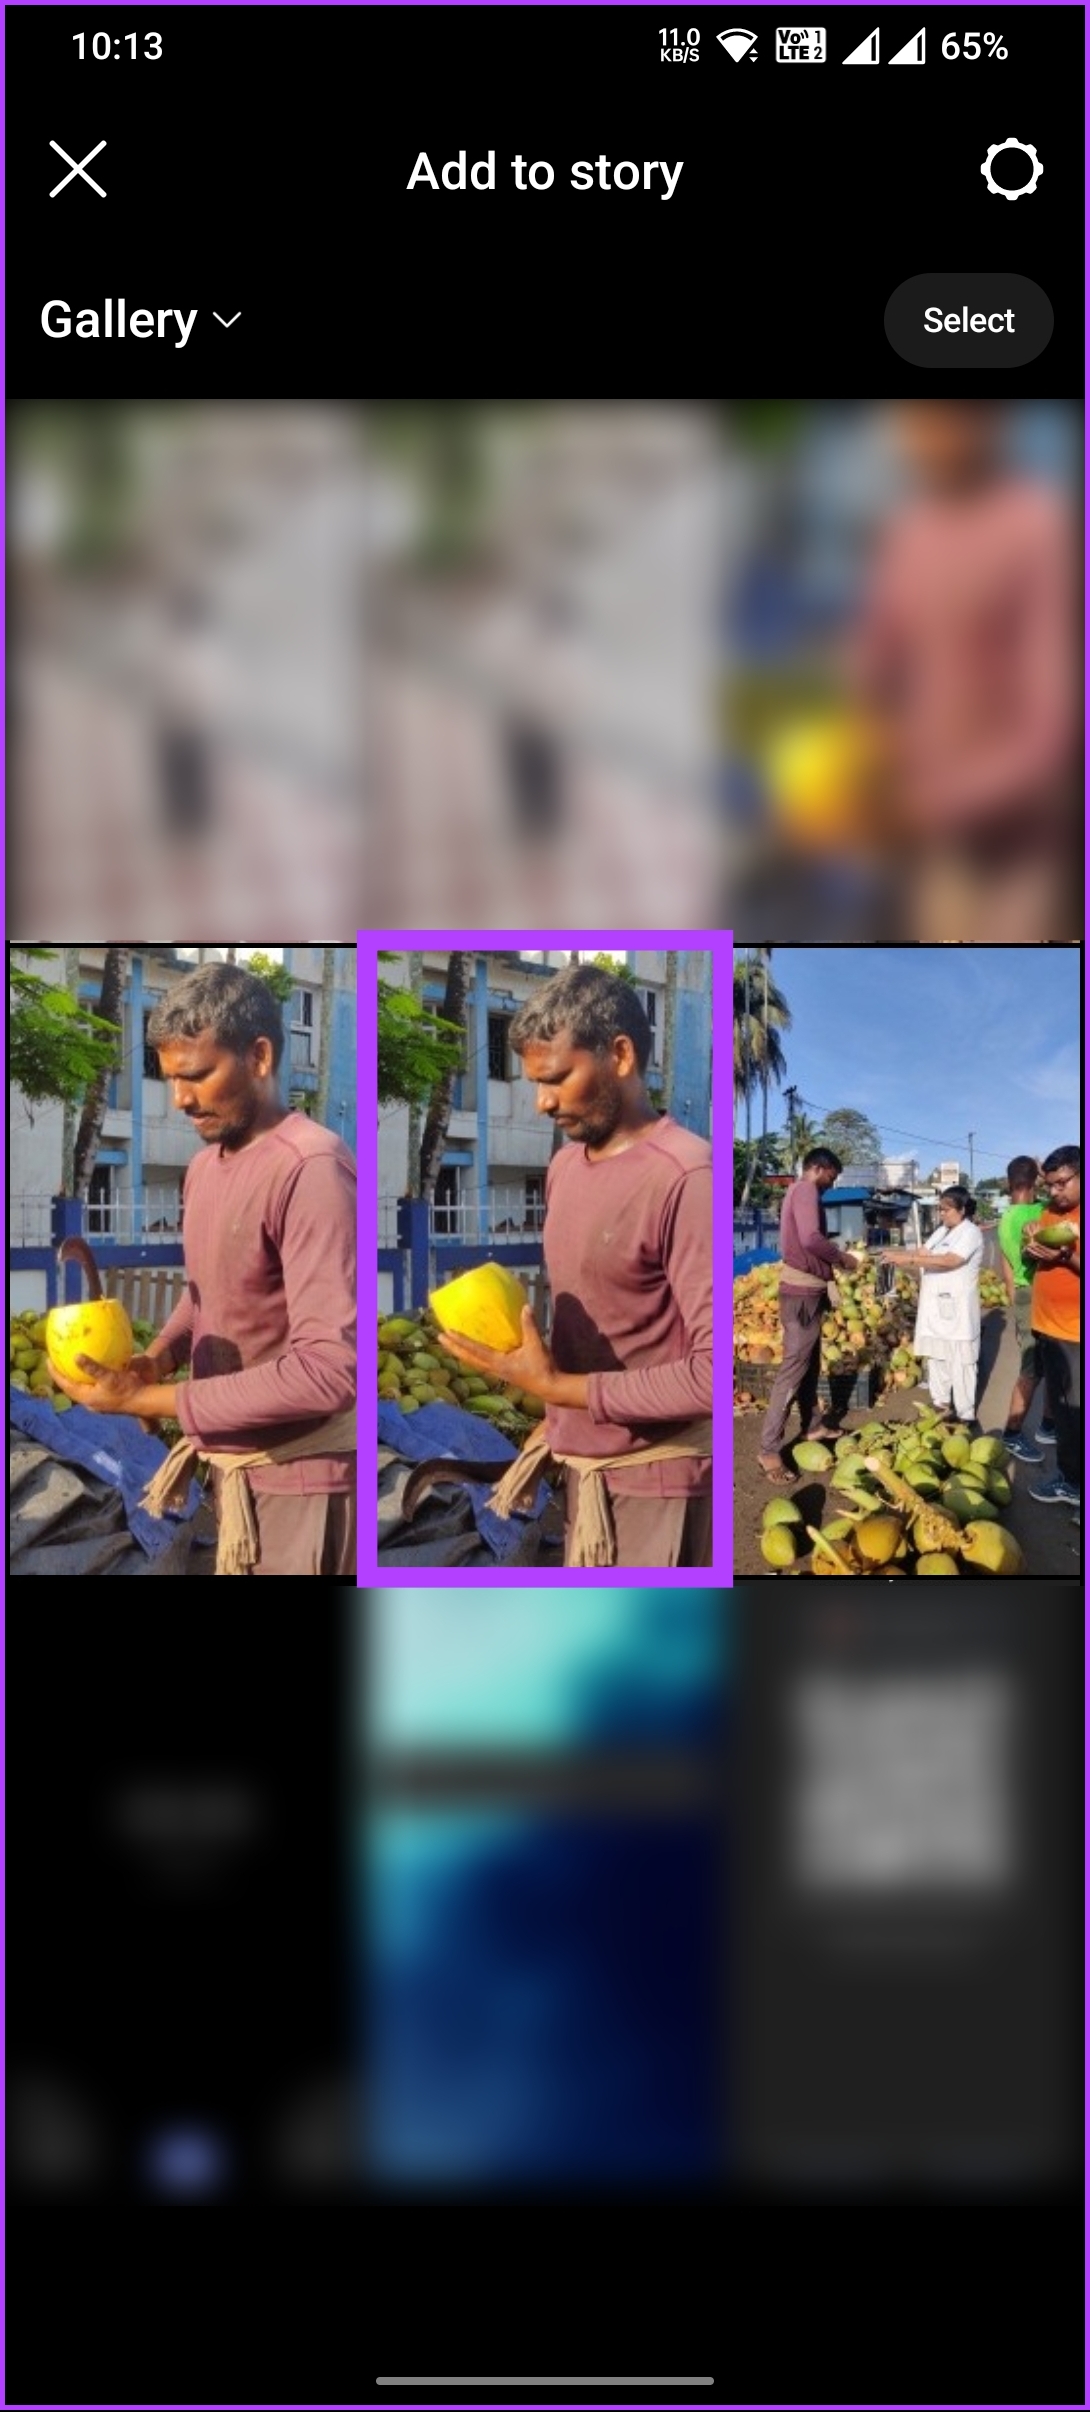
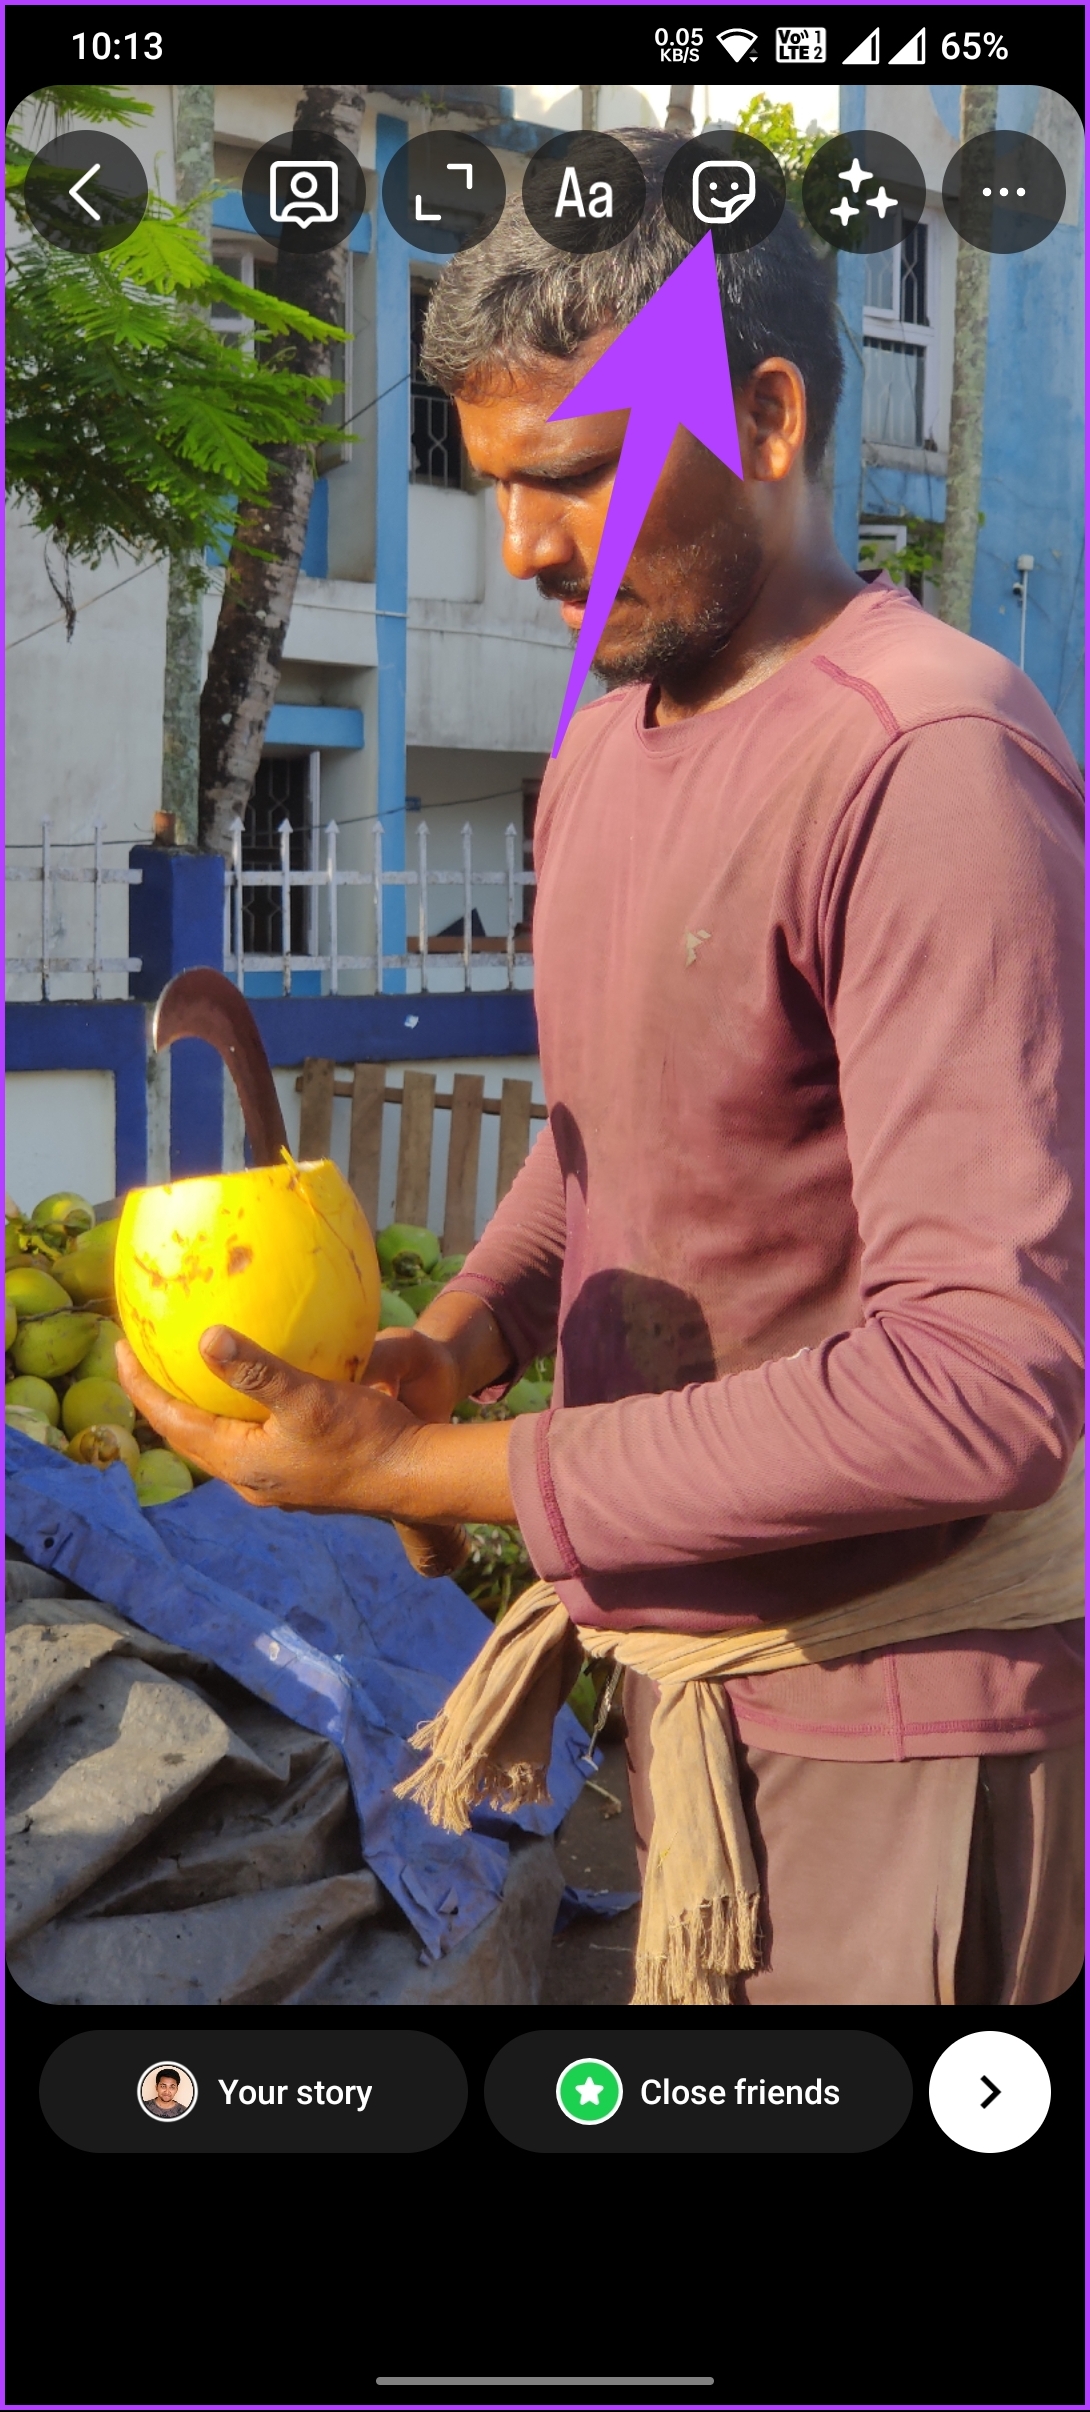
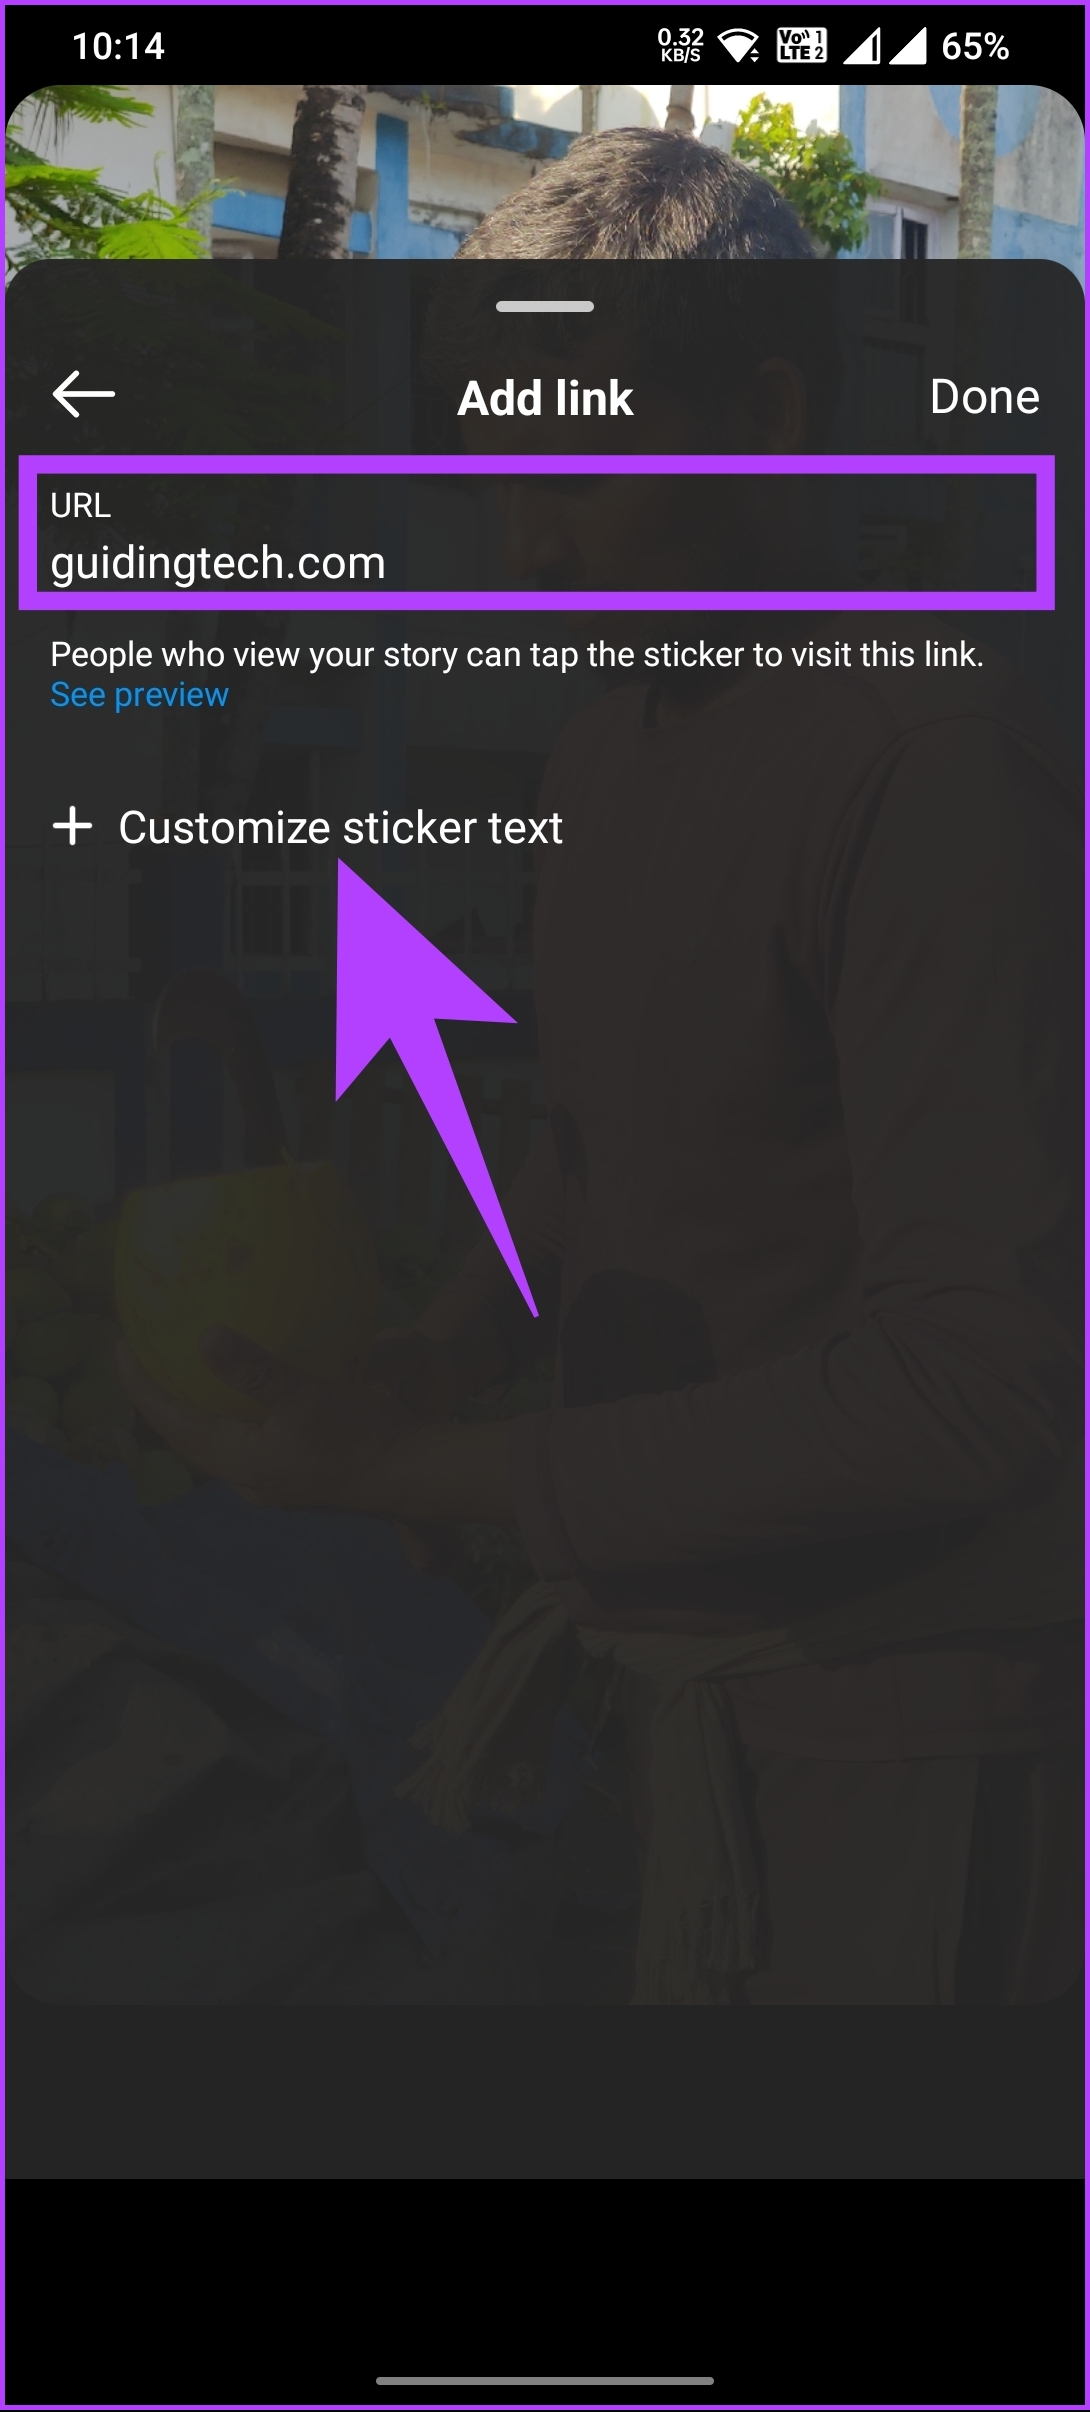
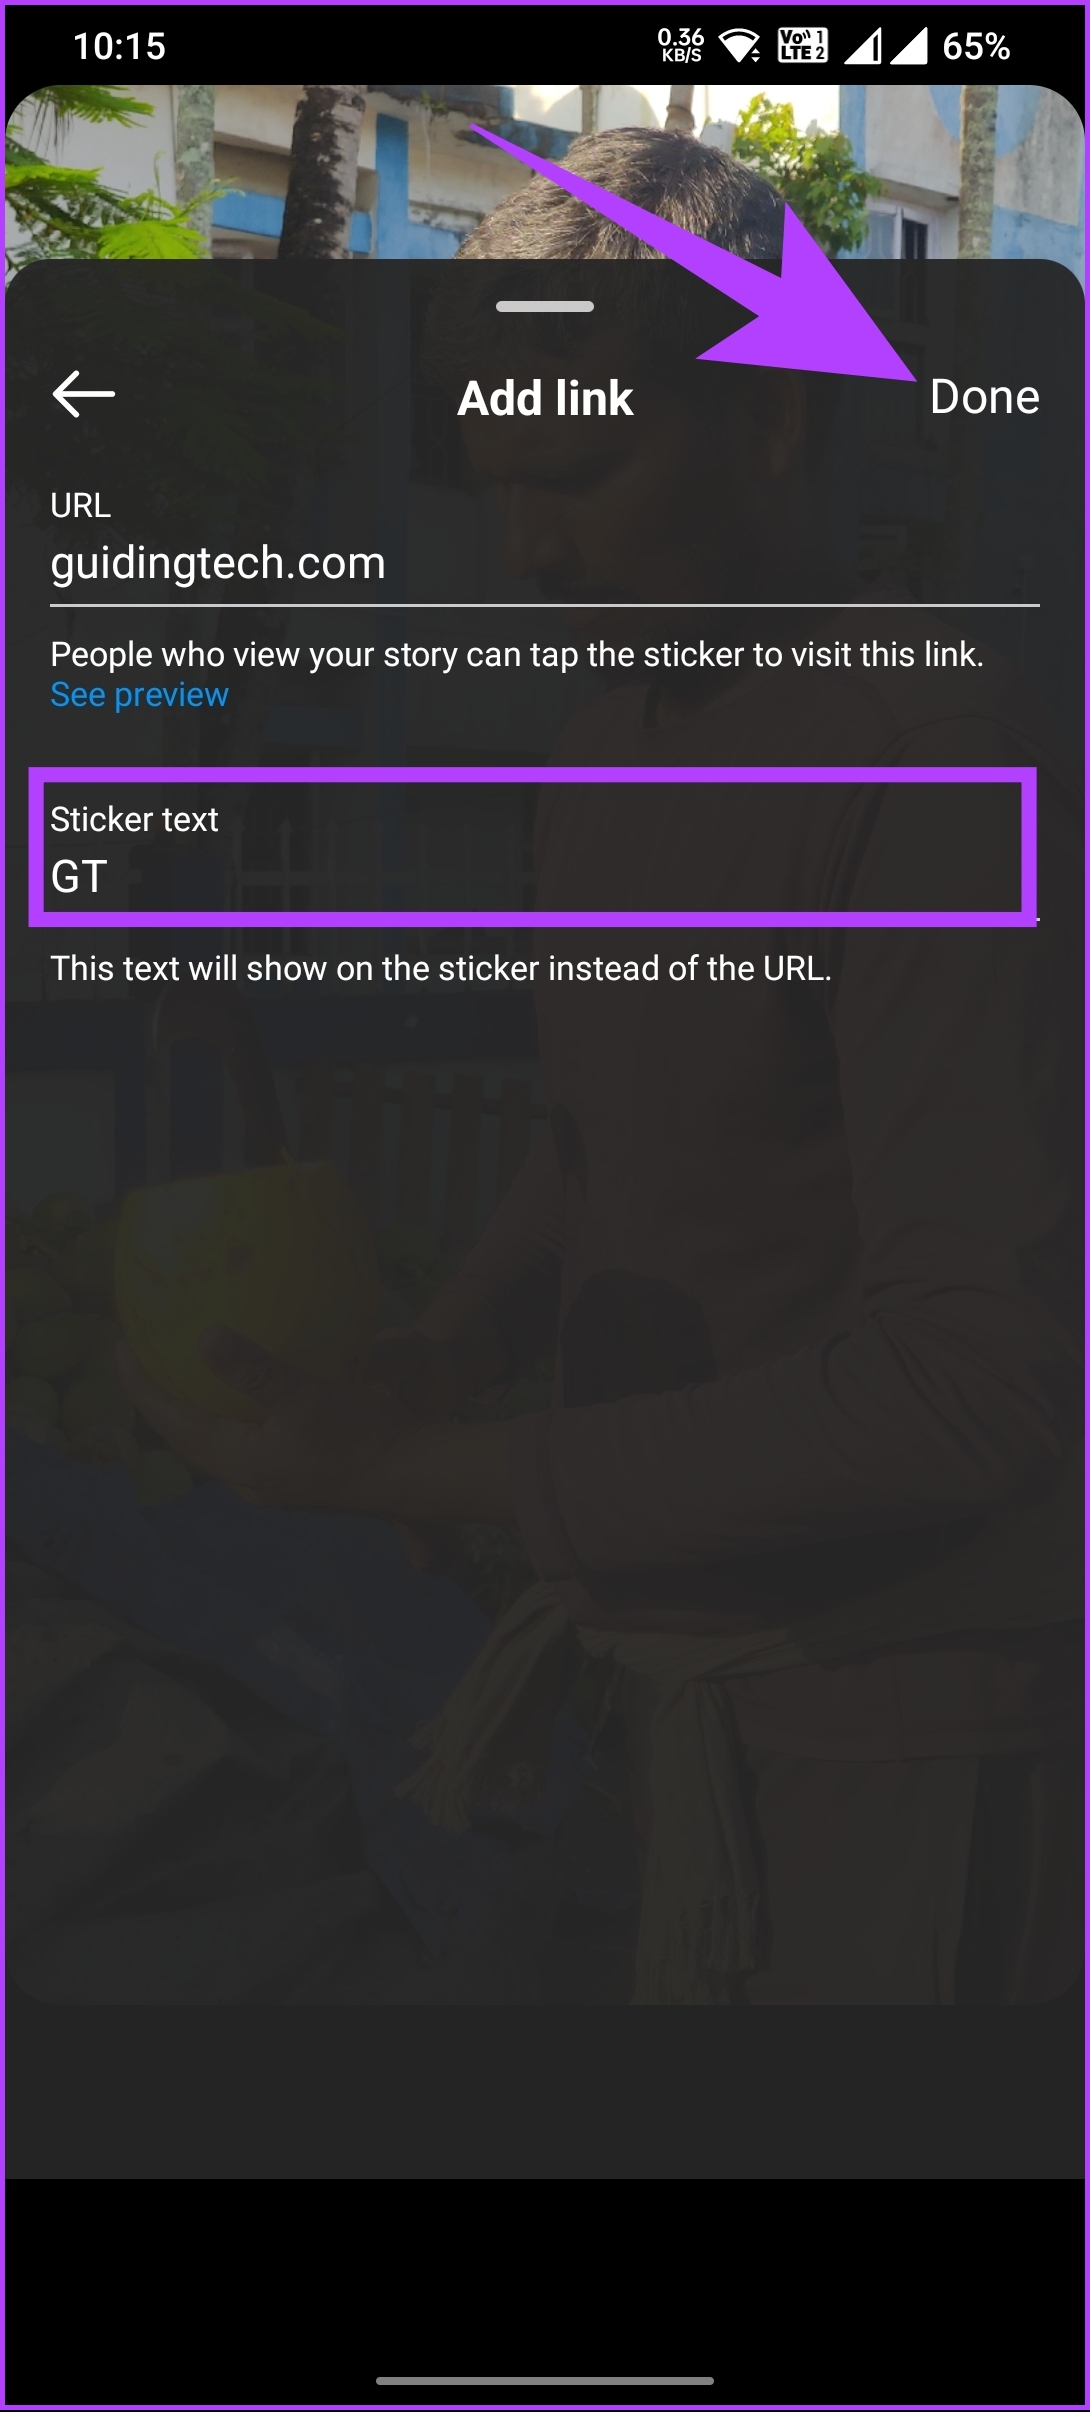
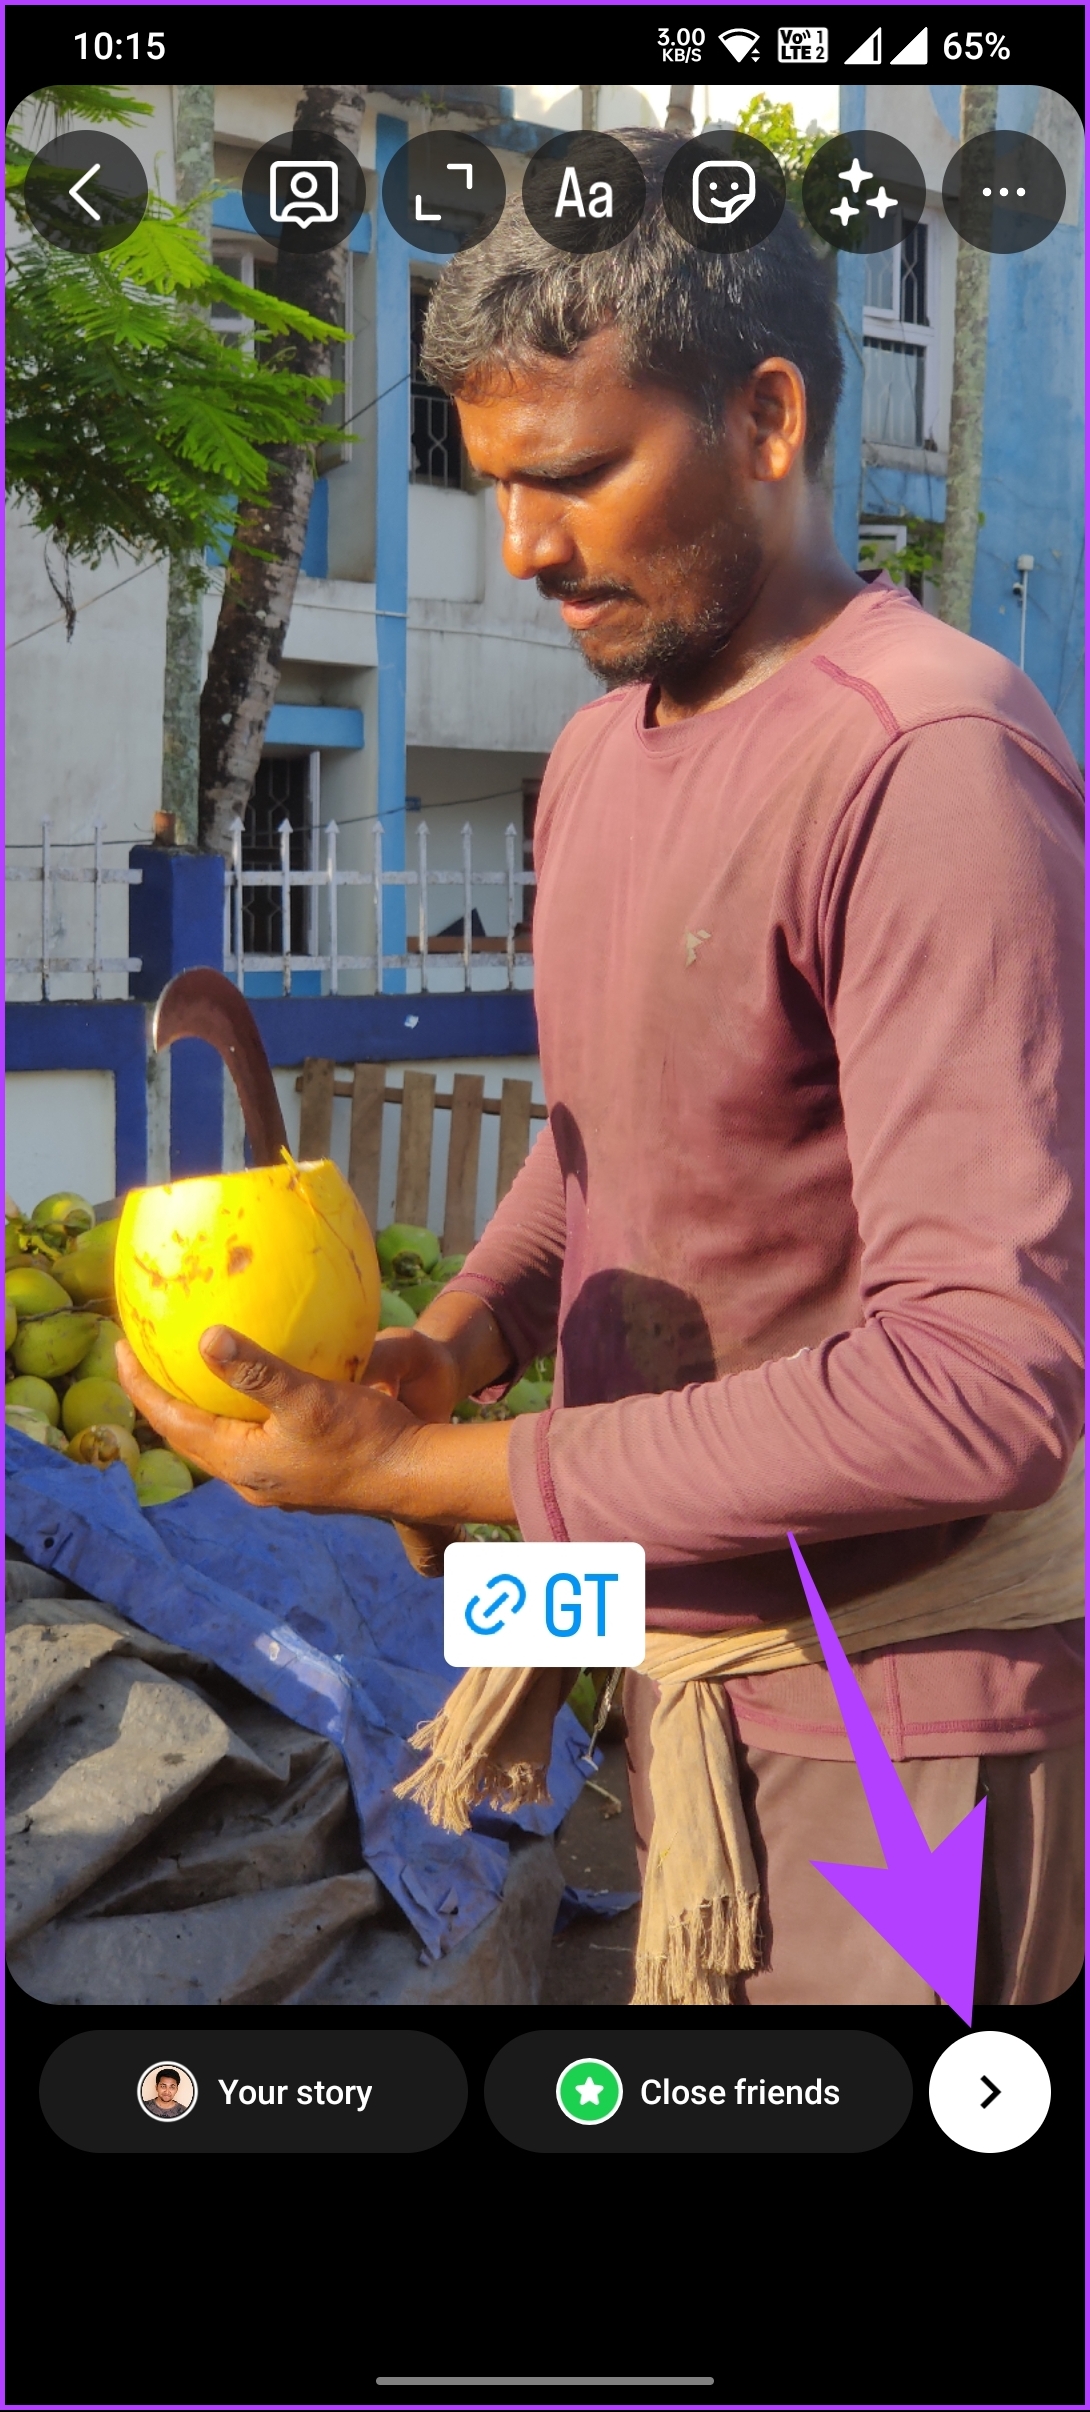
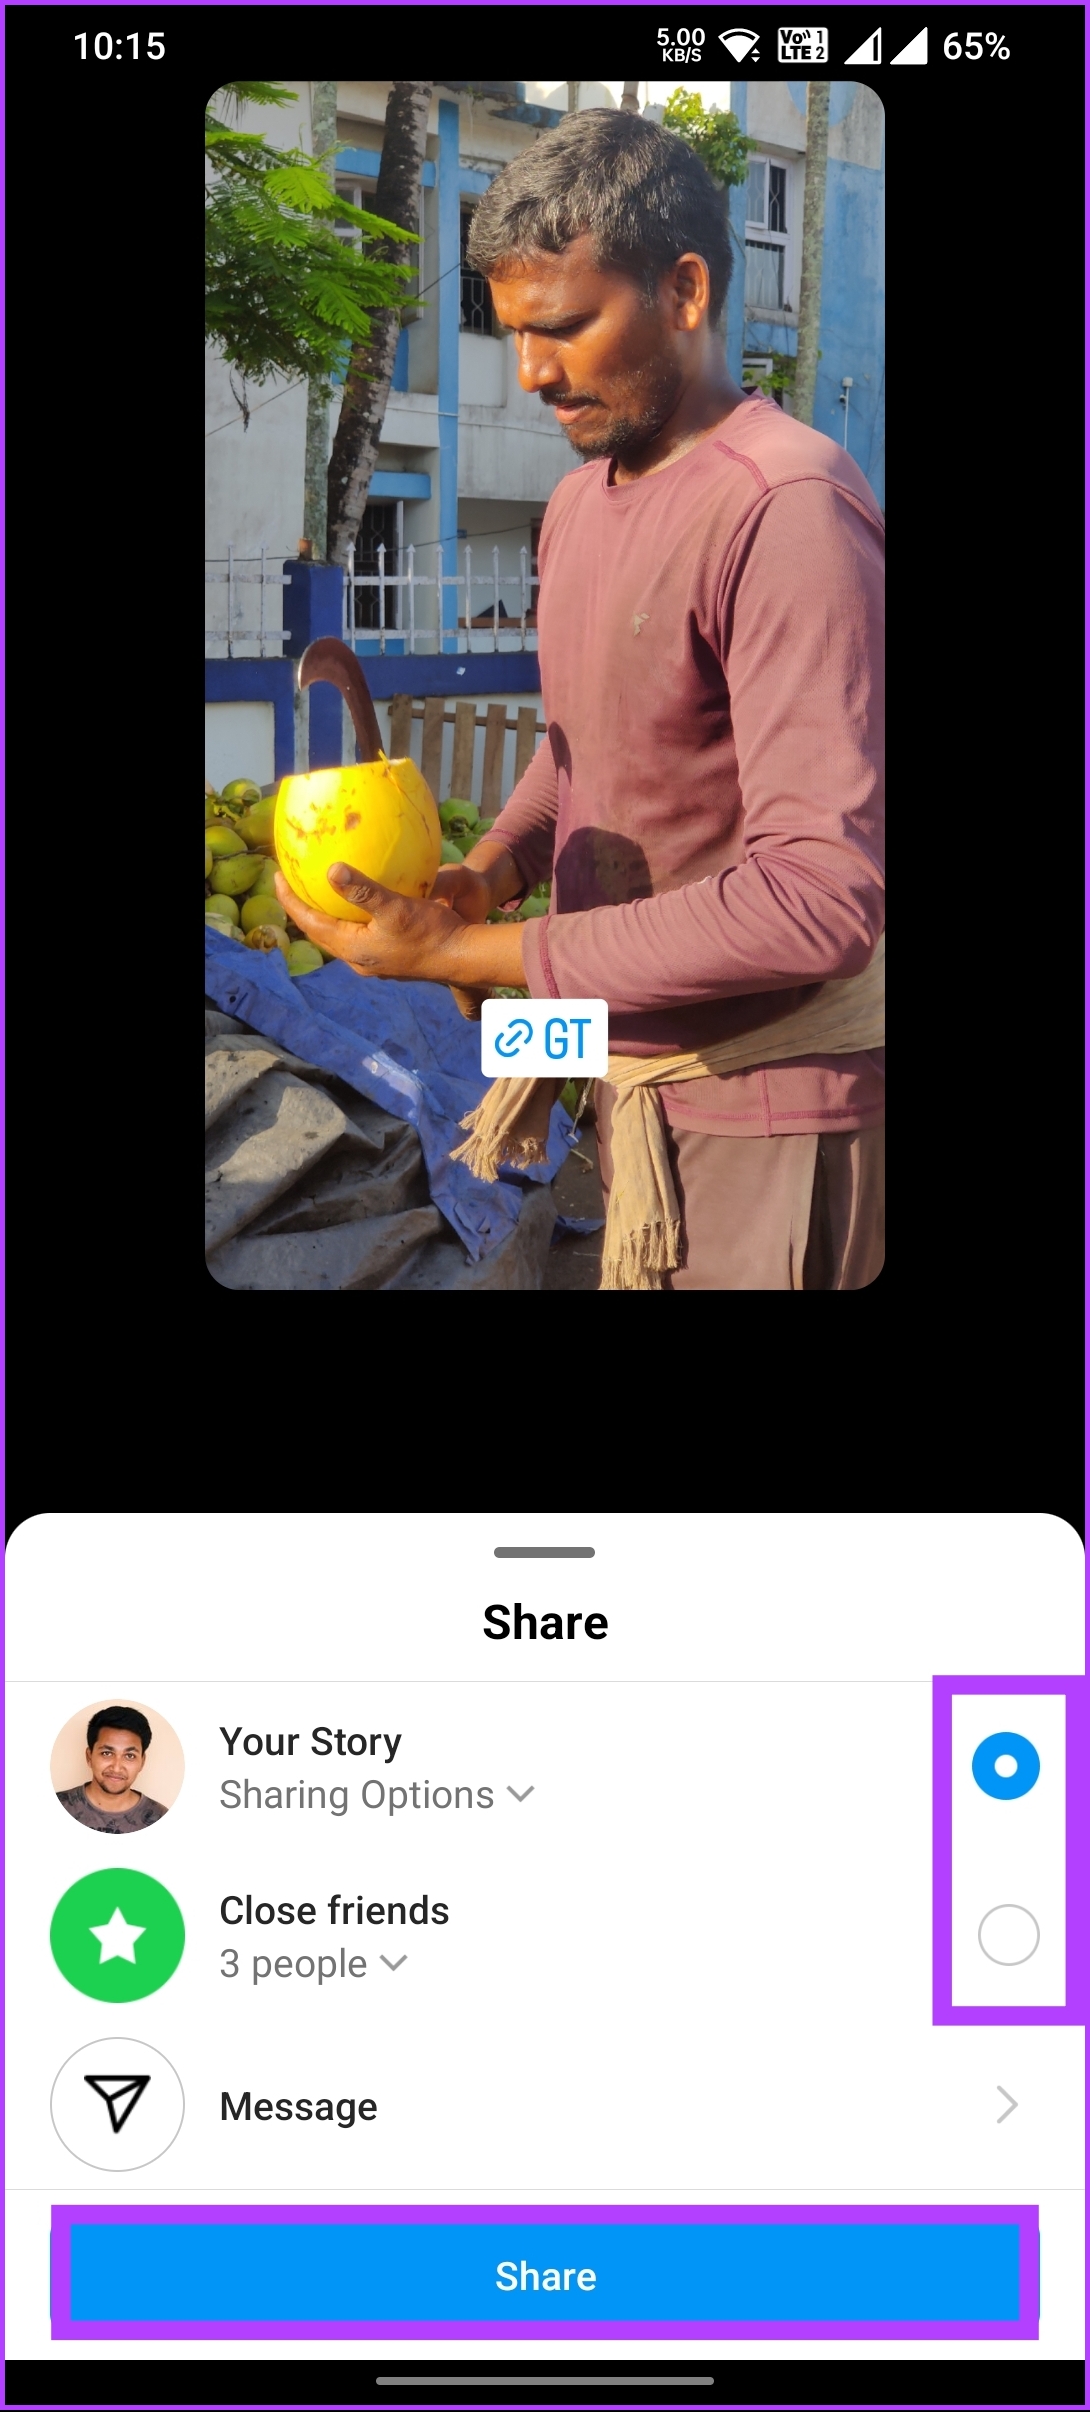
Migrating your follower from one social media account to another has been propagating for quite a while, instigating influencers to post more on social media. Instagram has accommodated well and has provided users a way to add links to their Instagram Stories. If you want to add links to your Instagram Story, follow the steps below. Step 1: Launch the Instagram app on your Android or iPhone, and tap on the Your Story option in the top-left corner. Step 2: Select a photo or video from your gallery for your Story. Once selected, tap on the Sticker icon in the top-right corner. Note: You can also use the Shutter button to capture a photo for your Story. Step 3: Select the Link sticker from the bottom sheet. Once selected, under Add link, enter the URL you wish to share and tap ‘Customize sticker text.’ Step 4: Type your text under Sticker text, and click Done. Now, move the sticker to a preferred location. You can tap on the sticker to scroll through different styles. Step 5: Once done, tap on the right arrow in the bottom-right corner to share your Story. From the Share bottom sheet, choose your preference and tap Share. That’s it. You have successfully added a link to your Instagram Story. If it is not the Story to which you want to add a link but in the post, continue reading.
How to Add a Link to Your Instagram Posts
Unlike Instagram Stories, adding a link to your Instagram post is not exactly possible. Yes, you can type any URL in your photo’s caption, but Instagram will not hyperlink it for your user to click on it and get redirected. The only official way to add a hyperlinked link to your Instagram photo is to pay for the Ads. Unless you’ve got a legitimate reason to do it, there are better alternatives.
1. Use URL Shortener
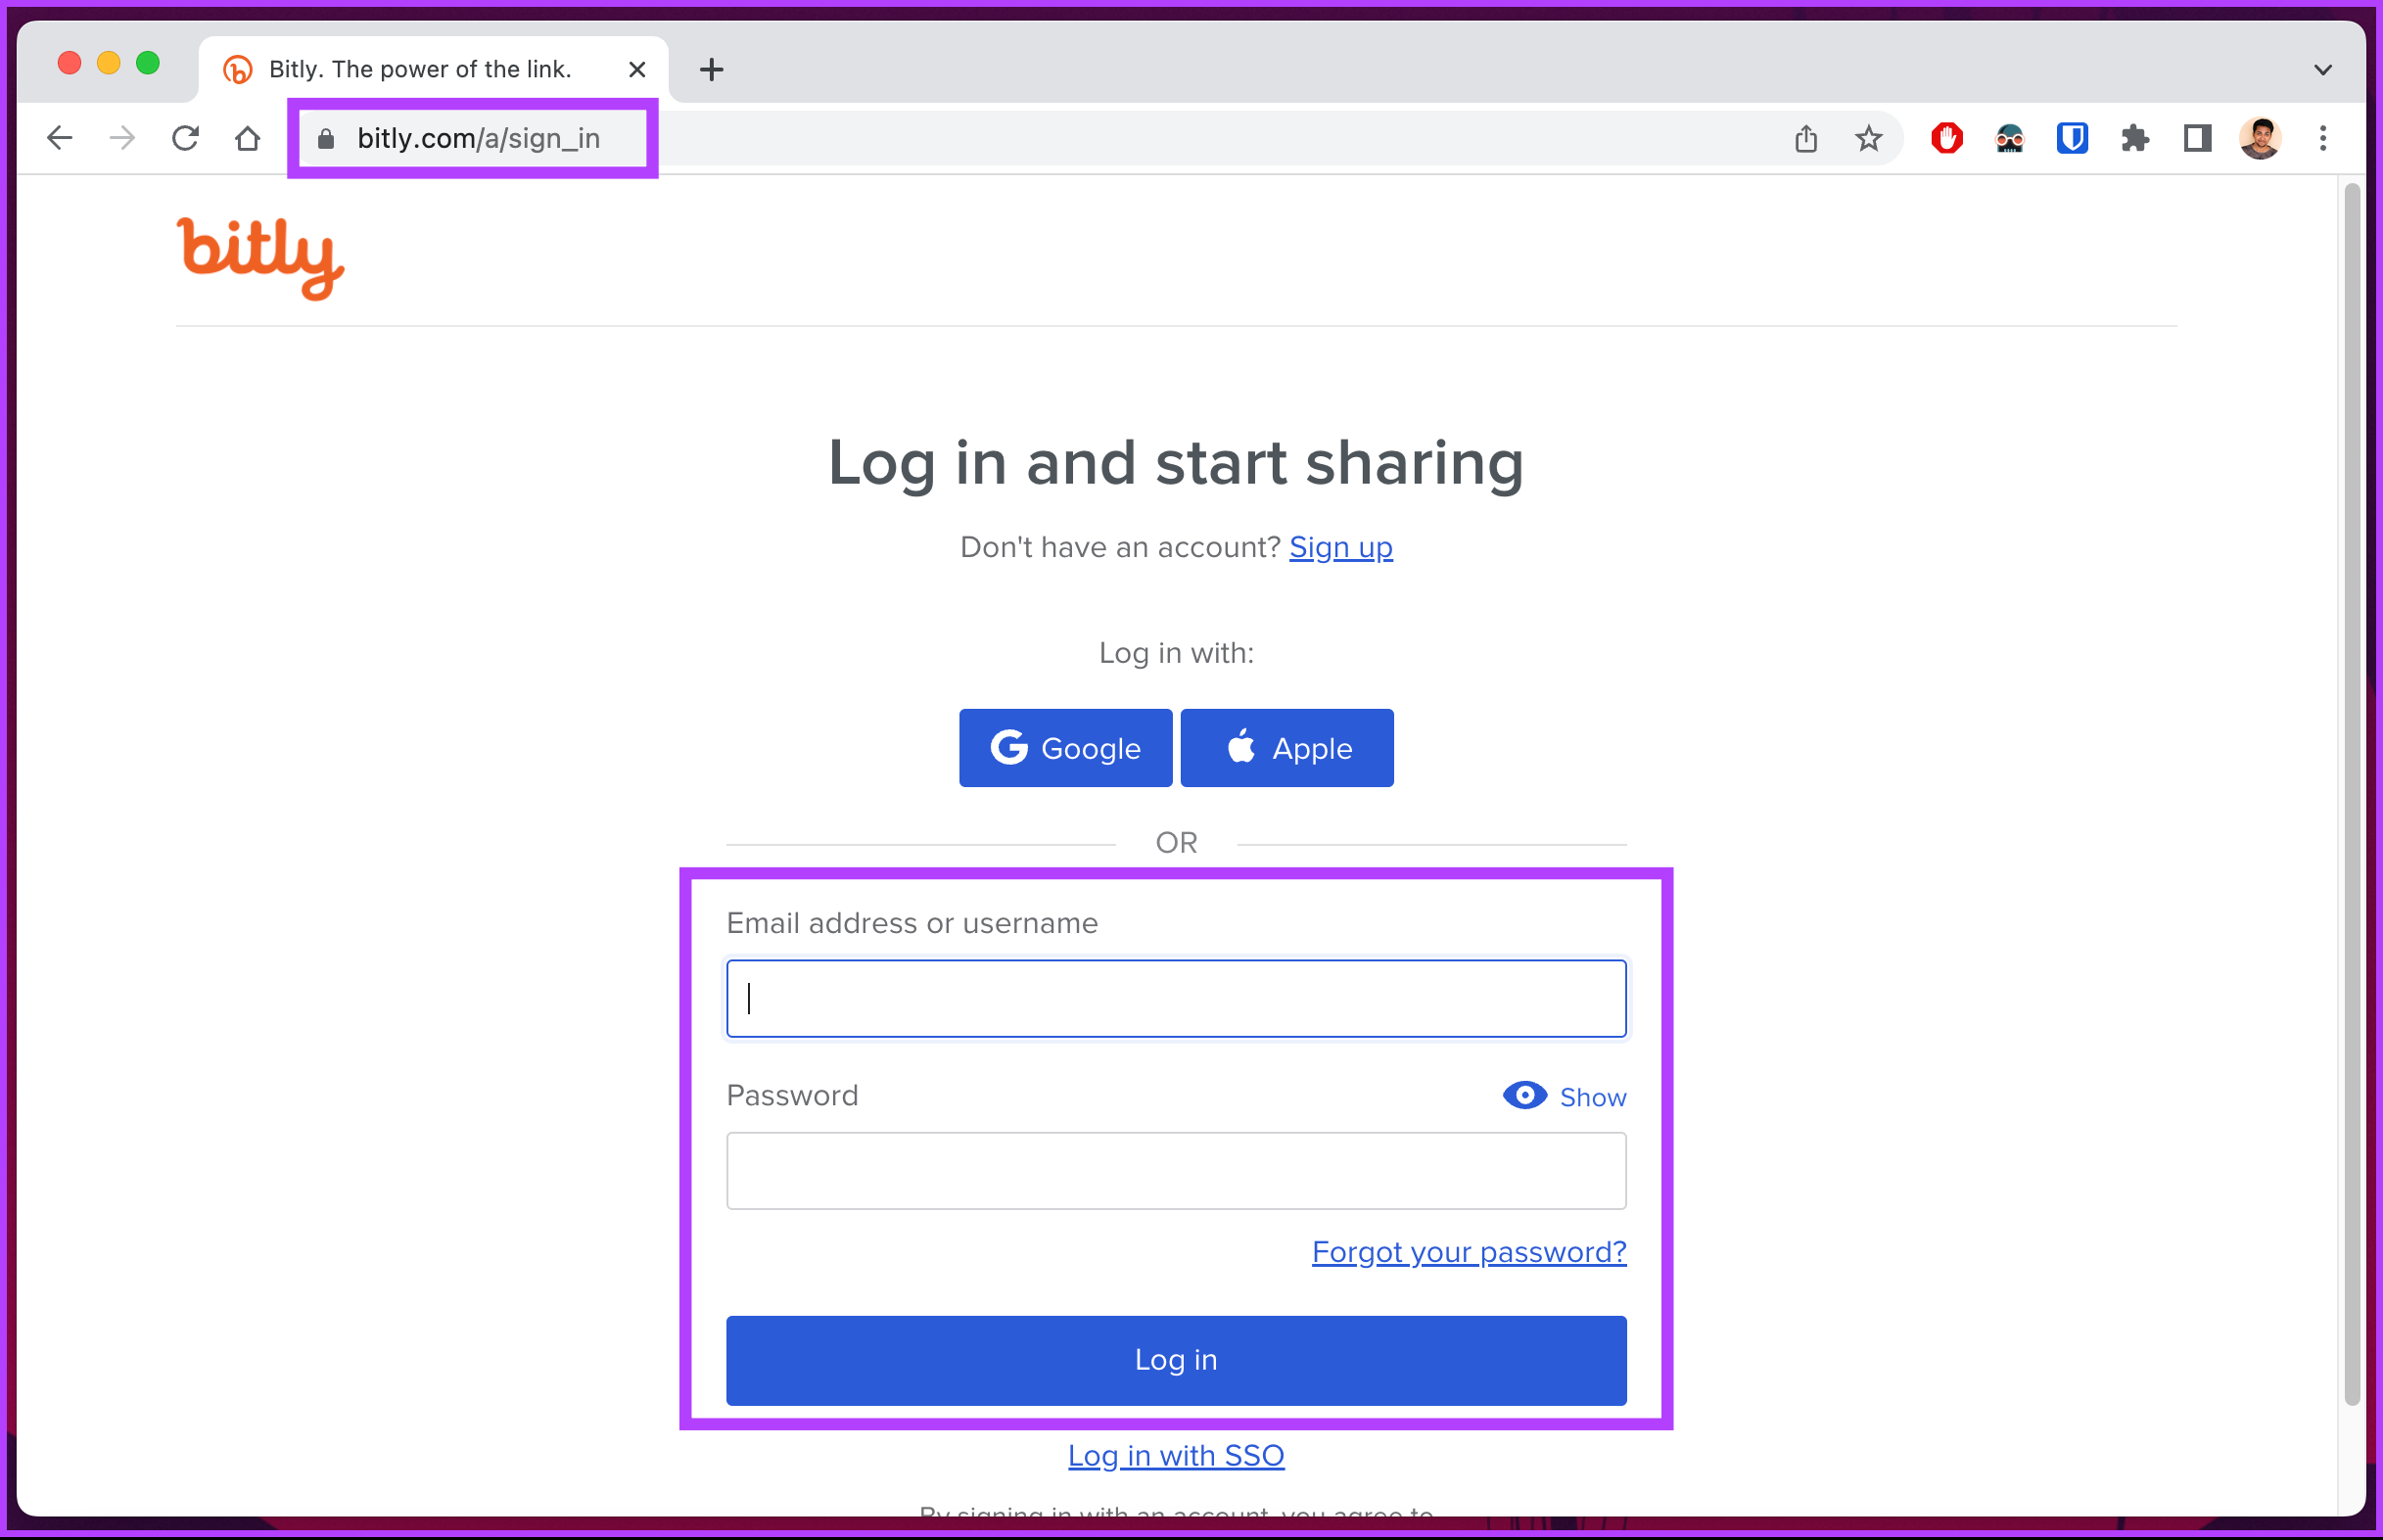
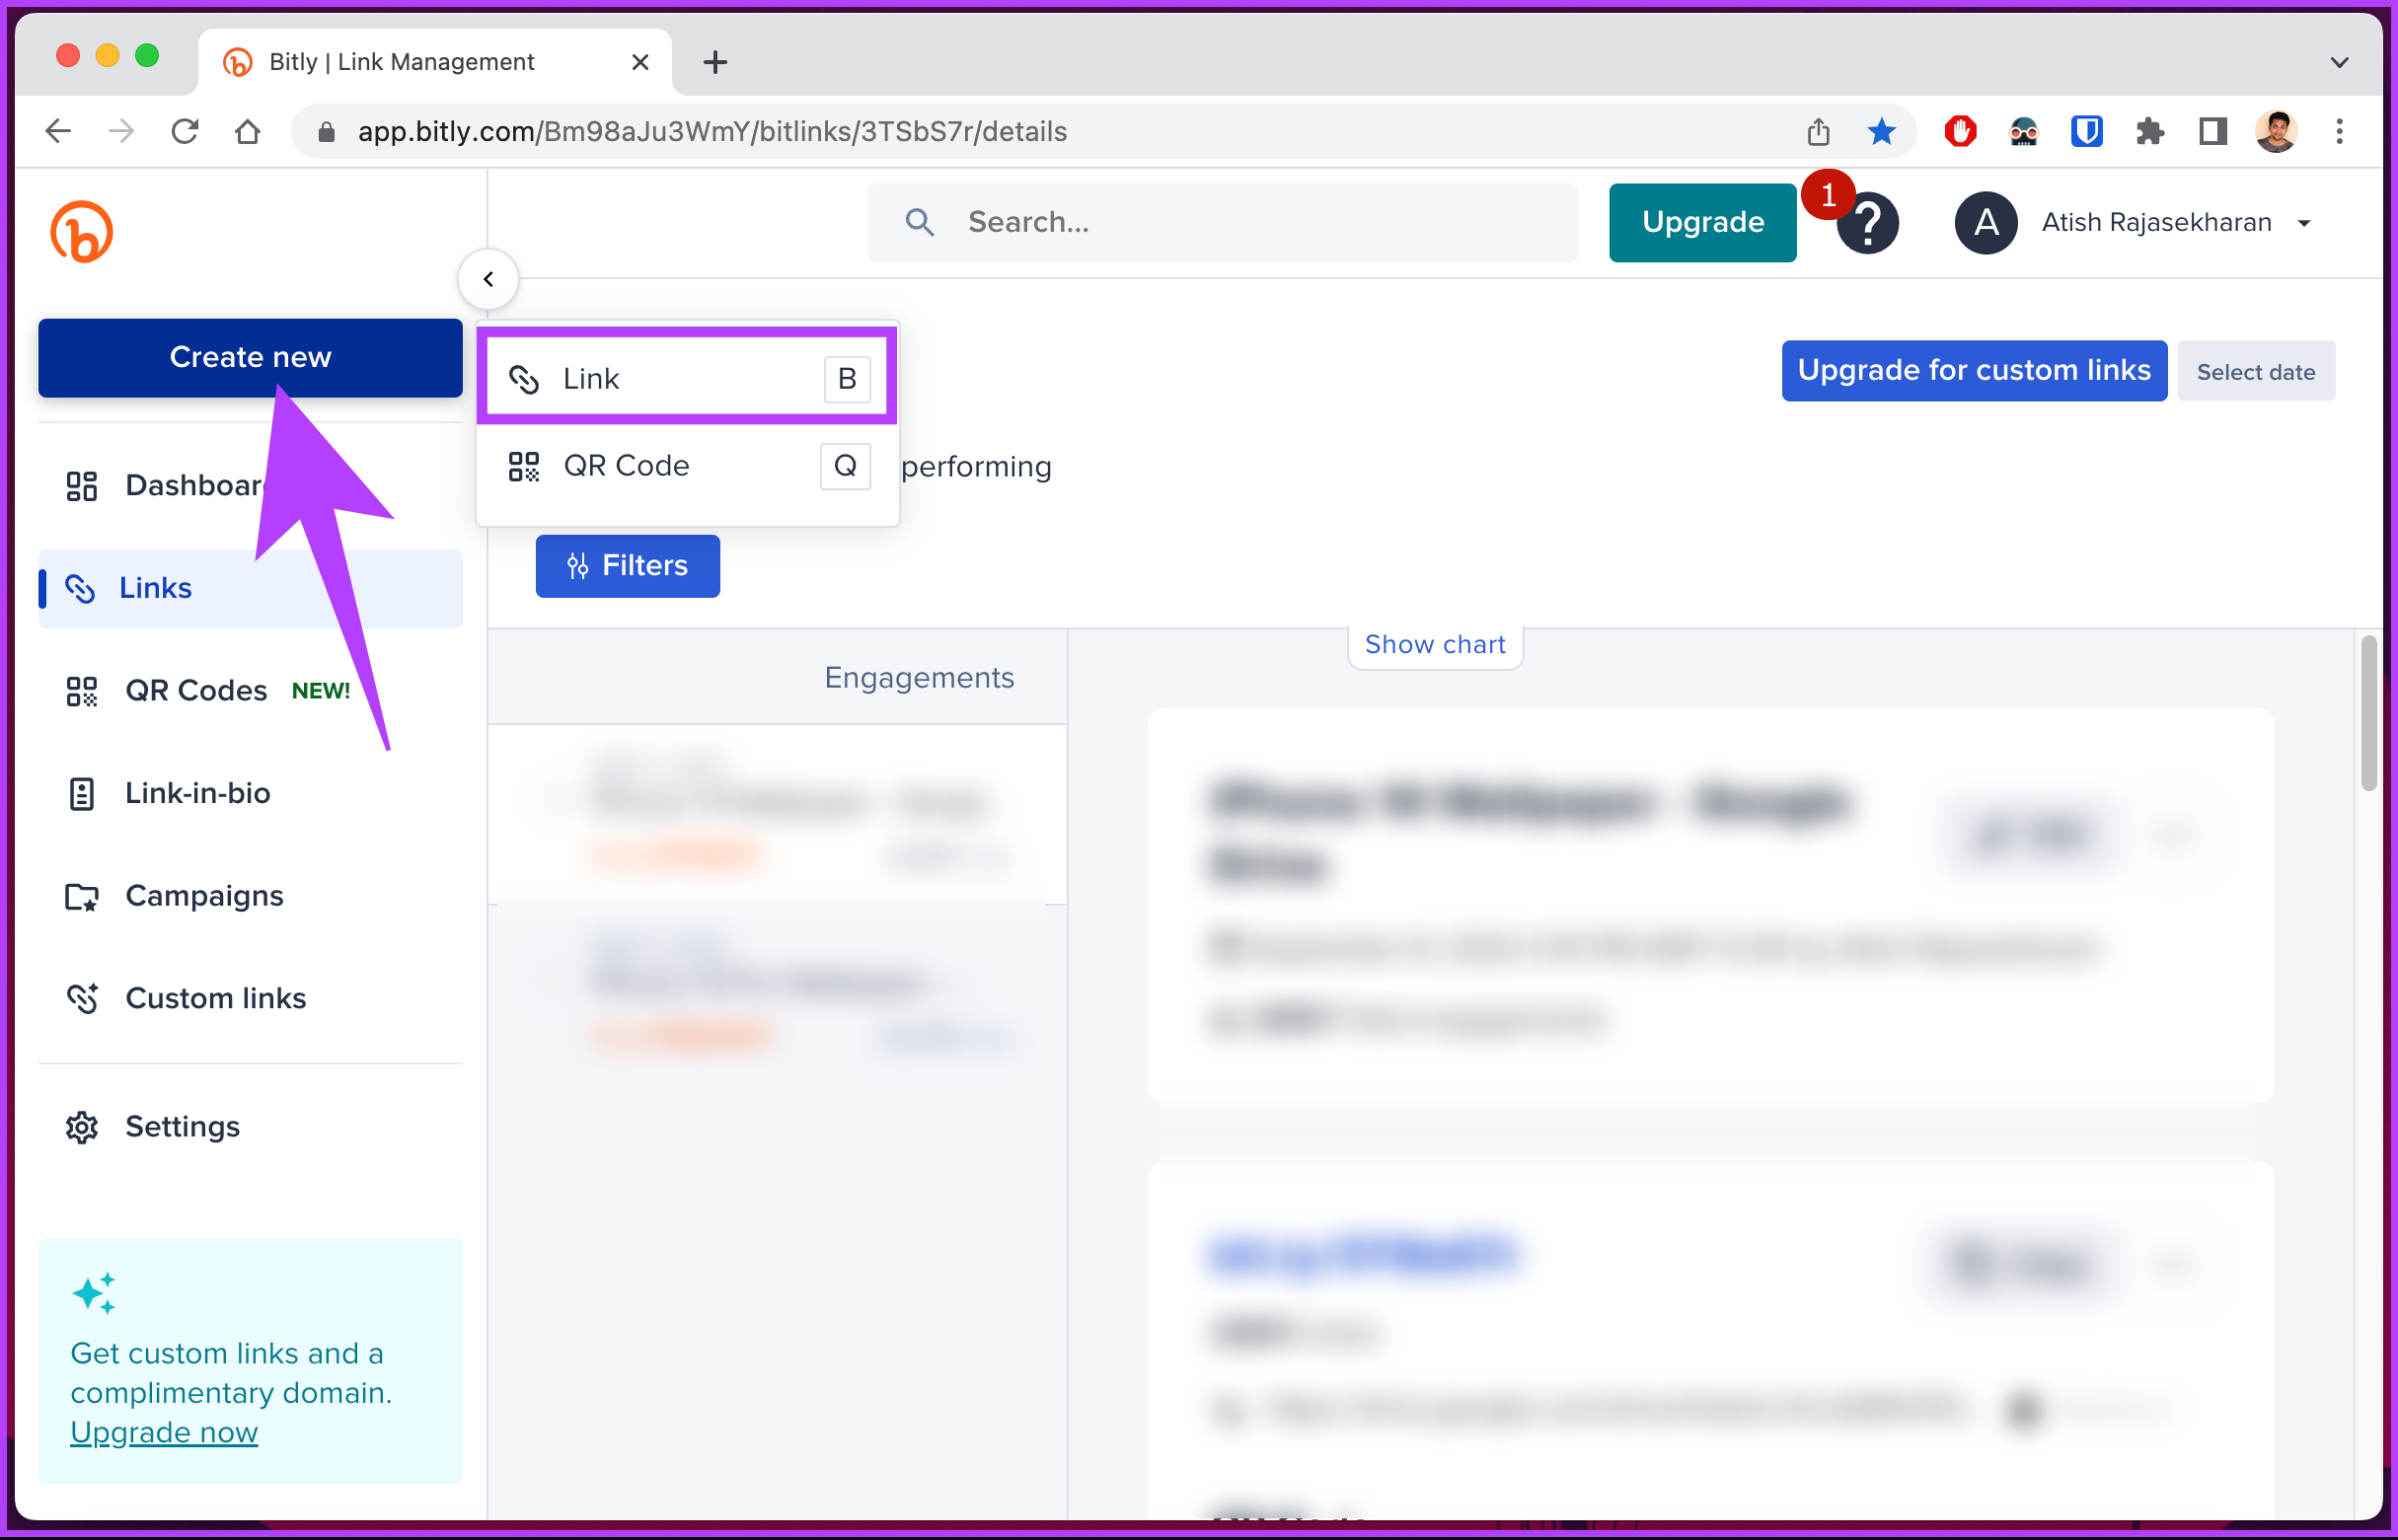
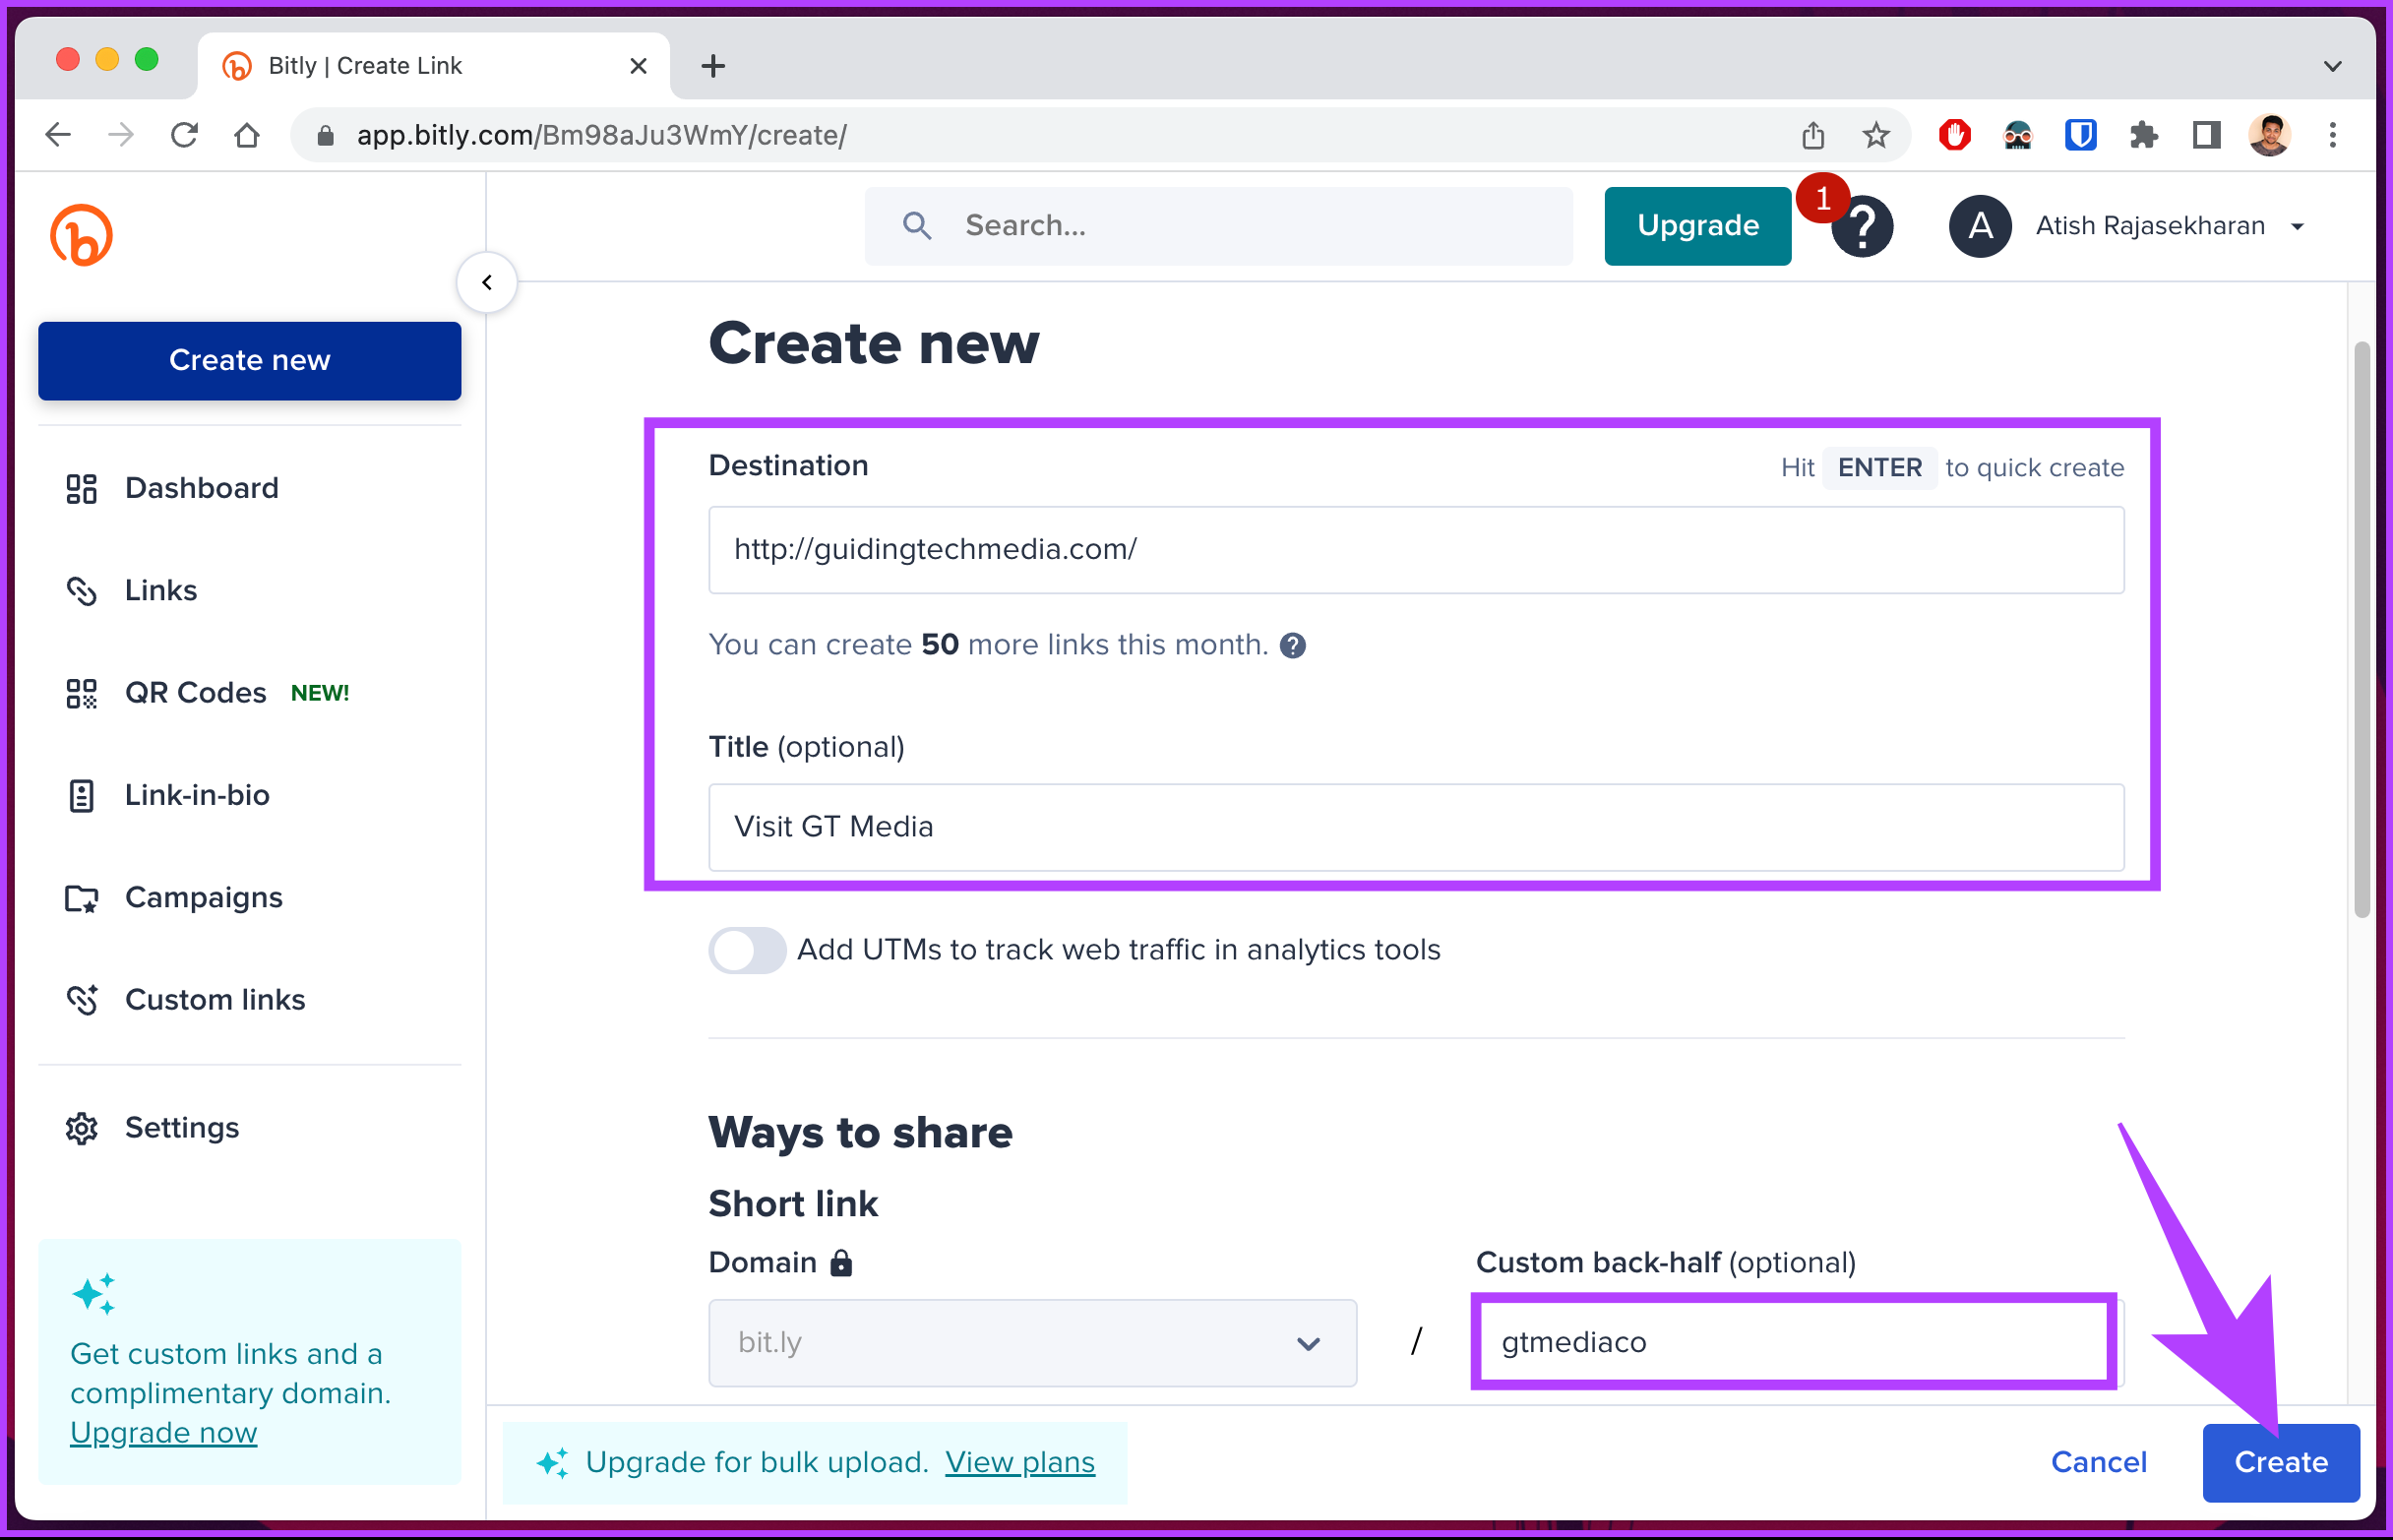
If you want to add a link to your post, using a URL shortener service is a great idea. There are several shorteners available in the market, such as Bitly, Owly, TinyURL, and so on. These services make shorter URLs that are easier to type and share. Even though it may not look clickable or tappable, it’s much easier to copy and paste than a really long link. Follow the steps below. Note: We will be using Bitly for the demonstration. However, other URL shorteners work similarly to that Bitly. Step 1: Open Bitly on your preferred browser on your desktop or mobile device, and log in to your account. Note: If you don’t already have a Bitly account, create one using the signup page. Go to Bitly You wouldn’t need a subscription plan until you need less than 50 shortened links per month. Step 2: Once logged in, click on Create new button from the sidebar and choose Link from the menu. Step 3: In the Create new page, enter the Destination URL, give a title (optional), enter a custom back-half of the URL for easy typing and sharing, and click Create. There you go. You have successfully created a shortened URL which you can now copy and paste on your Instagram post’s description/caption. Keep in mind that the shorter the link, the better it will look in your post and the easier it will be for your followers to type, share and remember. Also Read: How to trace the exact link for shortened URL
2. Pay for Sponsored Posts
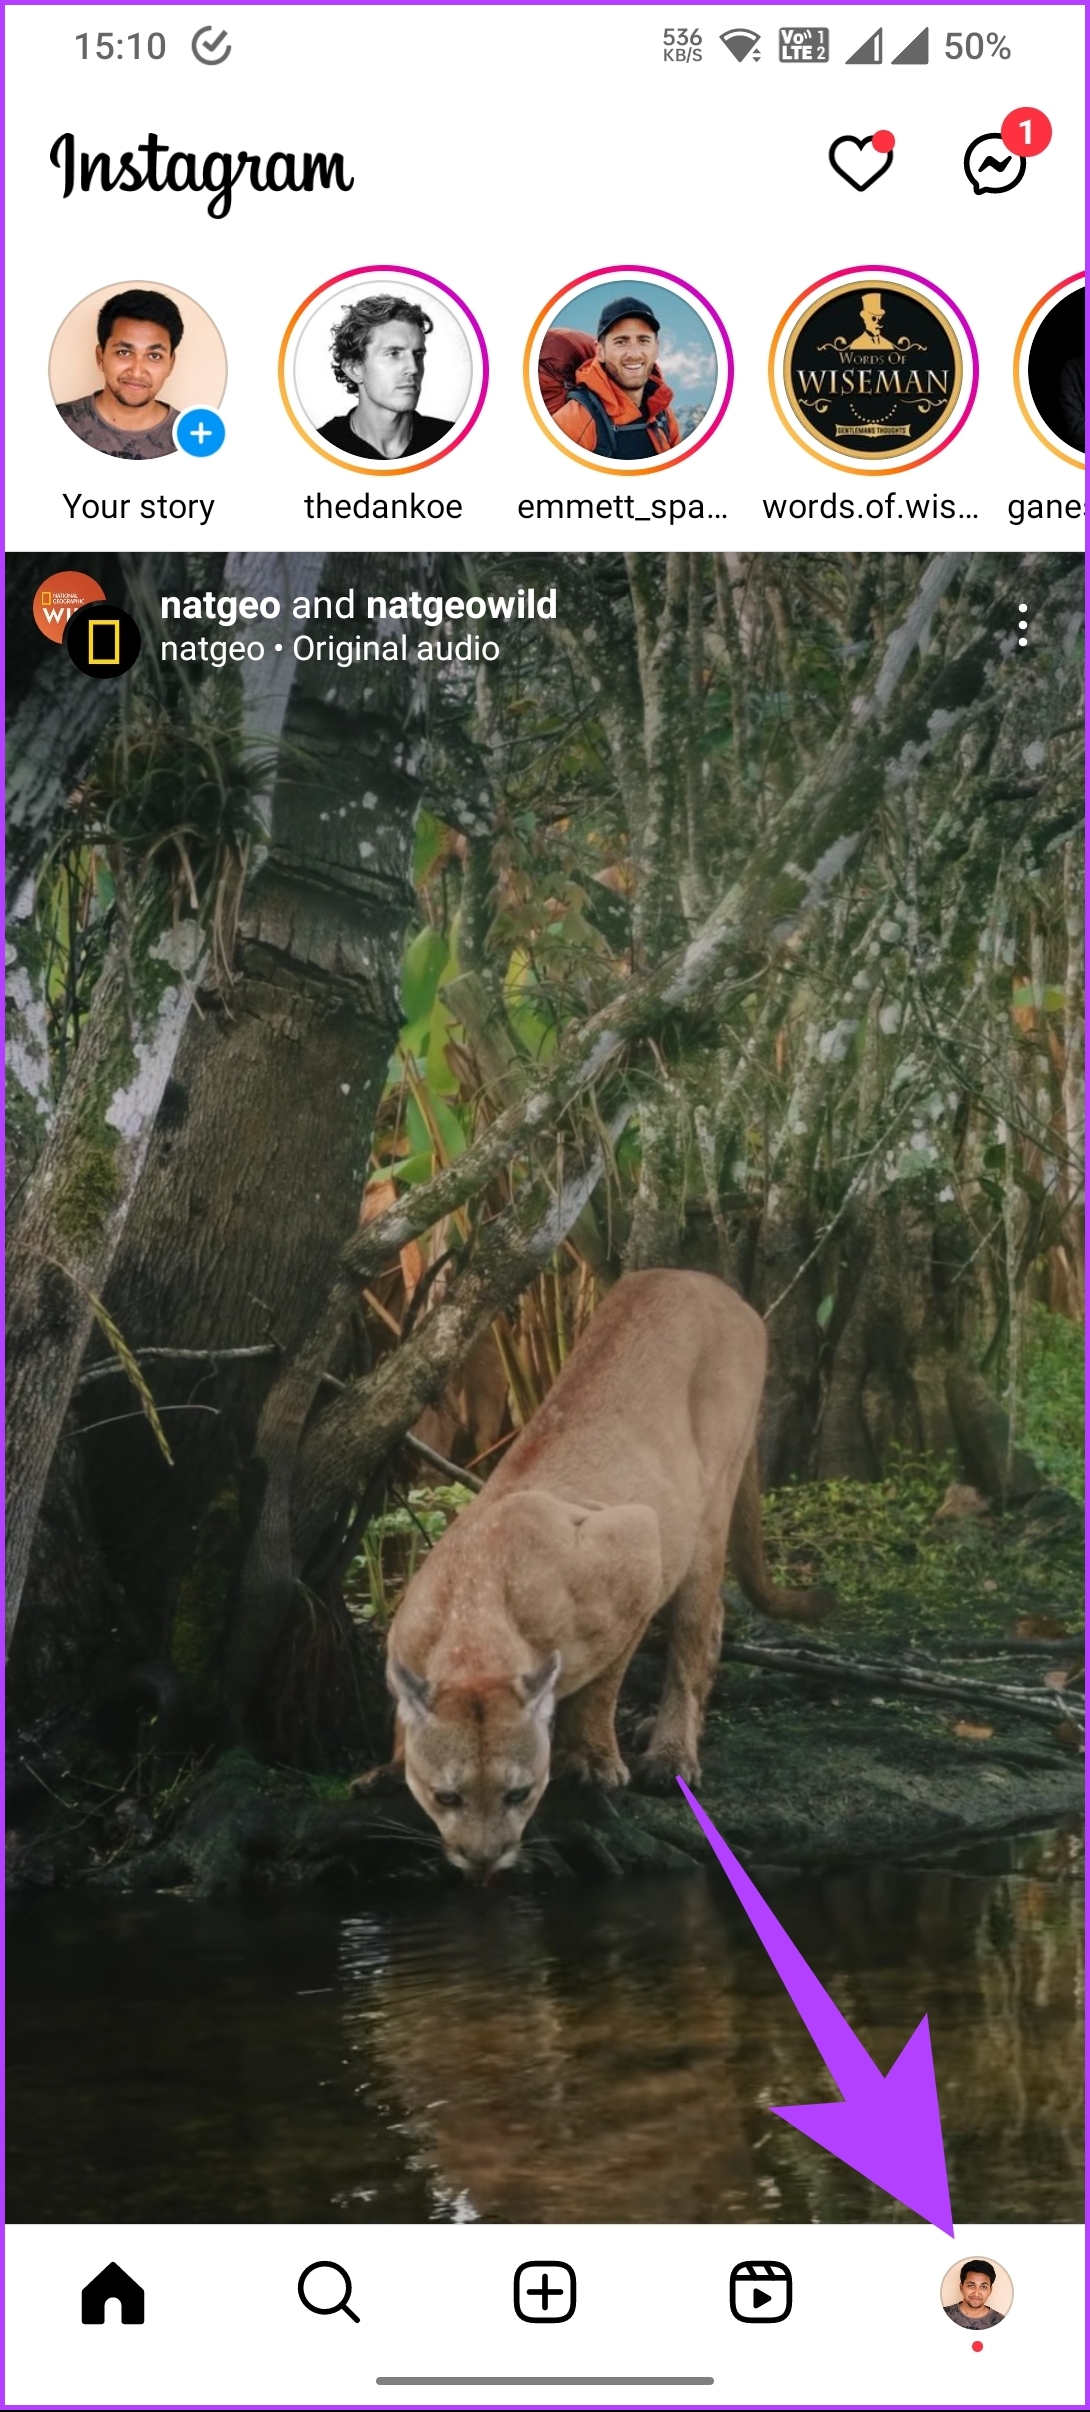
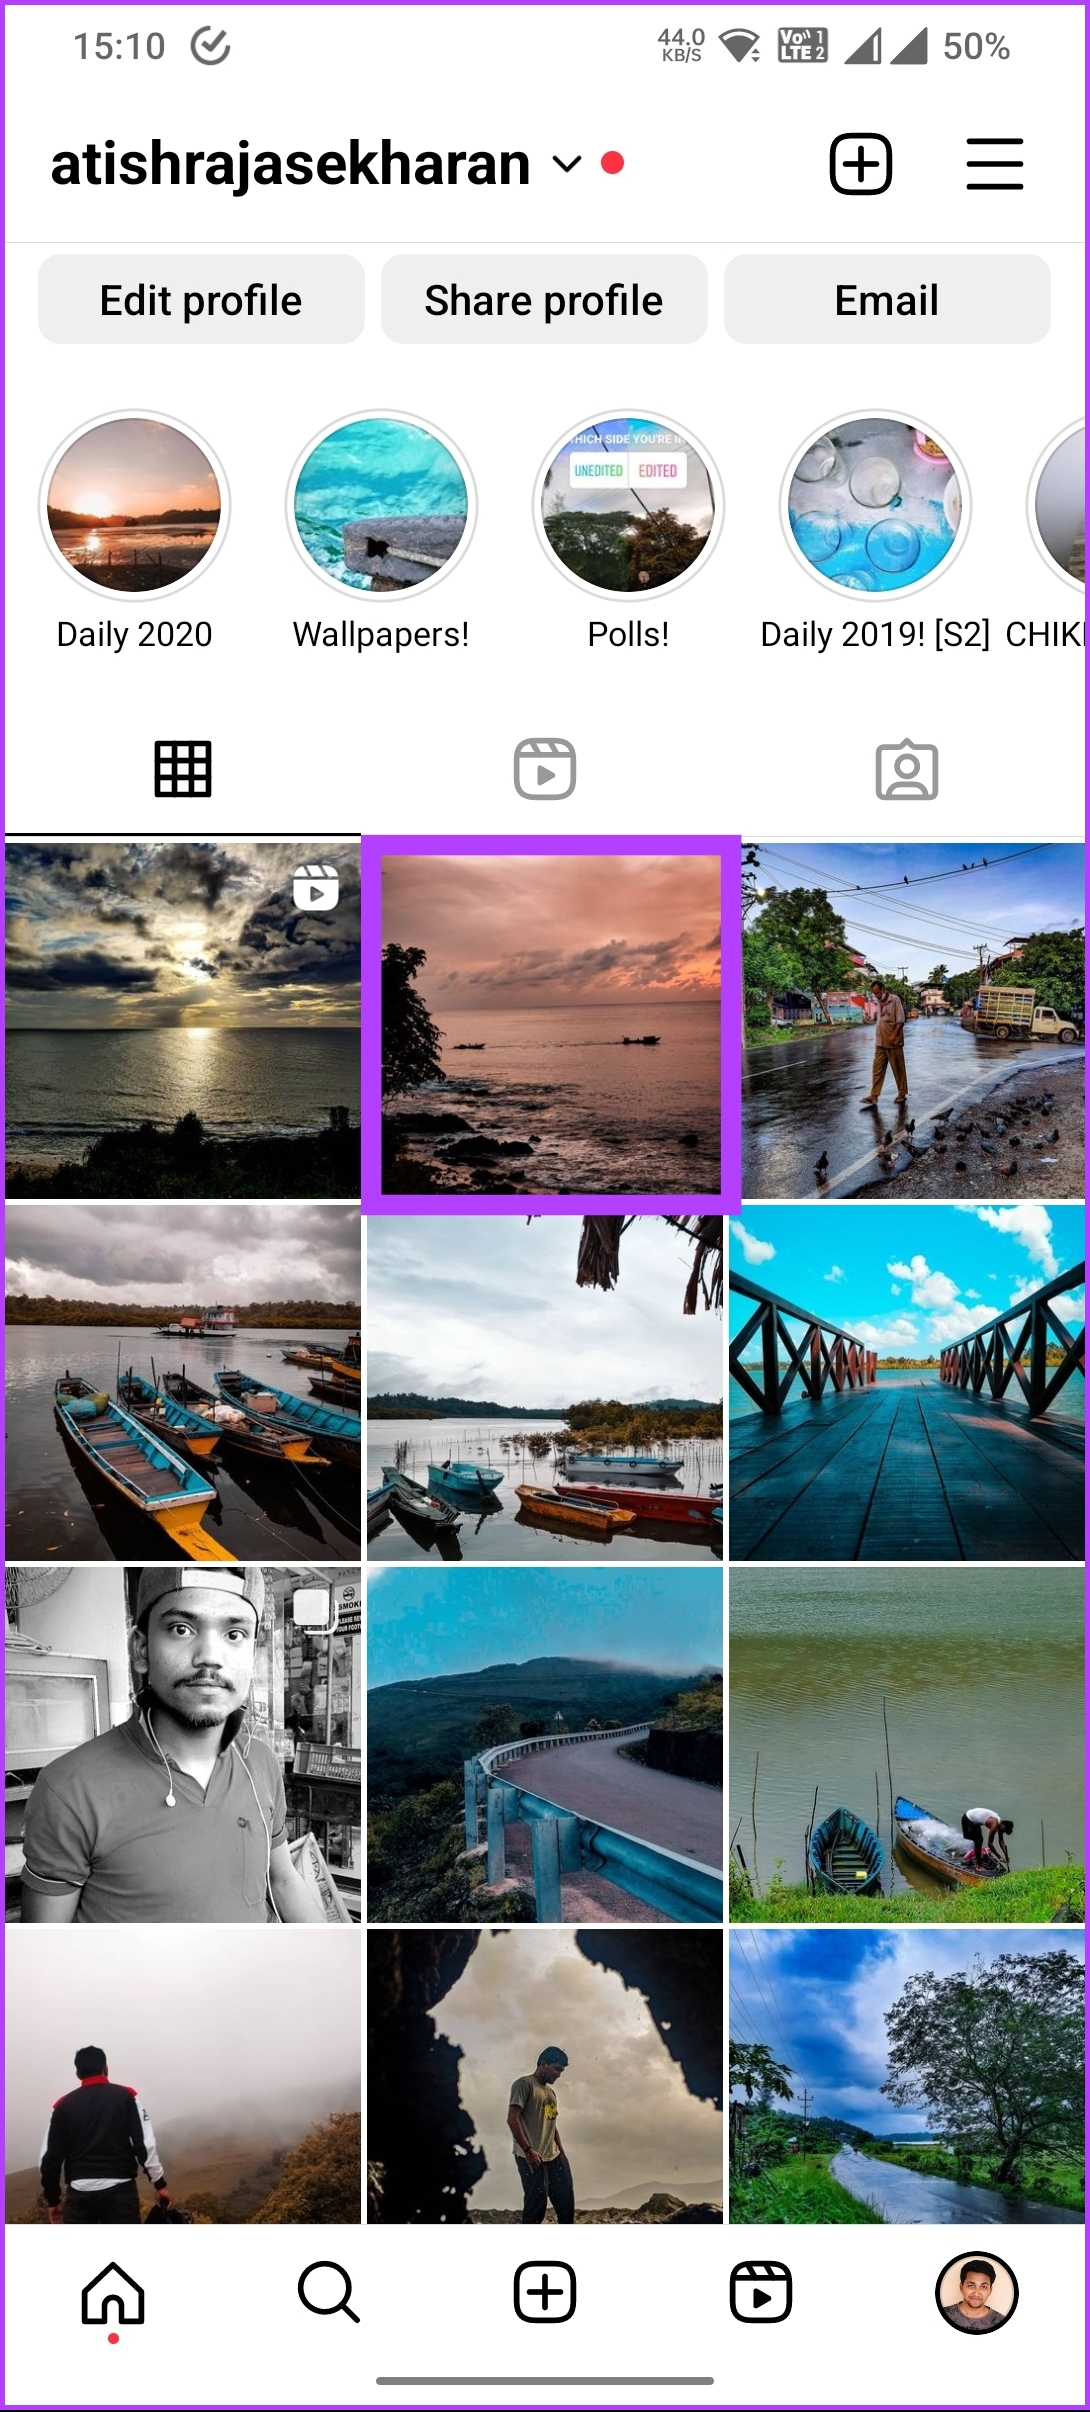
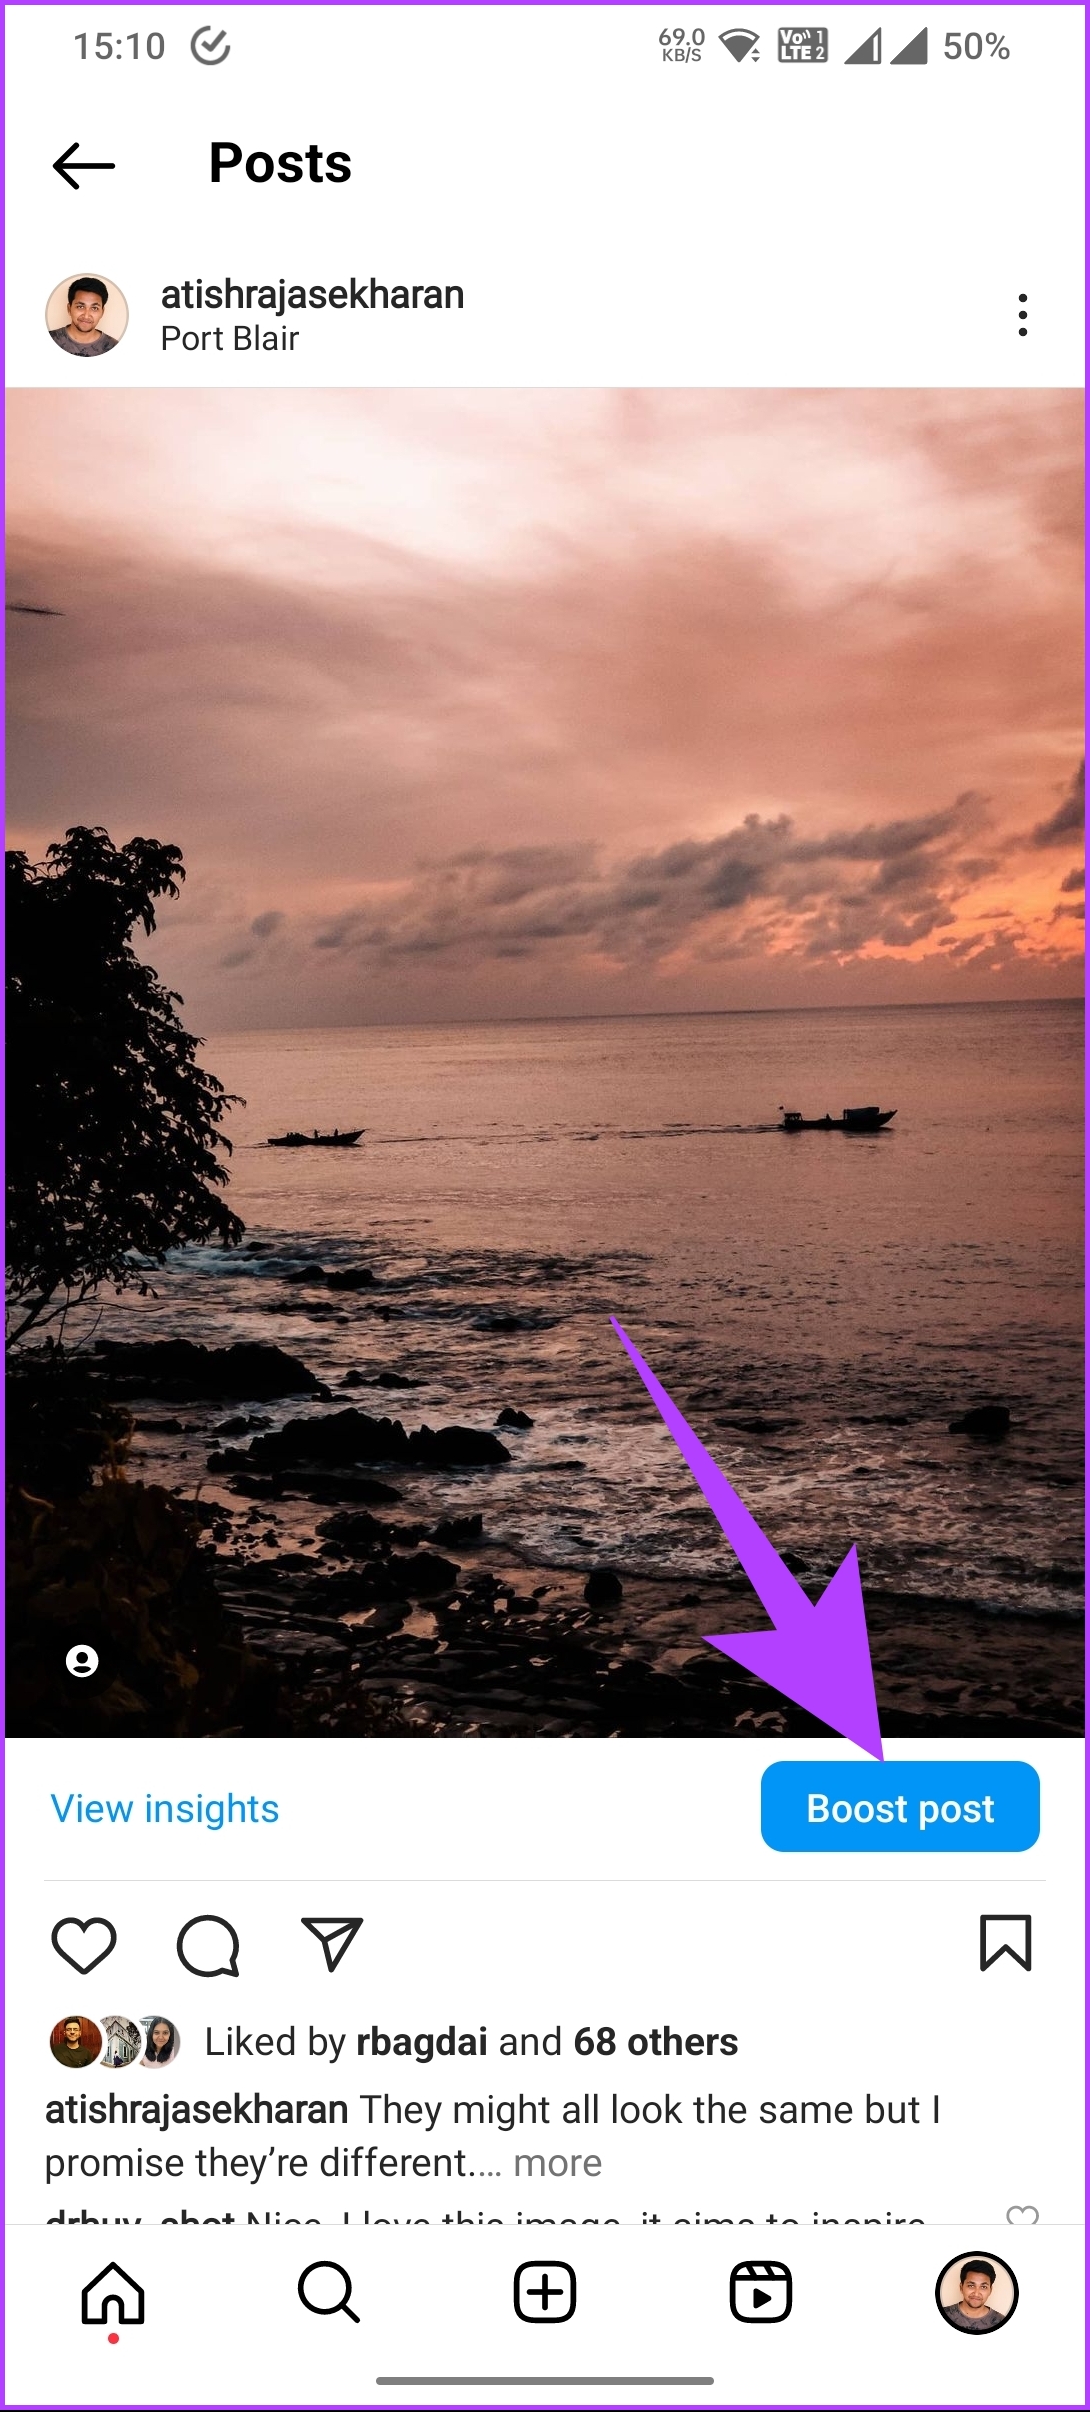
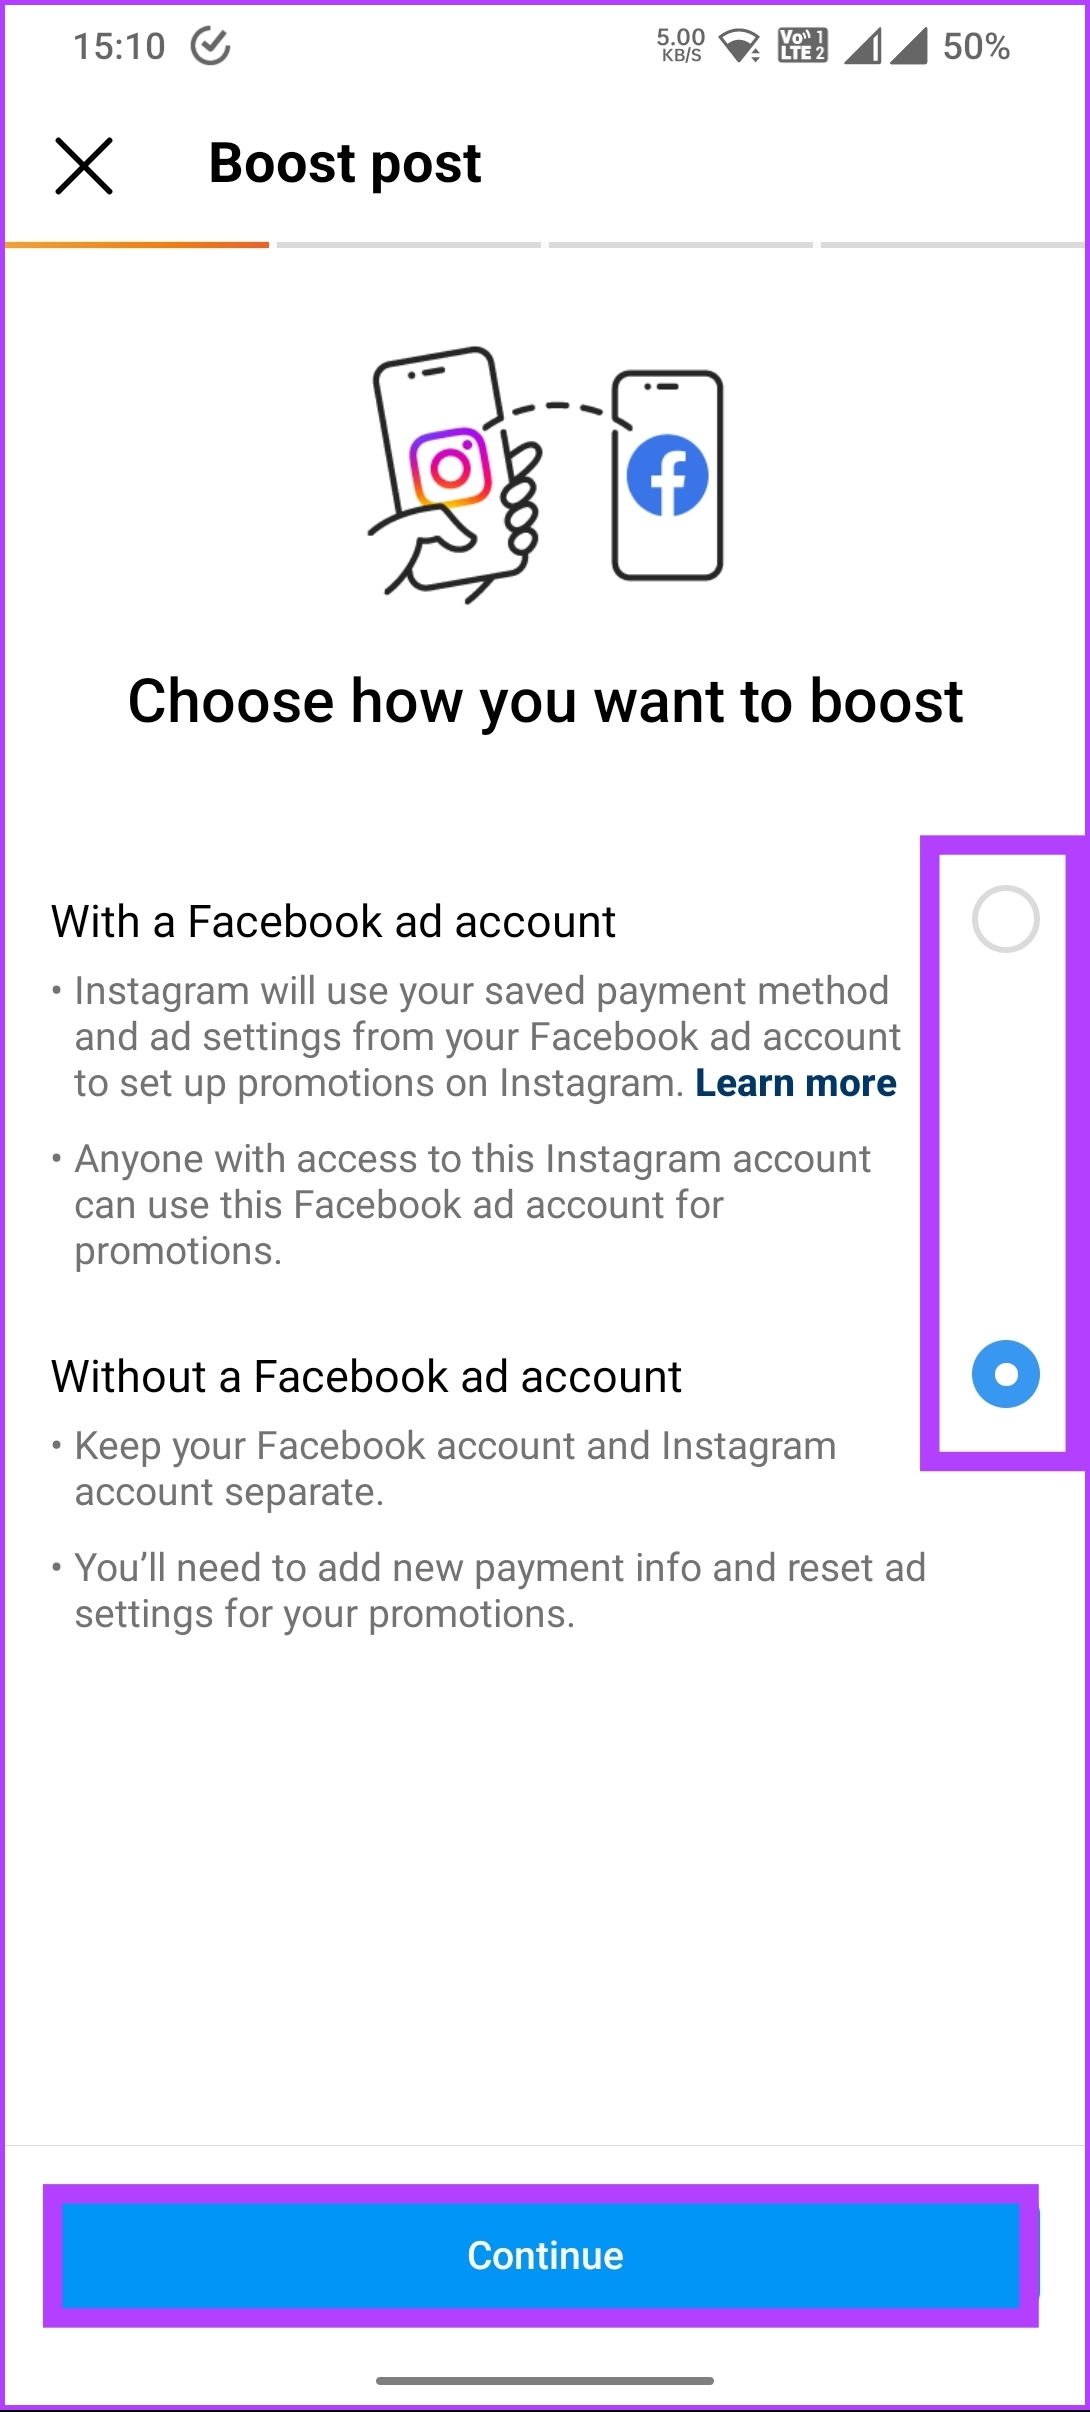
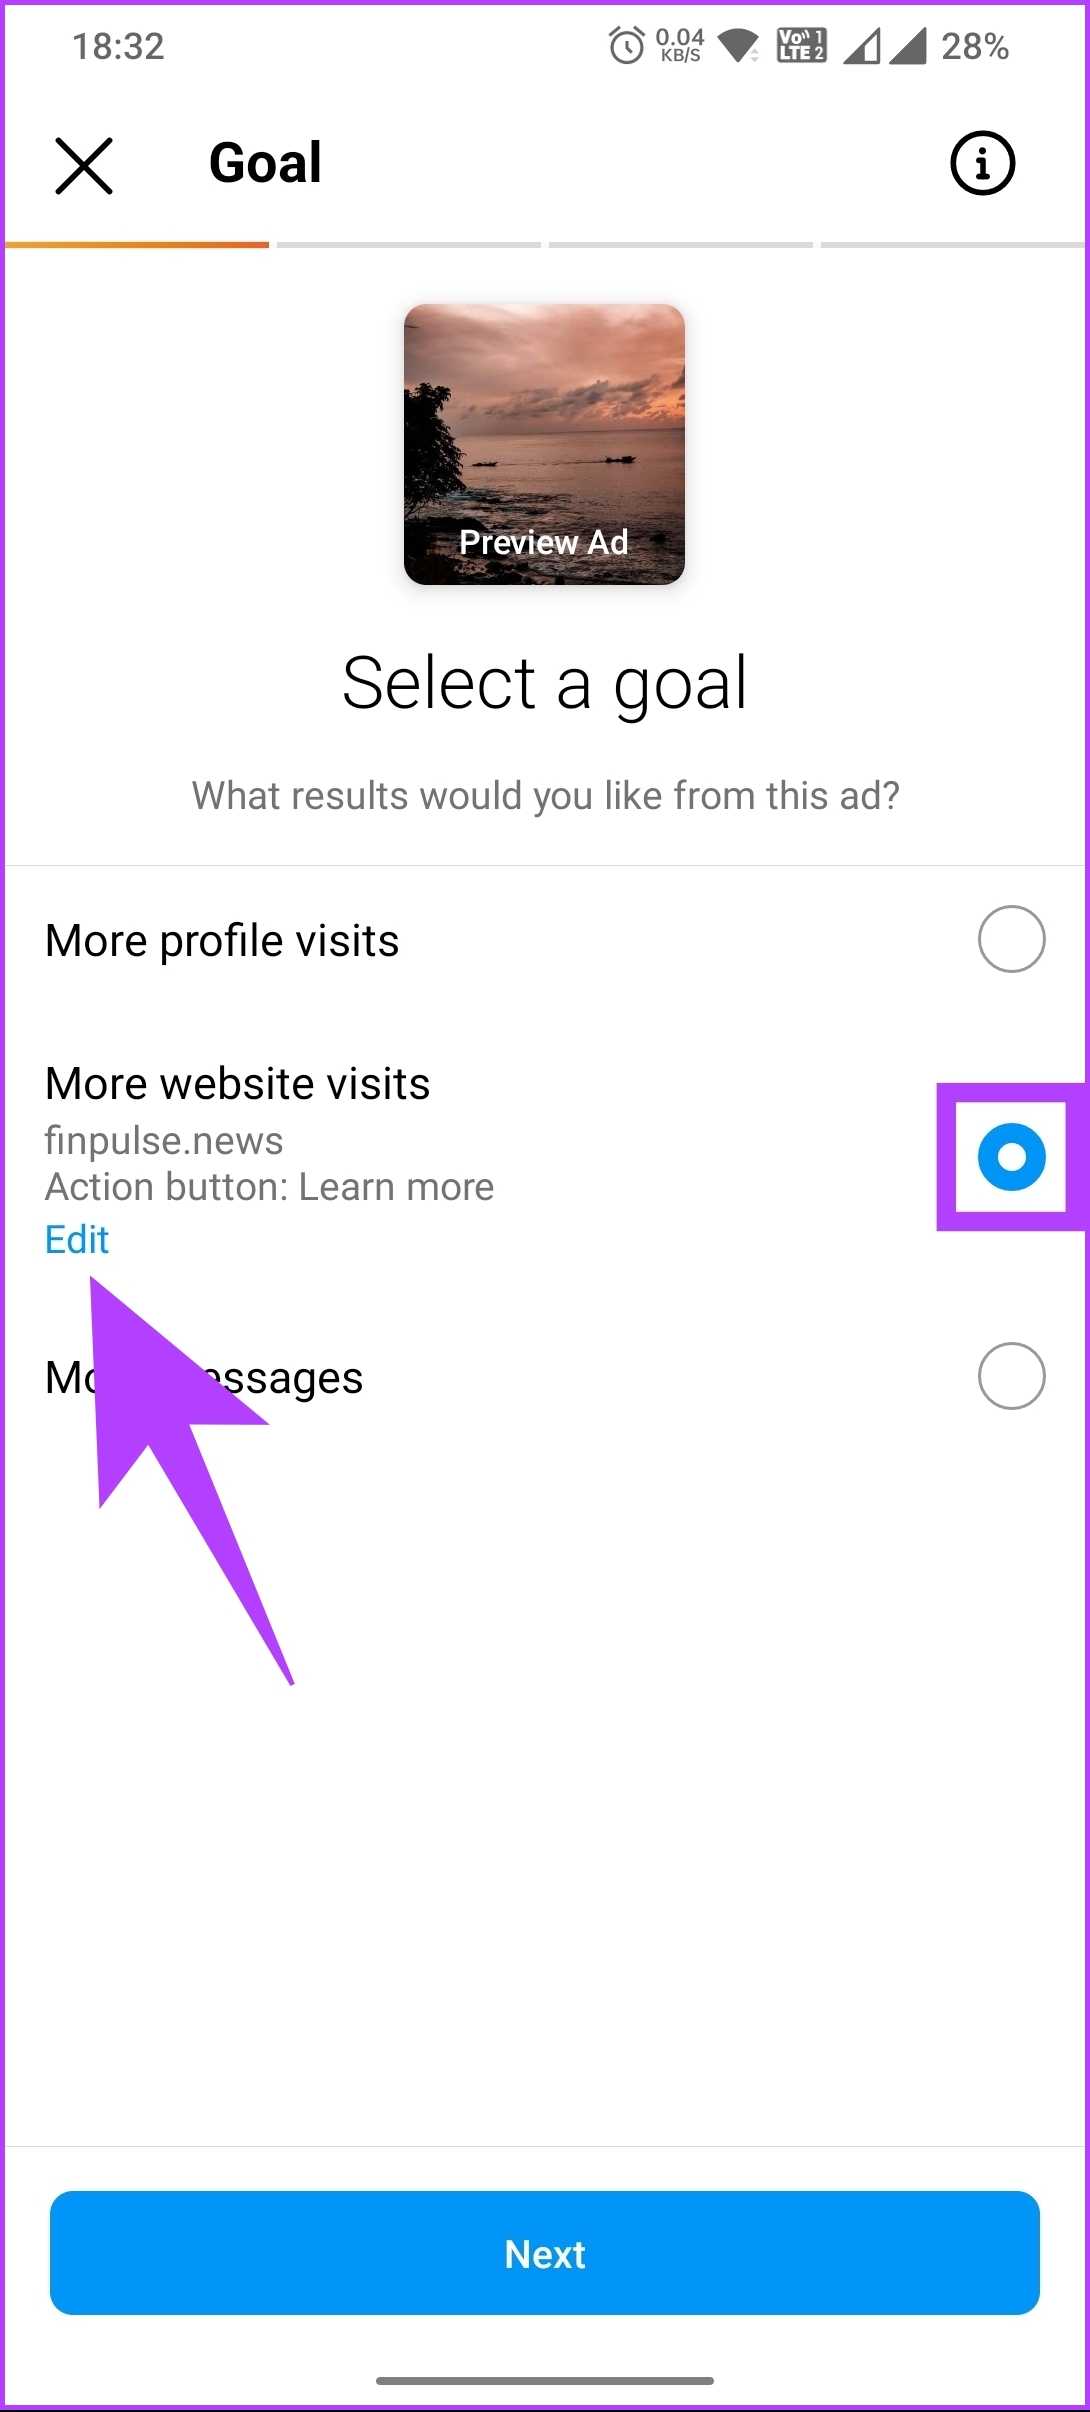
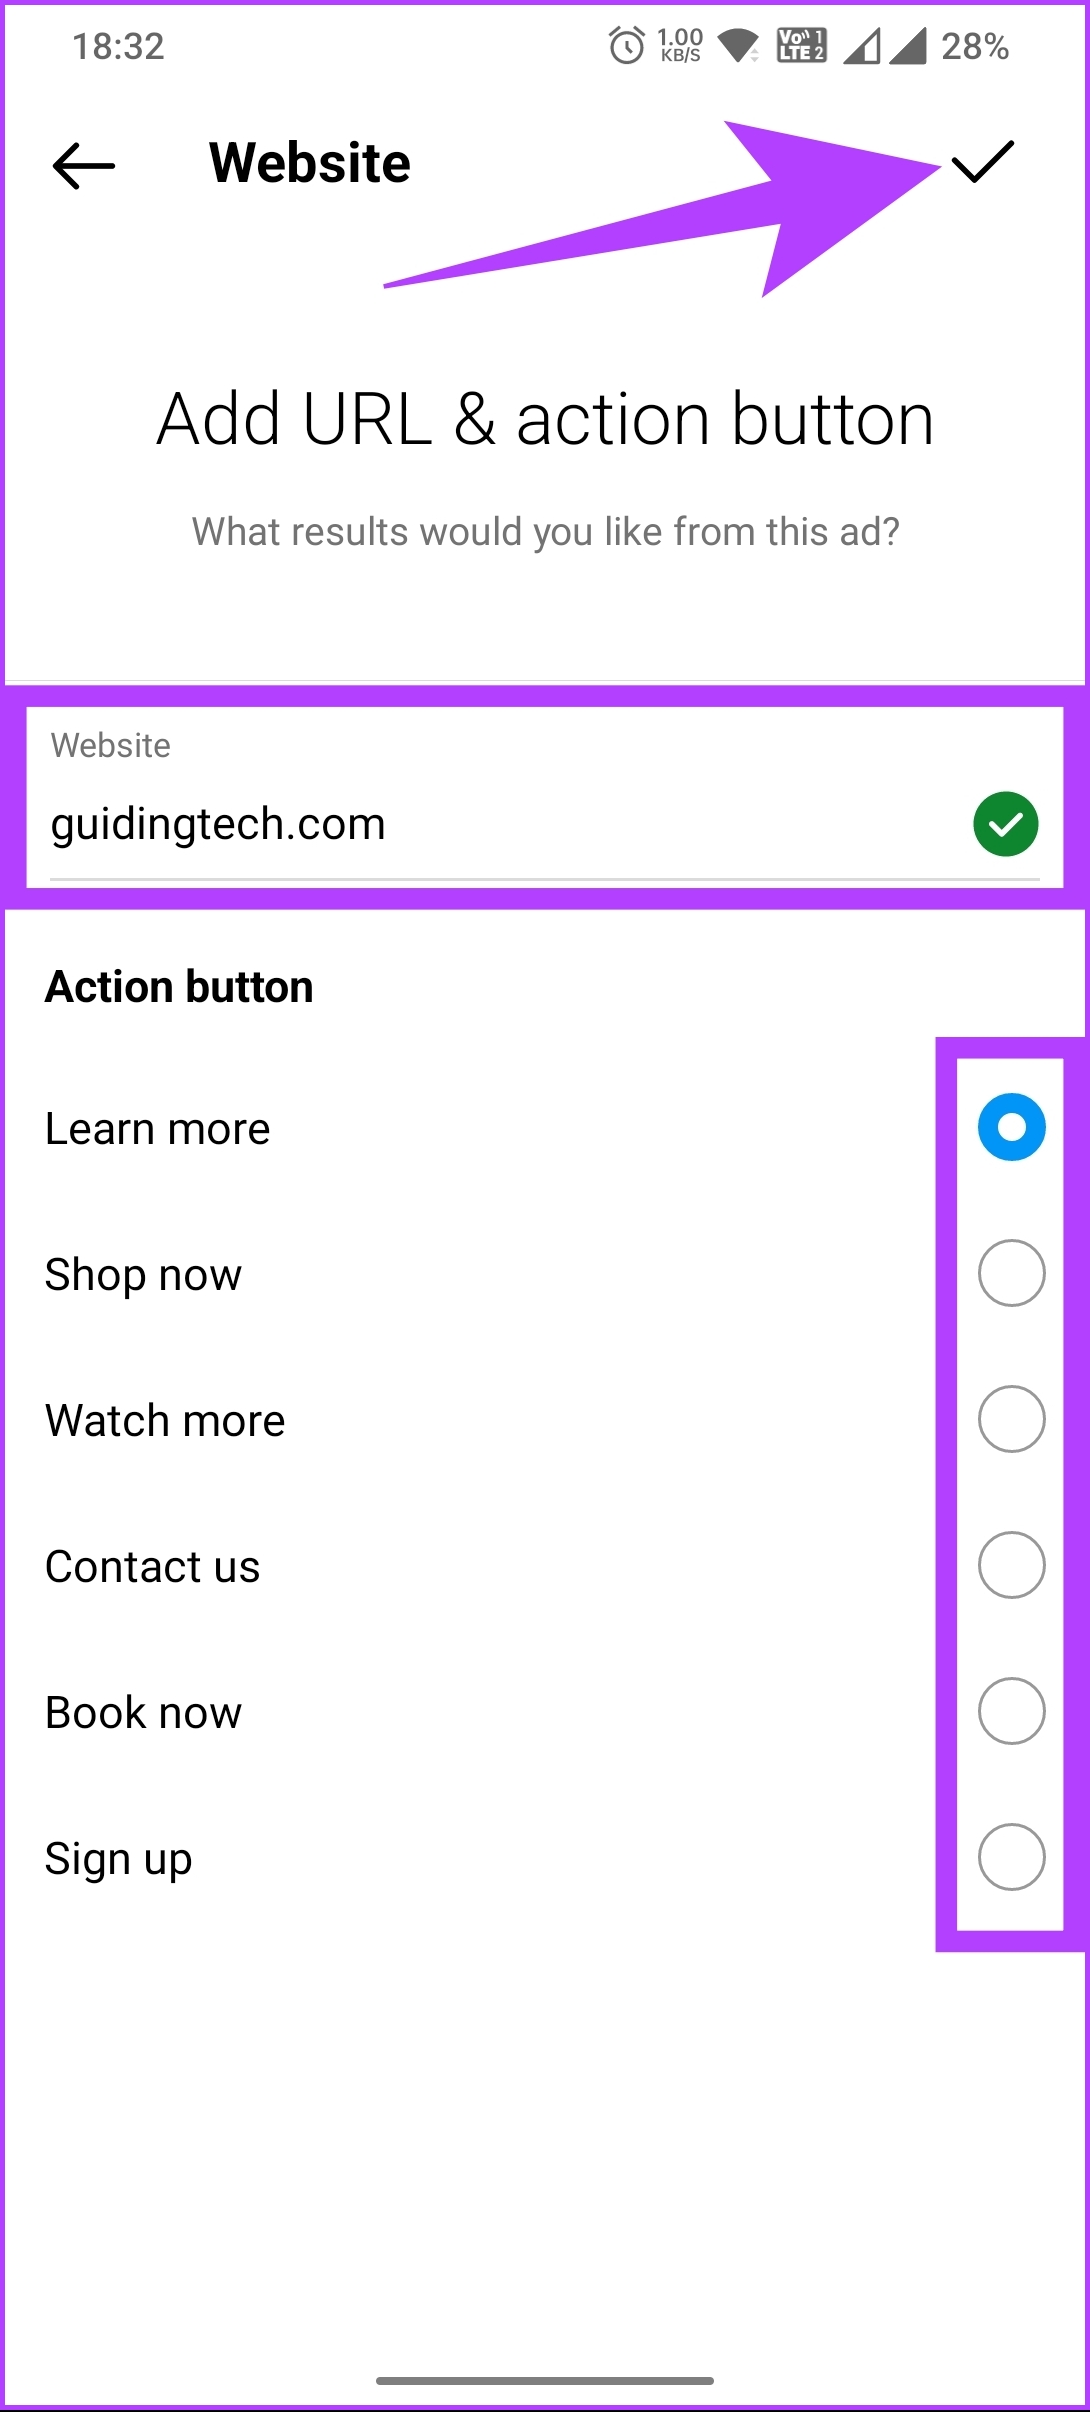
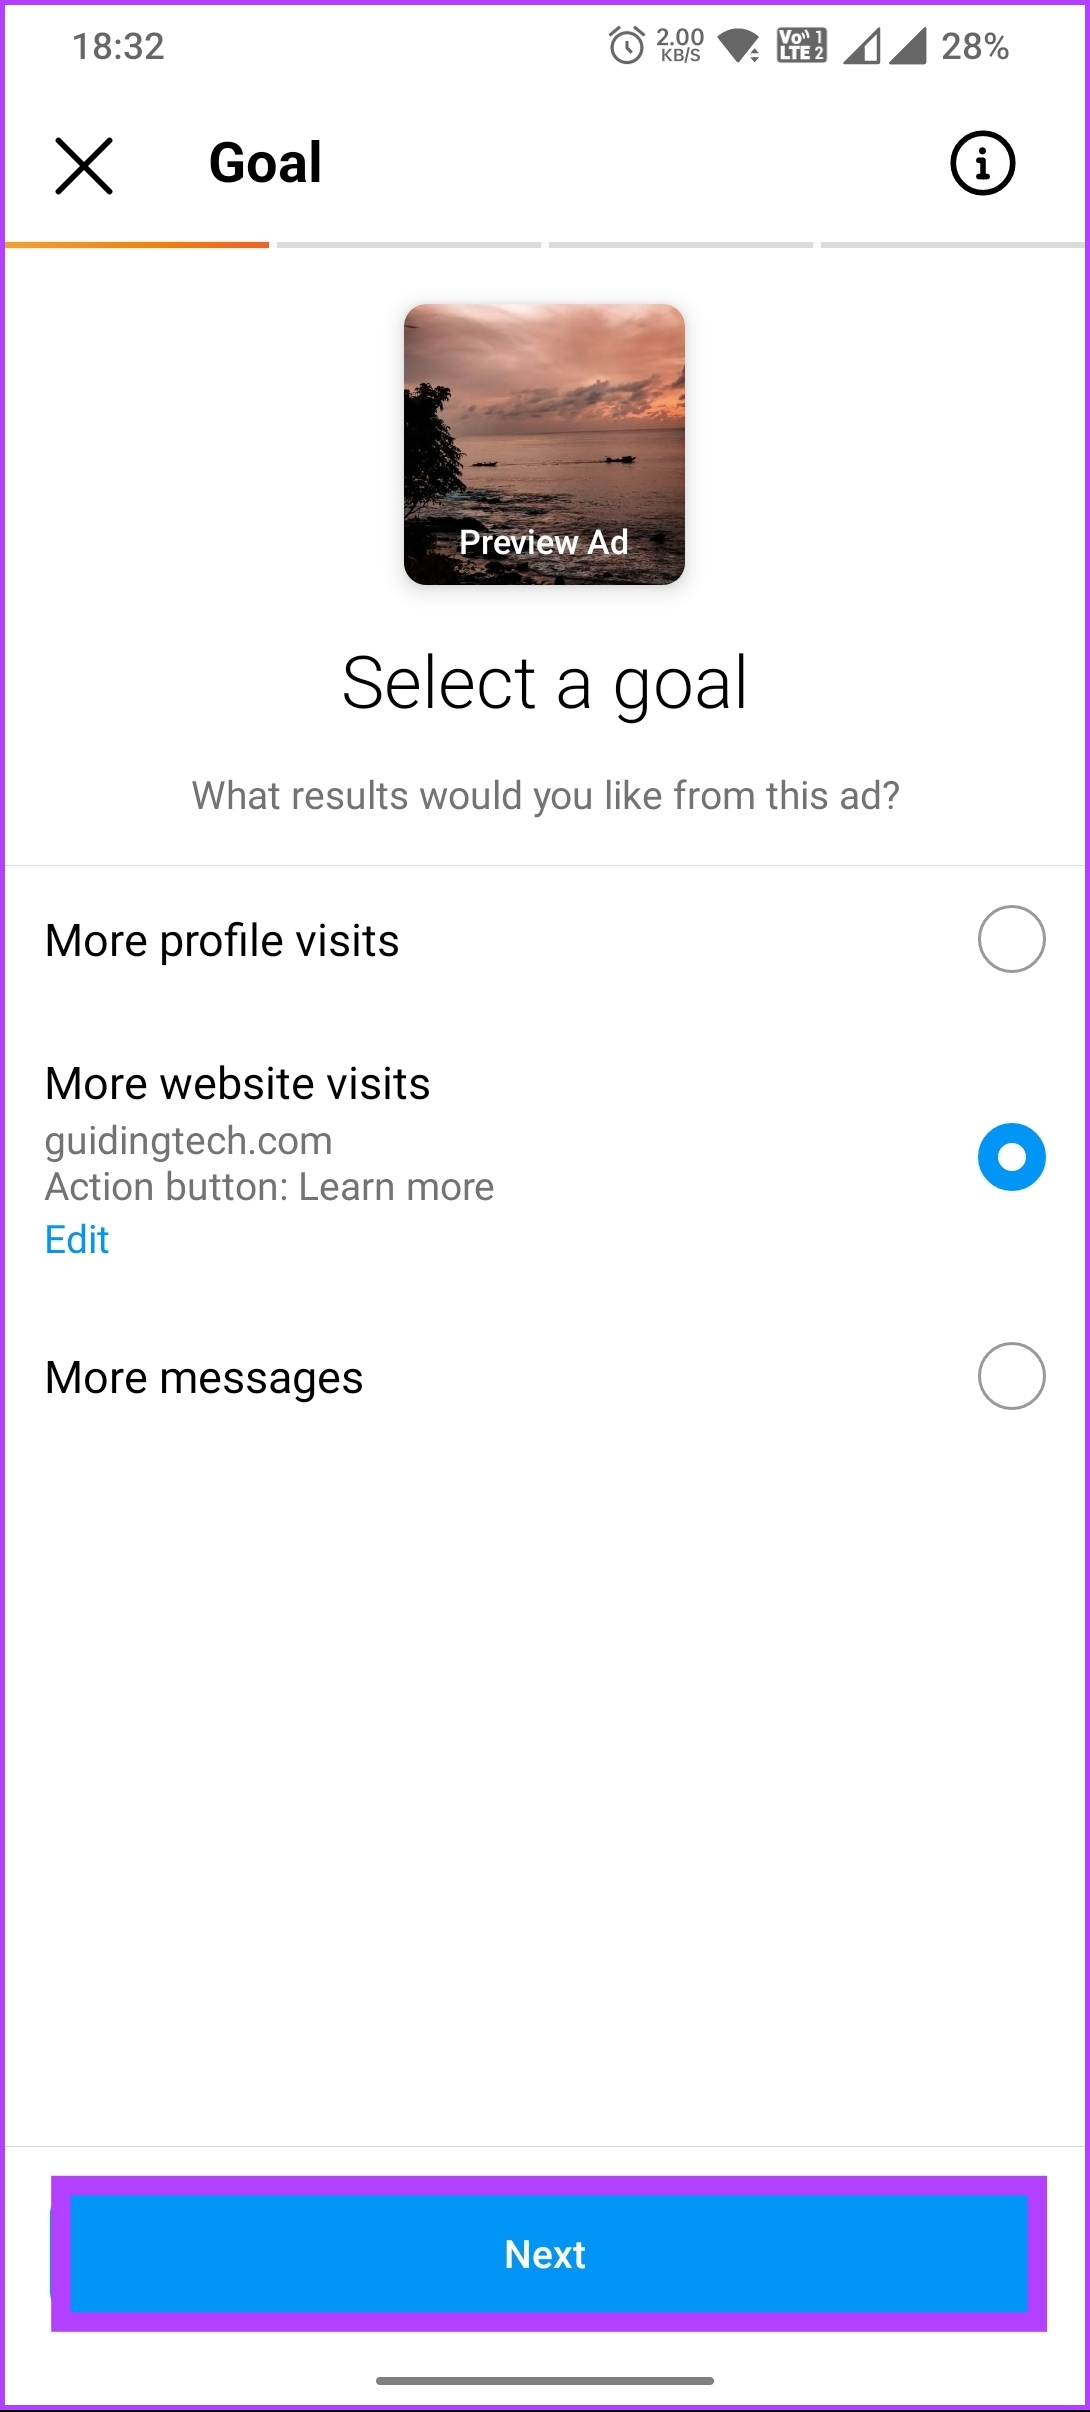
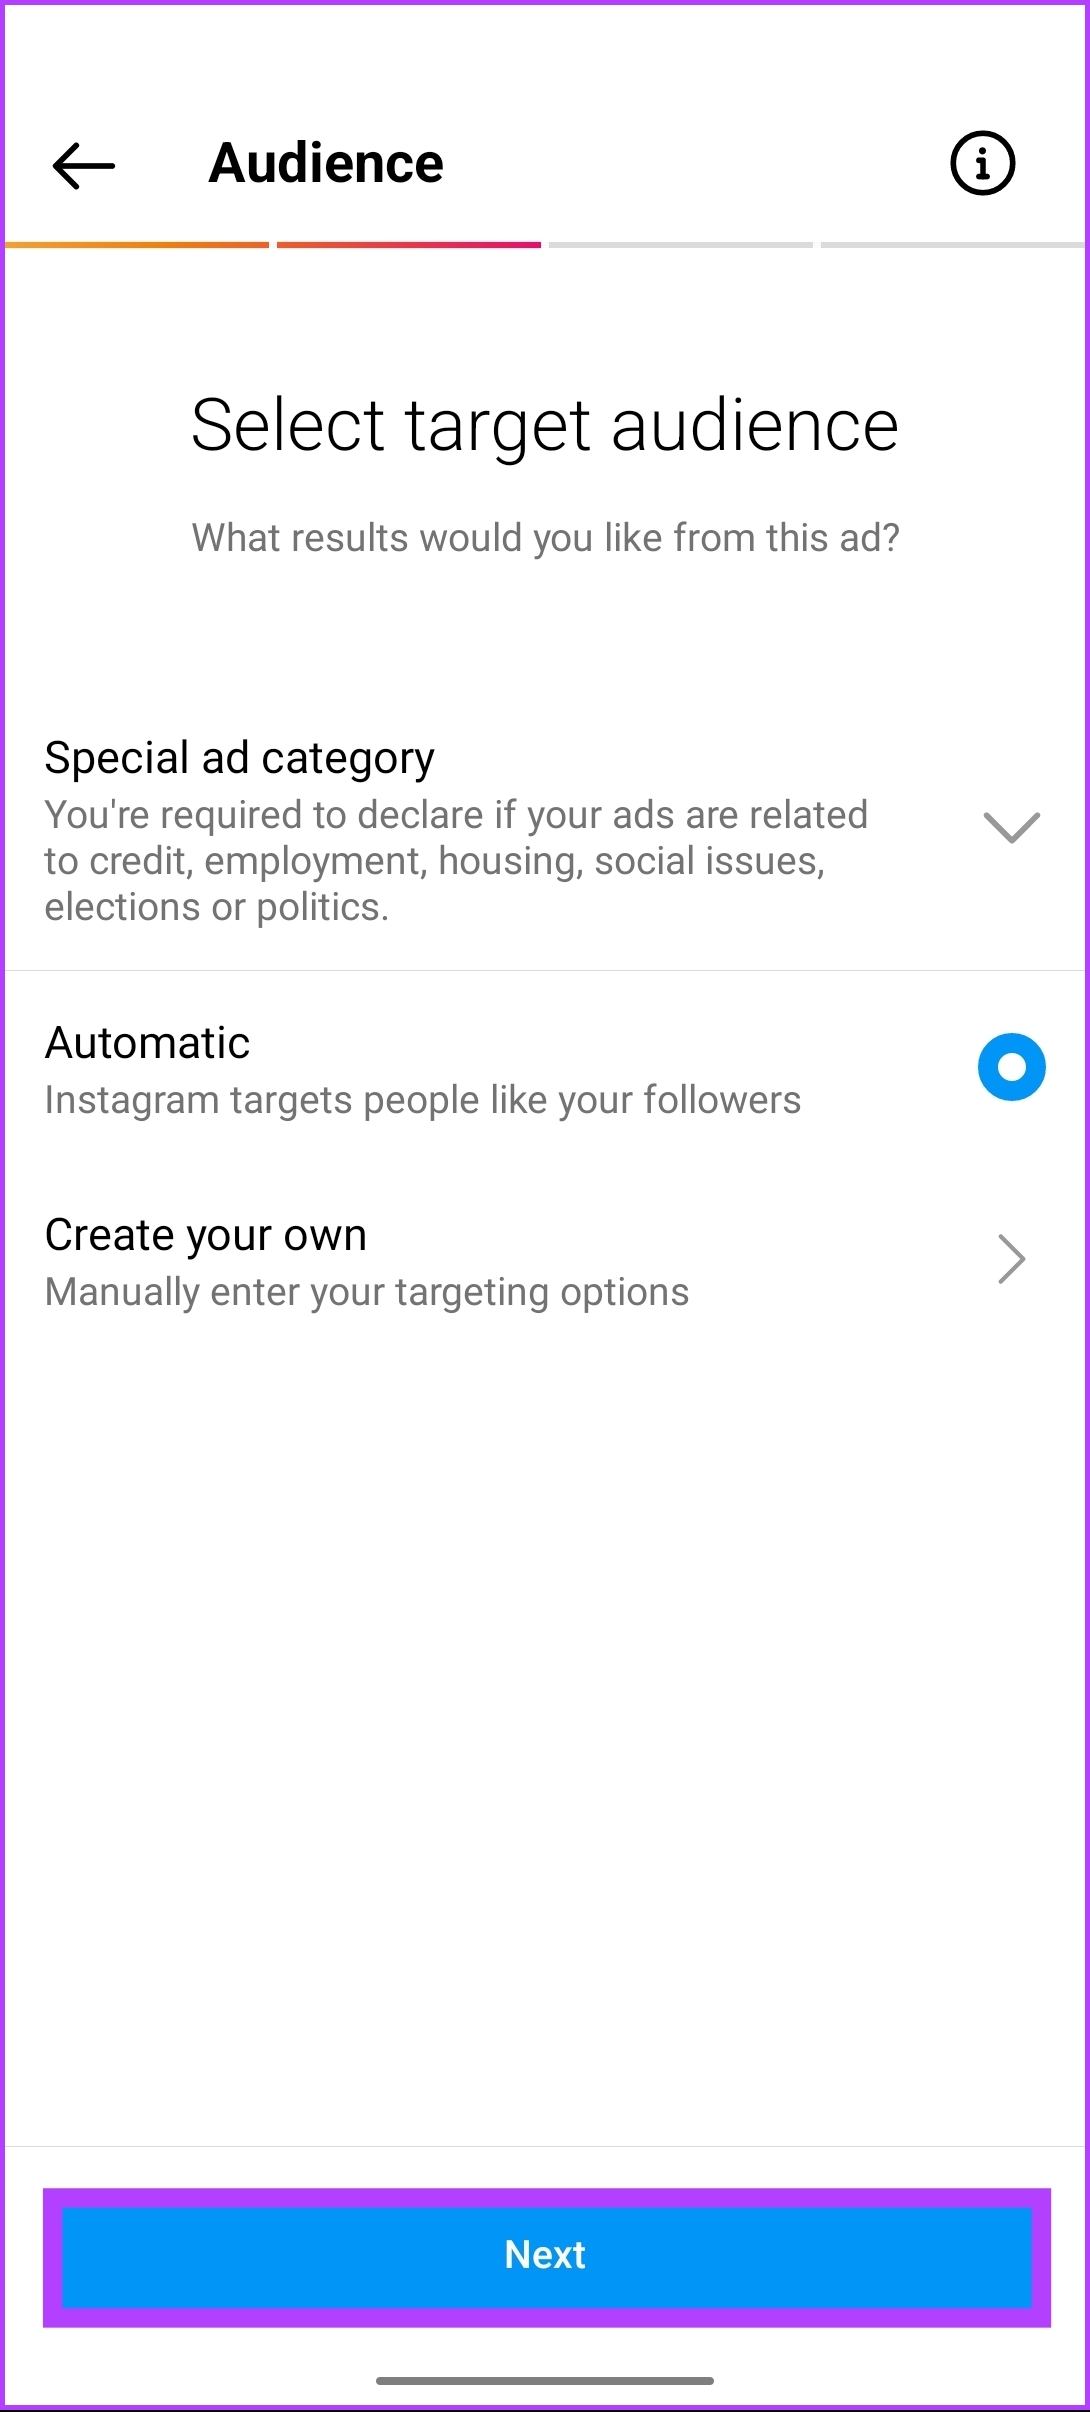
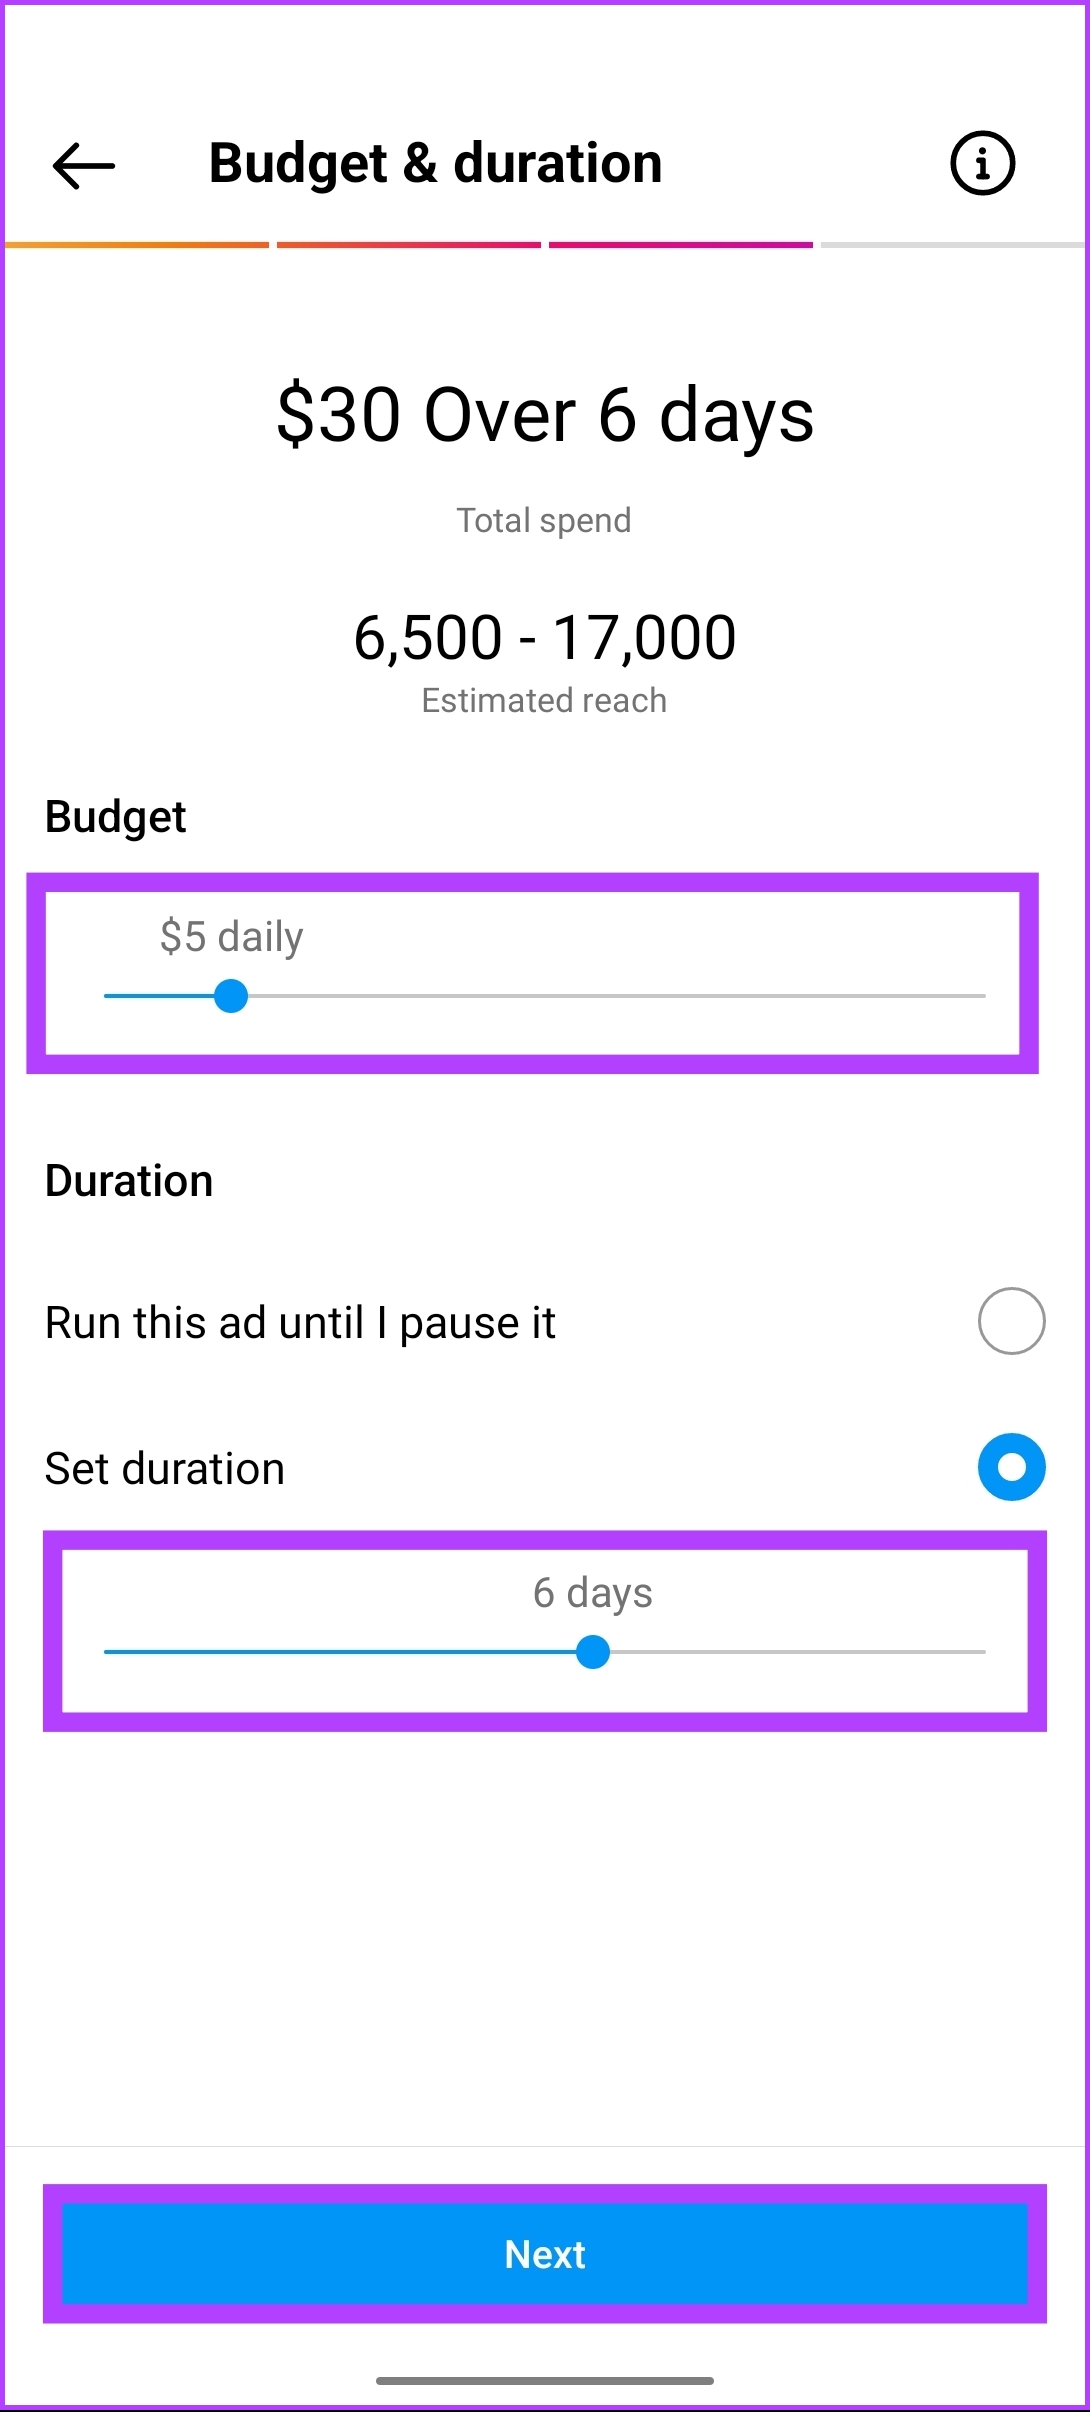
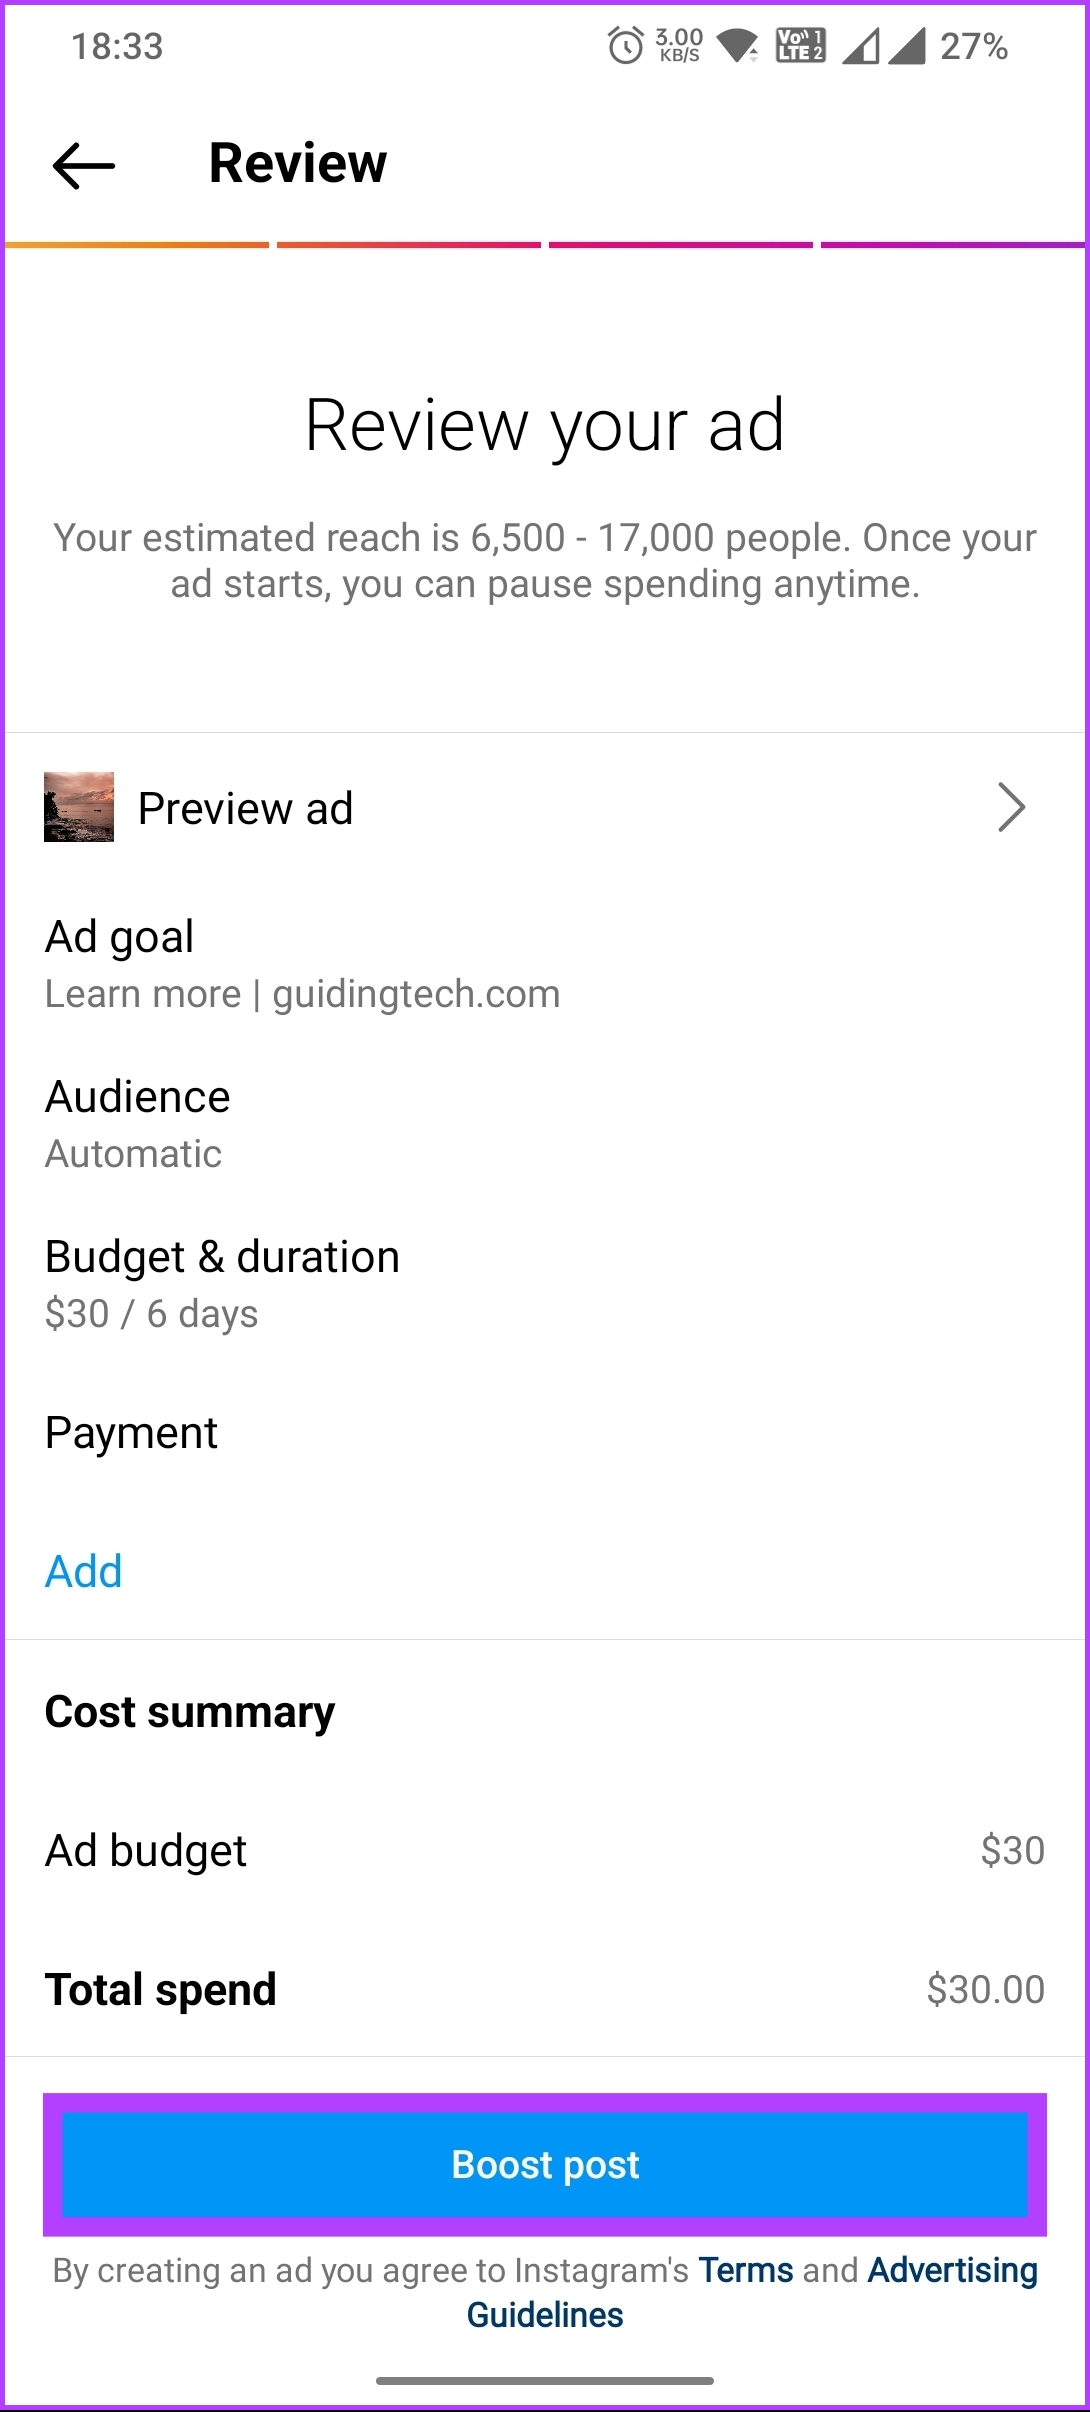
There’s no direct way to add a link to your Instagram post. However, you can promote your post or story with a link if you own a business page. When you promote a post with a link, your followers can directly tap on the link and get redirected without having to copy and paste the link. Step 1: Launch Instagram on your desktop or mobile device and go to your profile from the bottom navigation. Note: For the sake of demonstration, we are going with Android. Step 2: Select the photo you want to promote or boost and choose the Boost post button below the photo. Step 3: In the Boost post sheet, under ‘choose how you want to boost,’ choose between ‘with a Facebook ad account’ or ‘without a Facebook ad account,’ and tap continue. Note: We are opting to go without a Facebook ad account. Step 4: Select your goal from three options on the next screen, choose ‘More website visits,’ and select Edit. Step 5: On the next screen, add the website link, choose an action button, and tap Done (check) in the right corner. Now, tap Next. Step 6: Under ‘Select target audience,’ either create your audience or let Instagram automatically target the audience for you and tap Next. Step 7: Under ‘Budget & duration,’ choose your range and tap Next. On the next screen, ‘Review your ad,’ go through the details, and tap on Boost post. You may have additional steps to follow for payment details. Once that is done, your post will be boosted along with the link you attached for the users to tap or click on. If you don’t want to boost or promote your post on Instagram just to add a link, check out the next method.
3. Add a link to Instagram Bio
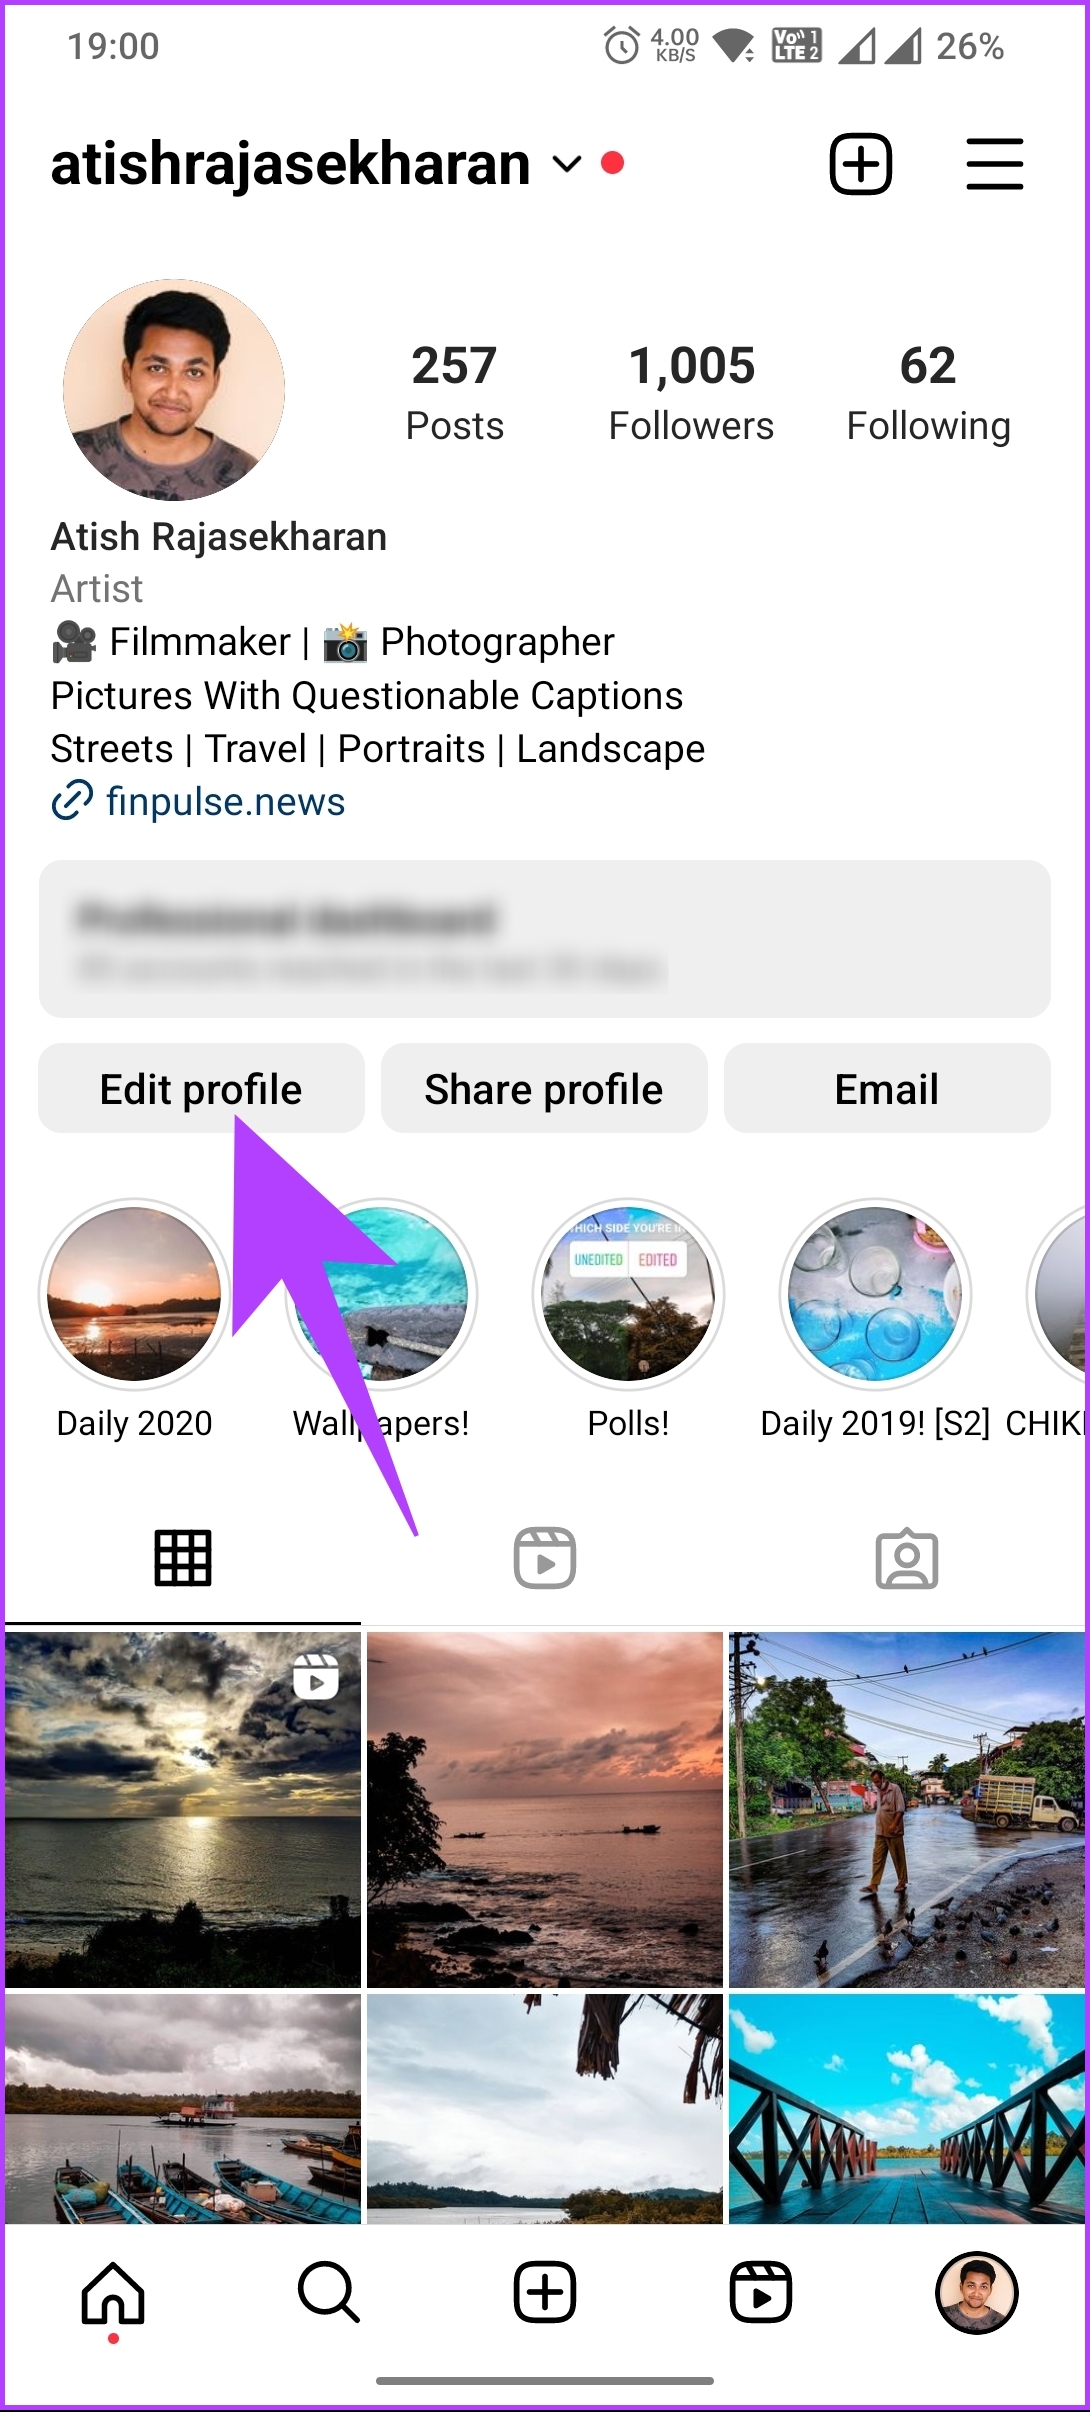
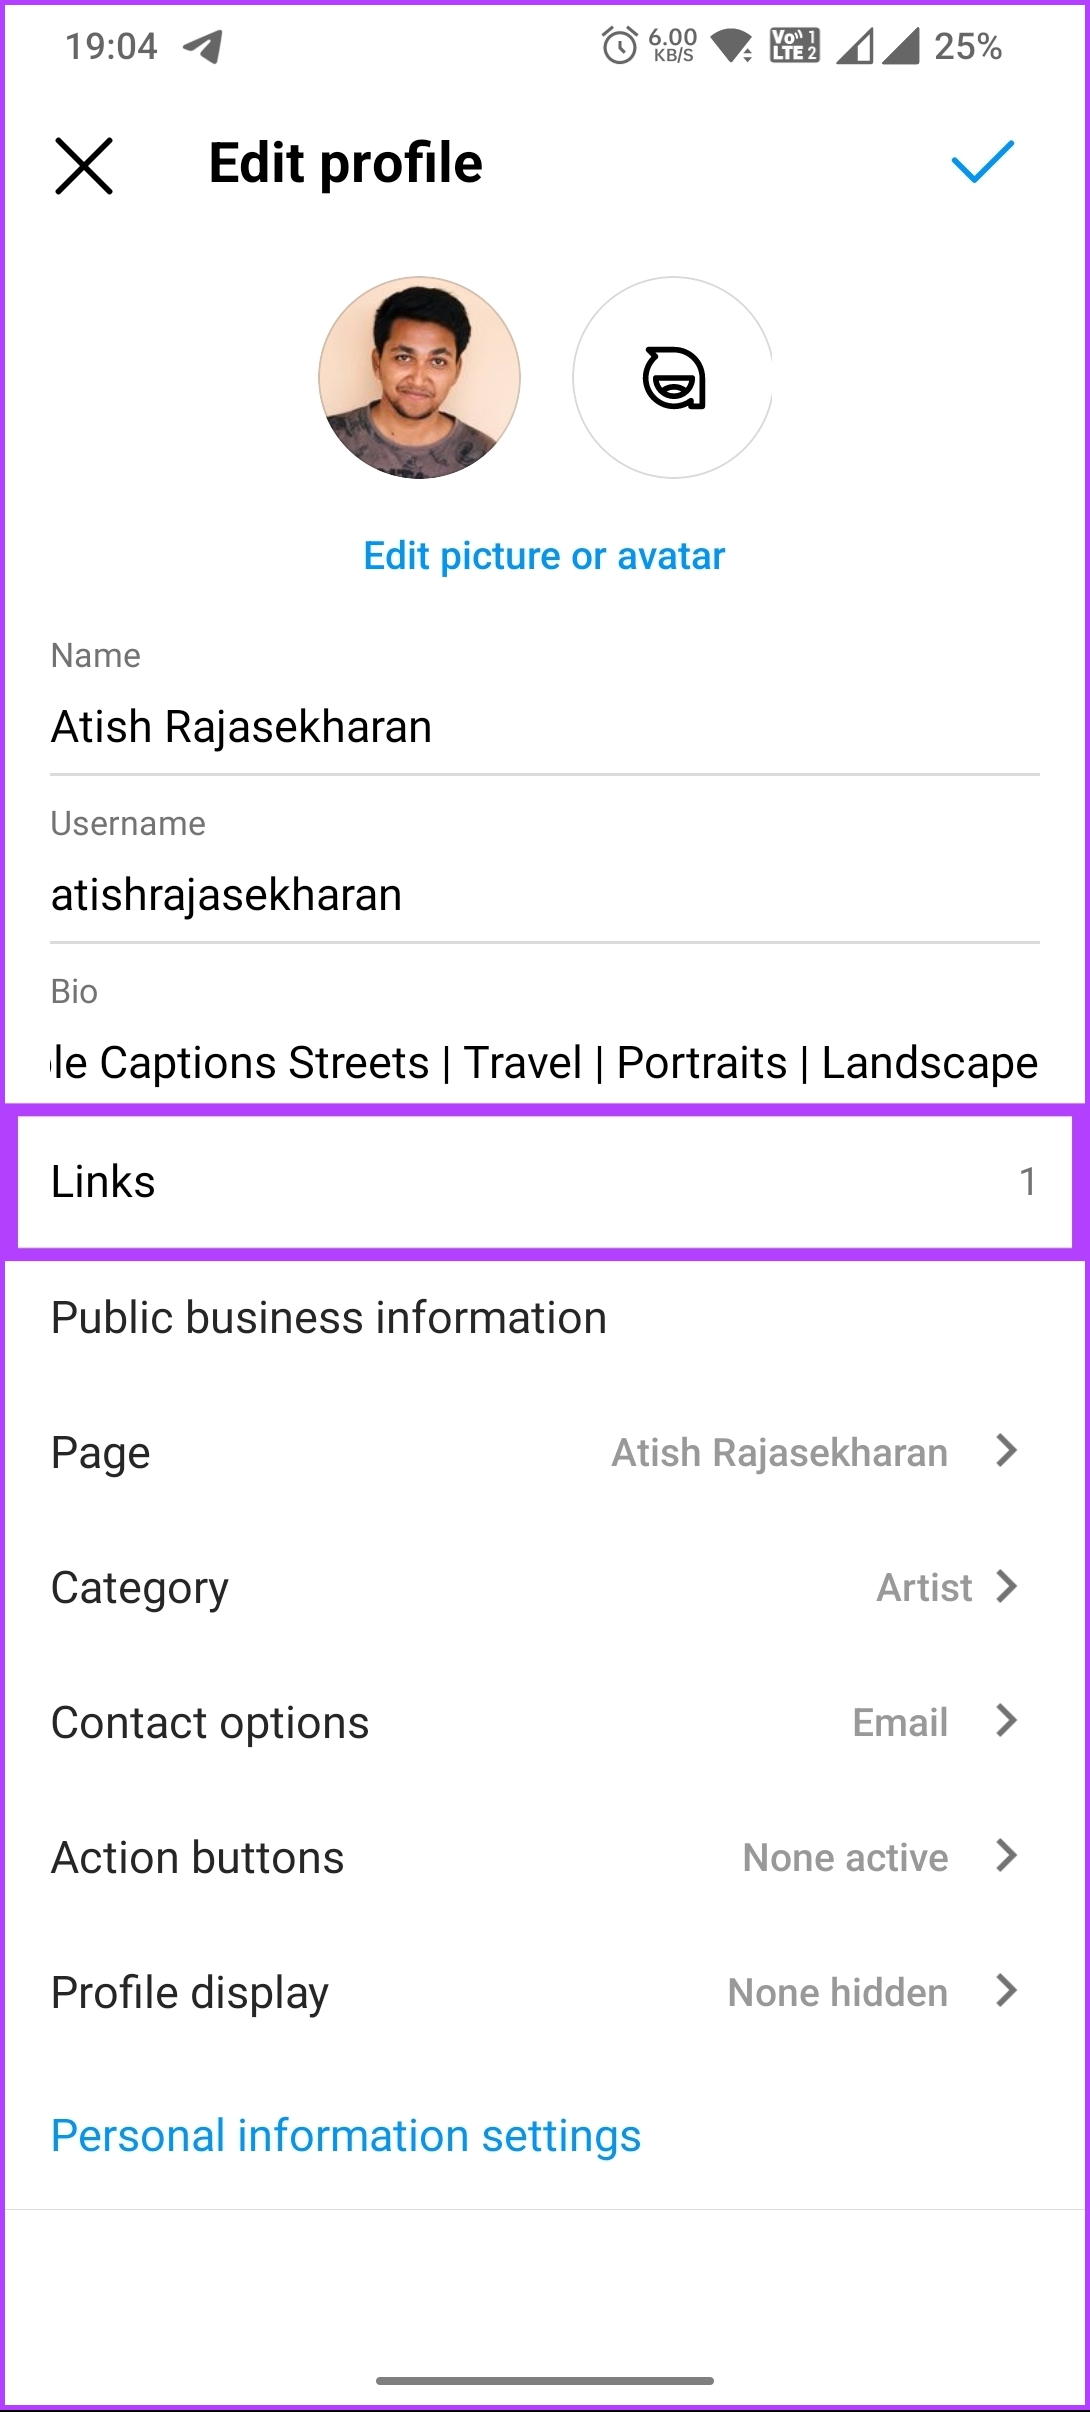
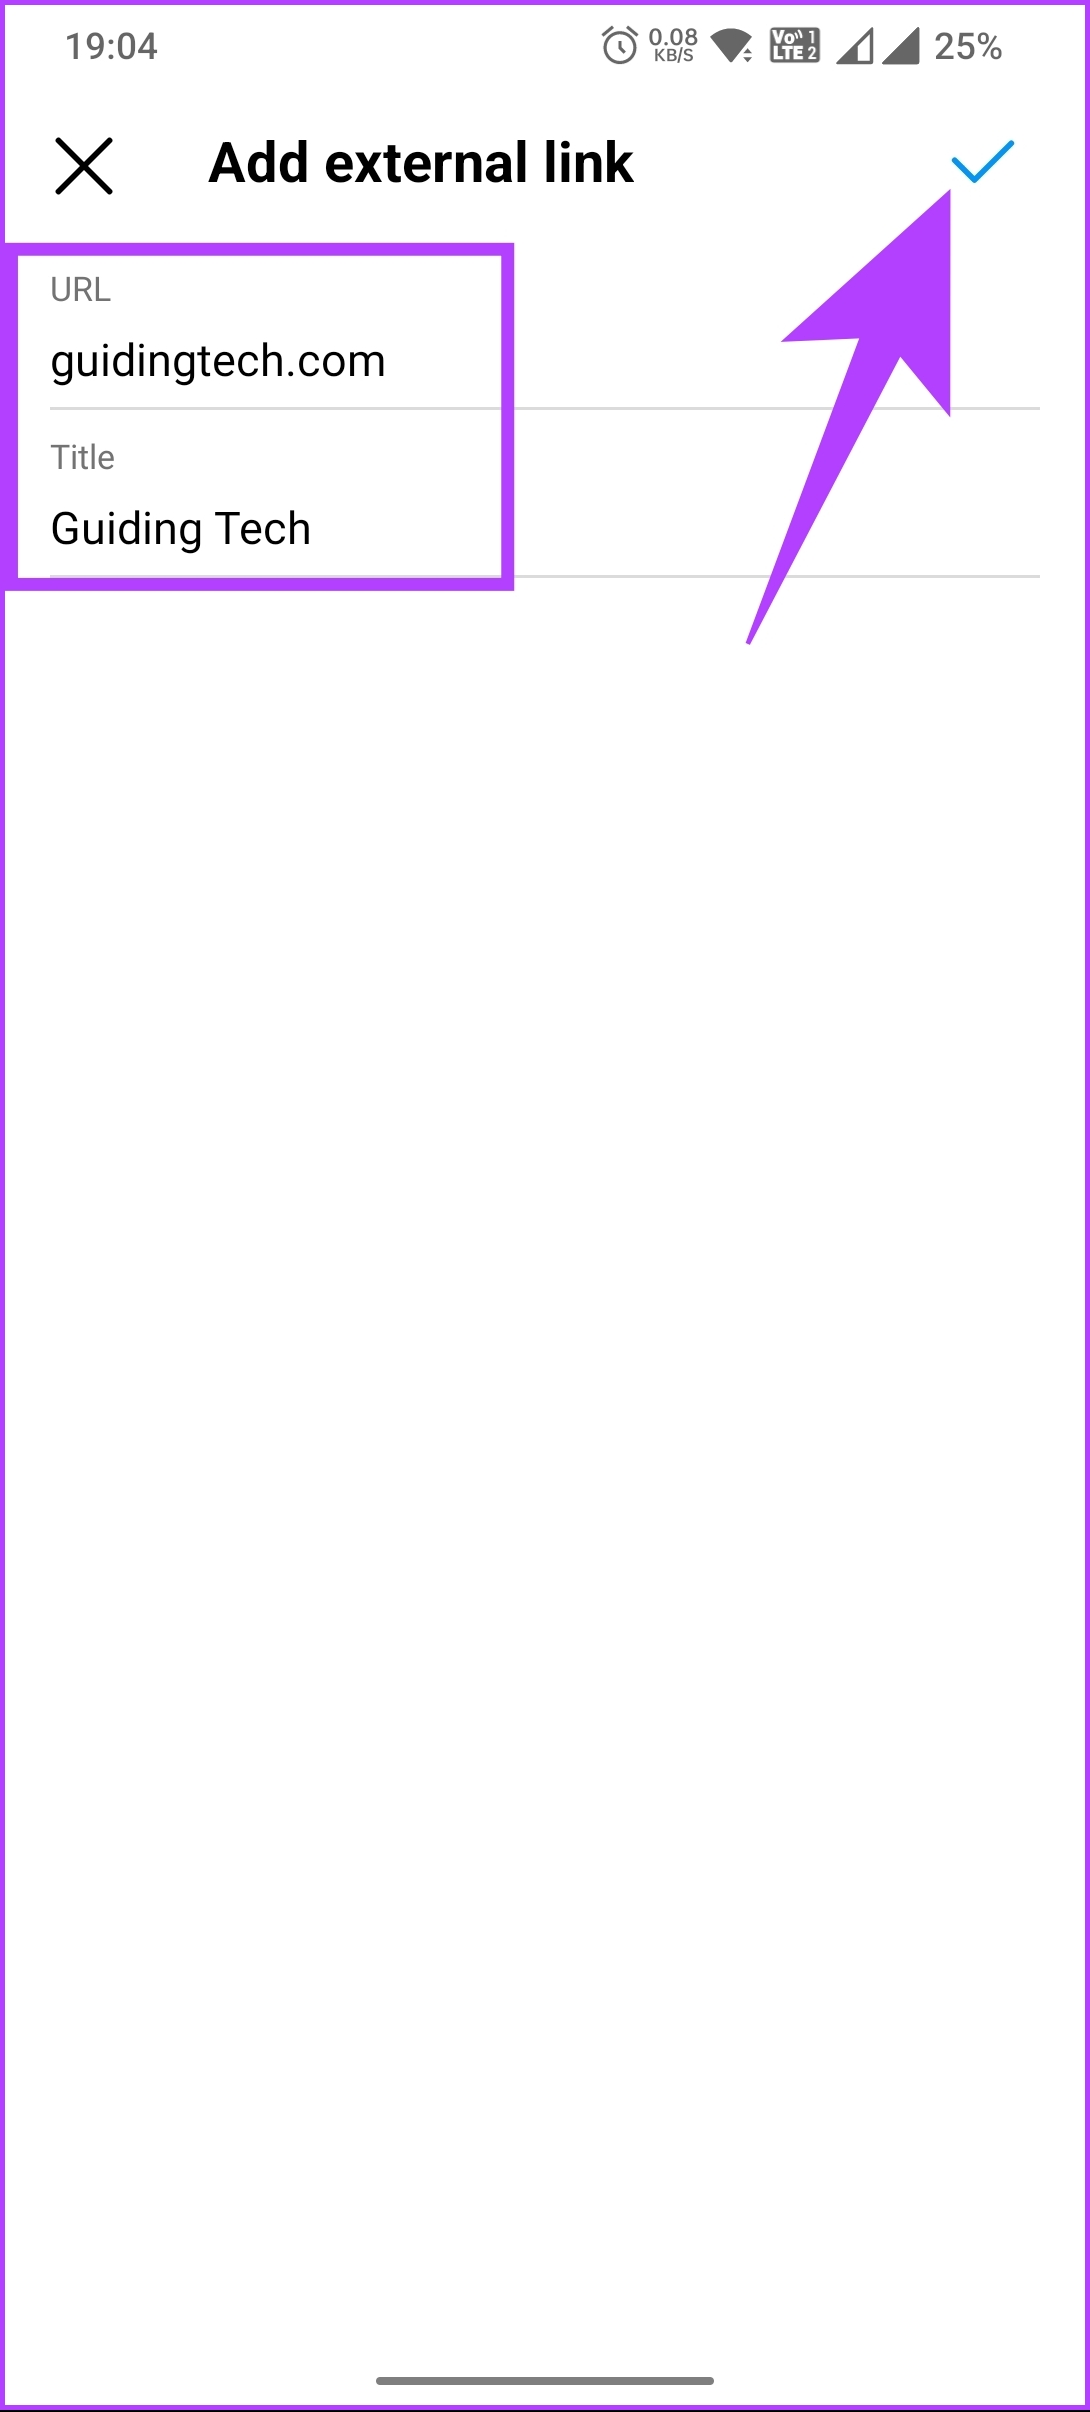
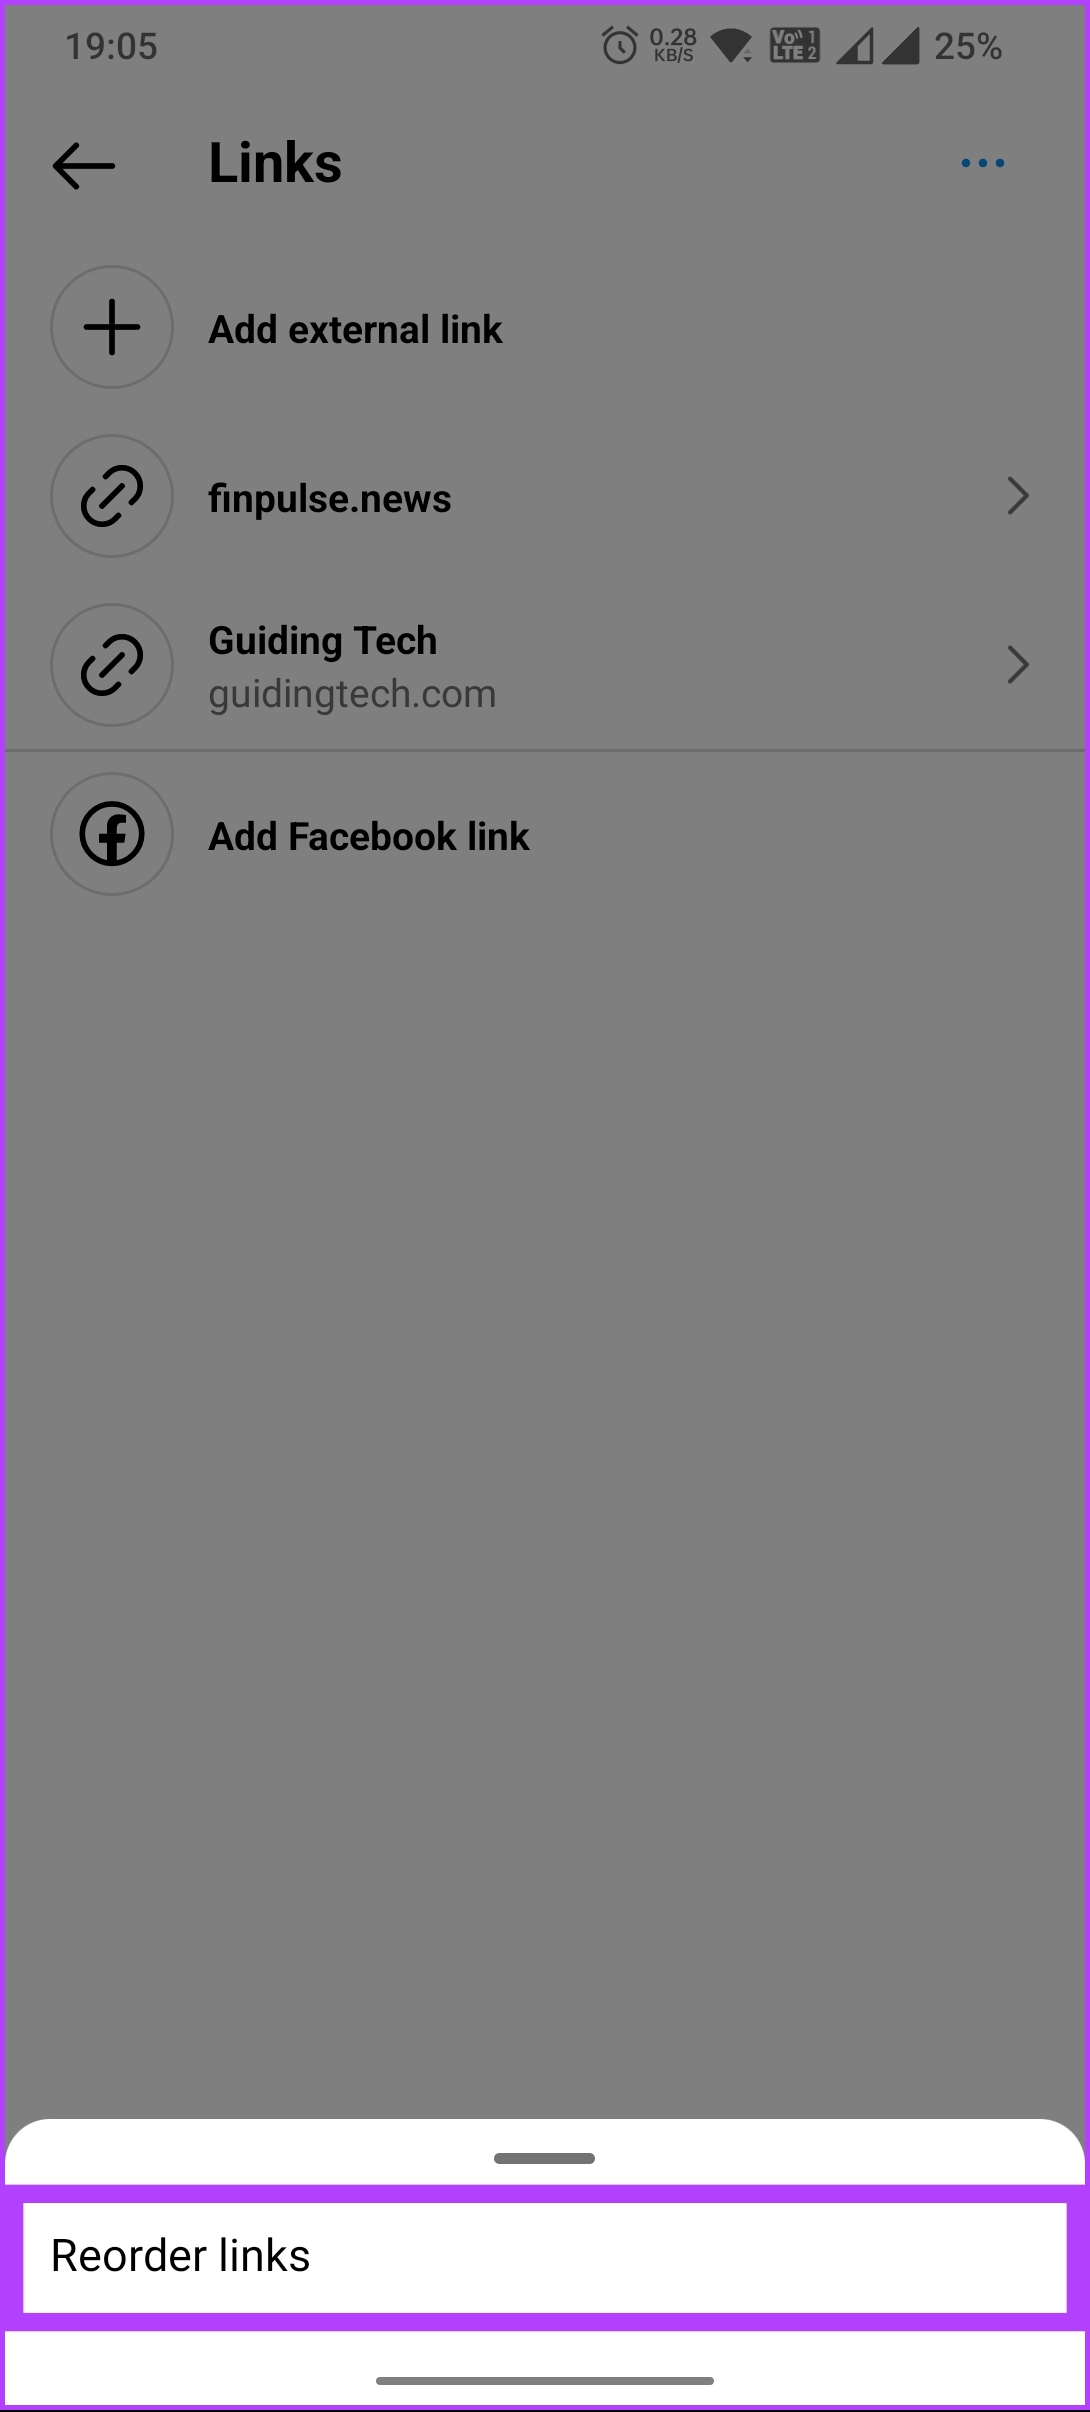
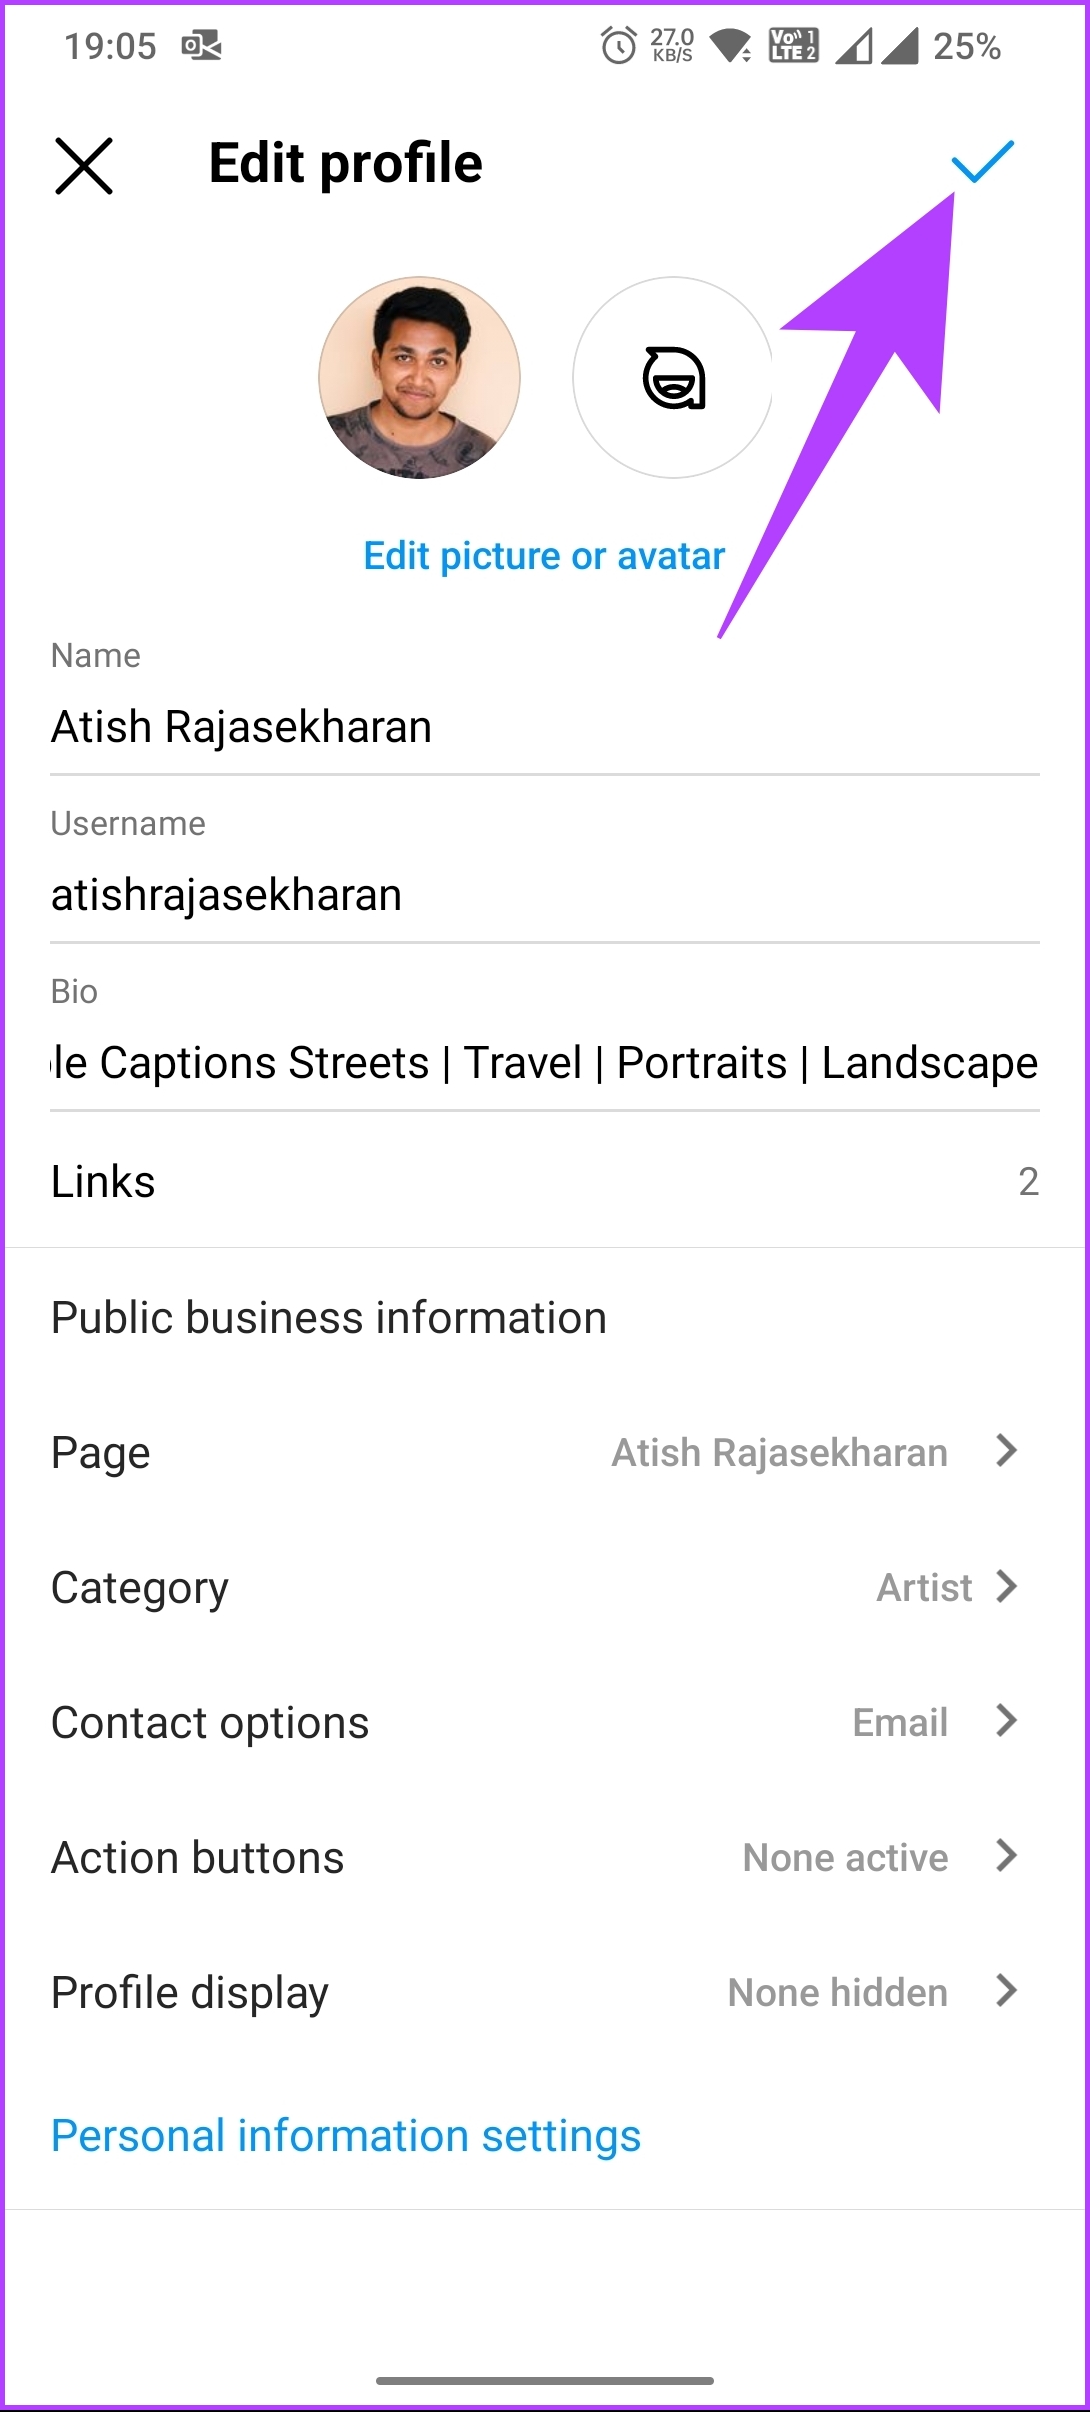
This is one of the most common and easiest ways to add a link to your Instagram. The link will be displayed on your profile for anyone to tap and get redirected. You can do many things with your Instagram bio, which we have already covered under 5 cool Instagram Bio hacks that you should know. That said, here’s how to add a link to your Instagram bio. Step 1: Launch Instagram on your Android or iOS device and go to your profile from the bottom navigation. Note: For ease of demonstration, we are going with Android. Step 2: Tap on the Edit profile button above your posts. On the Edit Profile page, select Links. Step 3: Under Links, tap on ‘Add external link.’ On the next screen, enter the URL and the Title, and finally, tap the Done (checkmark) at the top right corner. You will be returned to the Links screen, where your newly added links will be visible. If you want to reorder the link before displaying it, you can continue with the below steps. Step 4: Tap on the three-dot icon at the top right corner, and from the bottom sheet, choose Reorder links. Step 5: On the next screen, reorder the link per your preferences and tap the Done (check mark) button at the top right corner. Step 6: Finally, under Edit profile, tap the Done (check) button at the top right corner.
Loop-in and Redirect Your Users
Knowing how to add a link to Instagram Story and Posts is a simple yet effective way to engage with your audience and promote your content. With the step-by-step guide we provided, you can easily add a link to your Instagram Story and Posts and start reaping its benefits. You may also want to read how to rearrange Instagram posts without deleting them. The above article may contain affiliate links which help support Guiding Tech. However, it does not affect our editorial integrity. The content remains unbiased and authentic.
