Creating a custom power plan might not be uncommon for you if you’ve been using Windows for years. But did you know that you can import and export power plans in Windows? If not, we’ve put together this guide to teach you everything you need to know about importing and exporting power plans on your Windows 11 PC.
Why You May Want to Export or Import Power Plans on Windows 11
Importing and exporting power plans in Windows may seem counterintuitive and useless, but it can be helpful in a handful of situations. For instance, exporting a power plan lets you create a backup copy of any custom power plans you’ve made on your PC. Such a backup is useful if you need to restore your current power settings after reinstalling or resetting Windows due to a serious system error. Besides creating a backup, importing power plans can come in handy if you ever need to transfer your current power plans between PCs. And even though one might have to make slight changes to the power plan to accommodate changes with the hardware, importing the power plan from another PC can still help transfer the sleep timings, brightness settings, and more.
How to Export Power Plans on Windows 11
Exporting power plans sounds easy in theory. However, to do so, you need to run a few commands using Command Prompt. Here’s how you can export an existing power plan and create its backup on your Windows 11 PC:
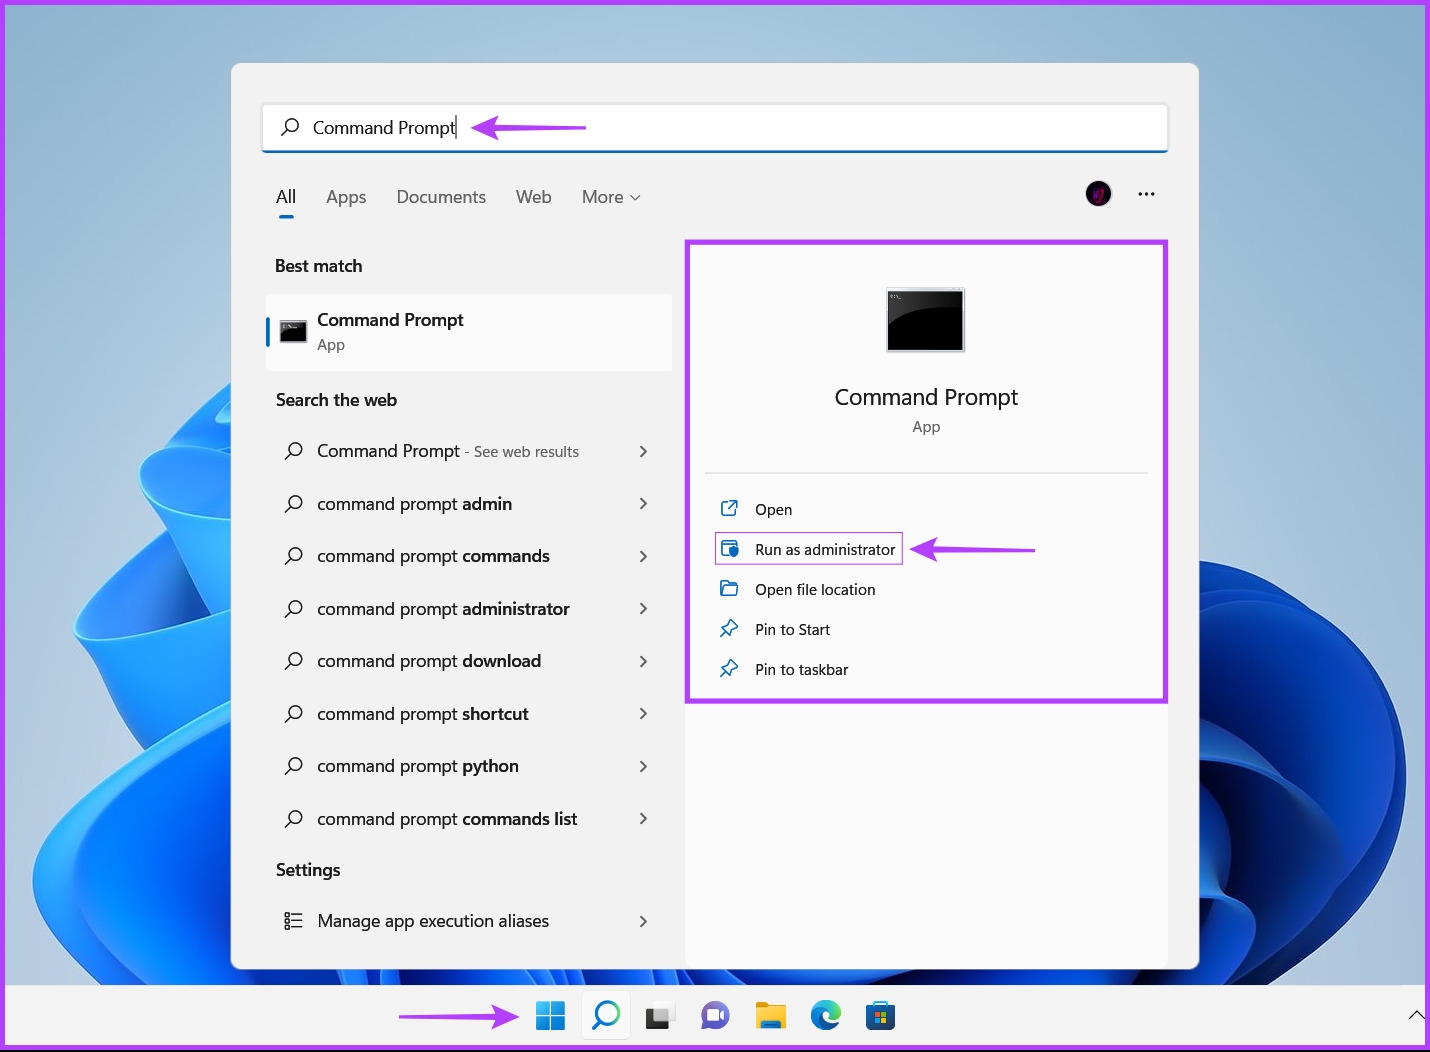
Step 1: Press the Windows + S keys and type Command Prompt. Then, from the results for Command Prompt, click on Run as administrator.
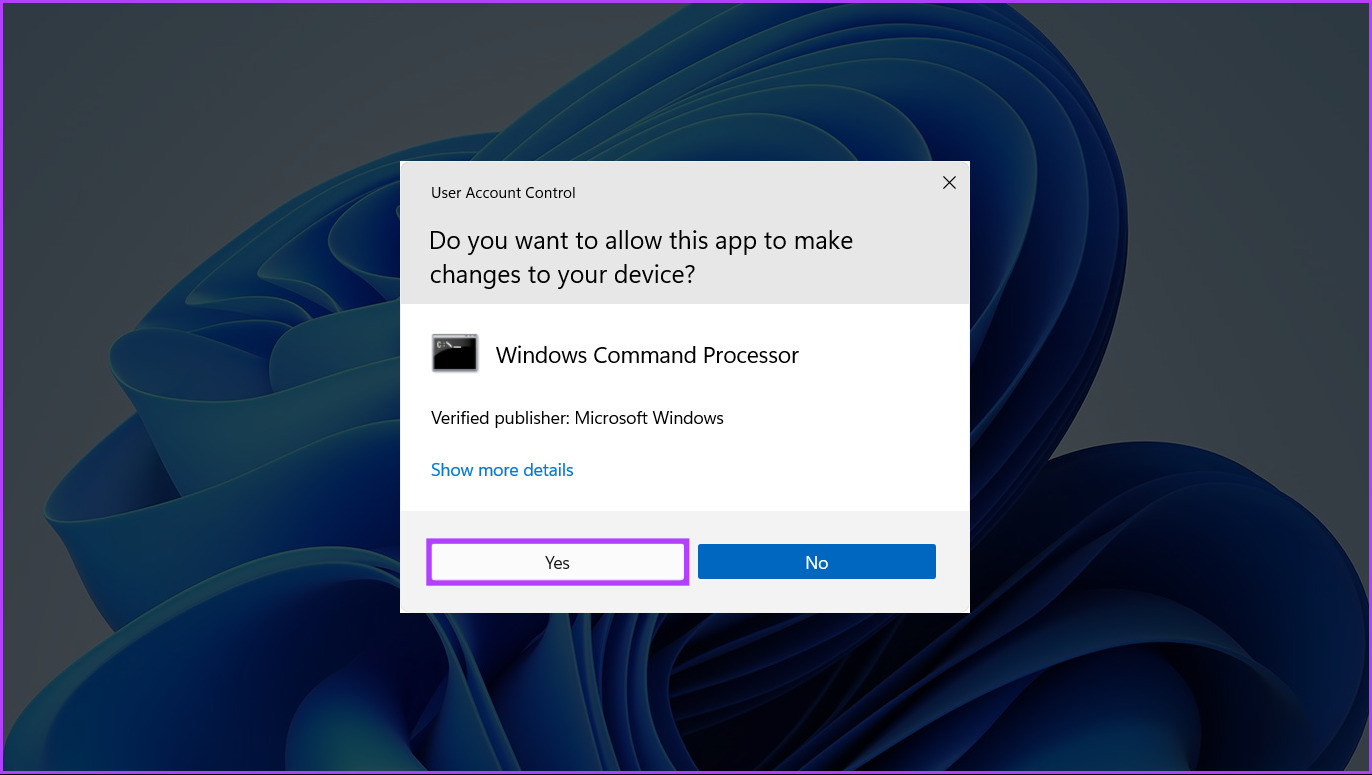
Step 2: Click on Yes when a User Account Control (UAC) prompt appears on the screen.
Step 3: Type the following command into the Command Prompt window and press Enter to list all the power plans available on your PC.
Step 4: From the list of Existing Power Schemes that appears, select the power plan you want to export and copy its Power Scheme GUID.
For this example, we want to create a backup of the High Performance power scheme whose GUID is:
Step 5: Type the following command into the Command Prompt window and press Enter to create a backup of the selected power plan.
You will have to replace the
How to Import Power Plans on Windows 11
Unfortunately, you cannot just double-click on the .pow file to install the power plan on your PC. Instead, you will need to execute another command to install the power plan on your PC.
Here’s how you can quickly import a power plan onto your new or existing Windows 11 PC:
Step 1: Press the Windows + S keys and type Command Prompt. Then, from the results for Command Prompt, click on Run as administrator.
Step 2: Click on Yes when a User Account Control (UAC) prompt appears on the screen.
Step 3: Type the following command into the Command Prompt window and press Enter to install a power plan onto your PC.
You will have to replace the
Managing Power Plans on Windows 11 Made Easy
You can carefully follow all the steps in this guide to back up your PC’s existing power plans or import new power plans to your PC. This makes it easy to manage the power plans available on your PC if you ever need to reinstall Windows from scratch or move to a new PC. The above article may contain affiliate links which help support Guiding Tech. However, it does not affect our editorial integrity. The content remains unbiased and authentic.


![]()


