Enabling this feature will also let you start working on your Mac immediately without causing any annoyance. If your Mac is not asking for the password after waking up from sleep, we recommend not using this feature. But if you want to learn more about this, keep reading this post that explains how to log in automatically on your Mac.
Before Getting Started
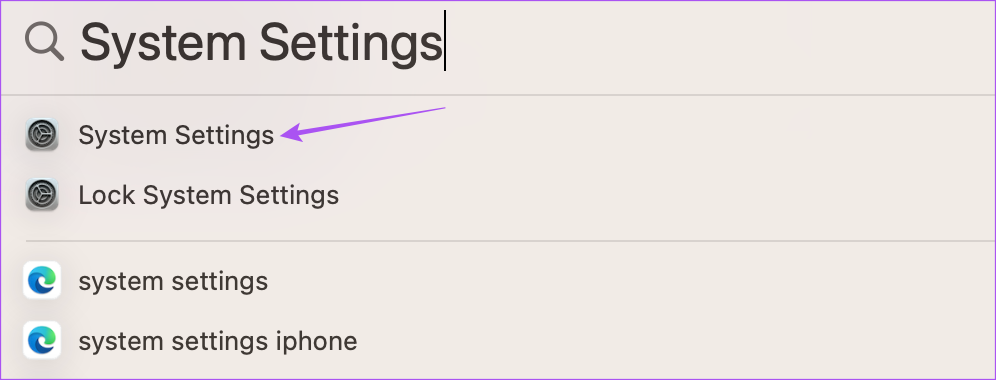
We recommend that you check for the latest update of macOS to ensure that you do not face any hiccups while following the steps mentioned below. Step 1: Press Command + Spacebar to open Spotlight Search, type System Settings, and press Return.
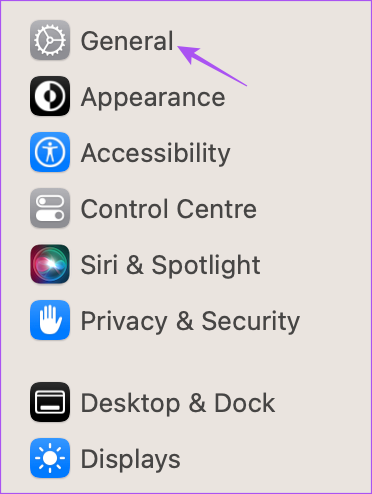
Step 2: Click on General from the left sidebar.
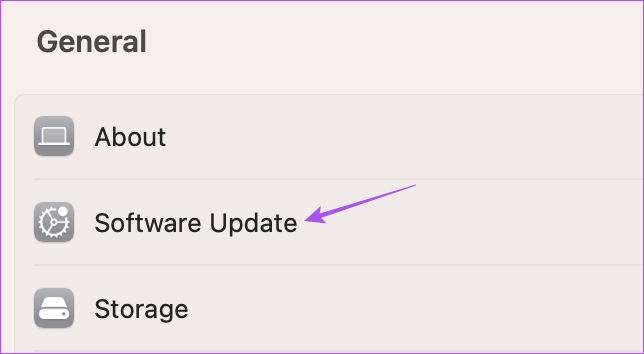
Step 3: Click on Software Update.
Step 4: If an update is available, download and install it.
Disable FileVault to Enable Automatic Login
Once you have updated to the latest software version, it’s time to disable the FileVault feature to enable automatic login on your Mac. FileVault is a full-disk encryption that uses the XTS-AES-128 encryption with a 256-bit key to protect all the contents of your Mac’s built-in startup disk. That’s how FileVault helps when your Mac contains sensitive data or information which you don’t want to be accessed by anyone. It means that if your Mac gets stolen or is lost, your data will remain safe. Your files and data will remain inaccessible unless your Mac’s password is entered. While setting up FileVault on your Mac, you also get a digital recovery key that you need to keep safe. If you don’t remember your Mac’s password or did not save the recovery key, your data will be lost. Here’s how to disable the FileVault feature on your Mac. Step 1: Press Command + Spacebar to open Spotlight Search, type System Settings, and press Return.
Step 2: Scroll down and click on Privacy & Security from the left sidebar.
Step 3: Scroll down and click on Turn Off button next to FileVault.
Step 4: Click on Turn Off Encryption to confirm your choice.
That will disable the FileVault feature.
Enable Automatic Login On Your Mac
Now that FileVault has been disabled, here are the steps to turn on automatic log-in on your Mac. Do note that enabling this feature will disable Touch ID and remove any Apple Pay cards from your Mac. Also, if your Mac is used by an organization, it is possible that you will be prohibited from using this feature. In that case, you need to check with your employer. Step 1: Press Command + Spacebar to open Spotlight Search, type System Settings, and press Return.
Step 2: Scroll down and click on Users & Groups from the left sidebar.
Step 3: Click the drop-down menu next to ‘Automatically Log In As.’
Step 4: Select your profile name from the drop-down menu.
Step 5: Enter your Mac’s password and click on Unlock.
Step 6: Enter the same password again and click on OK.
Step 7: Click on Continue to confirm your choice.
That’ll enable Automatic login on your Mac.
Disable Automatic Login On Your Mac
If you want to disable the automatic login feature on your Mac for security or other reasons, you’ll need to rollback the changes. Also, we recommend that you turn on the FileVault again for your data’s security. Here are the steps to disable Automatic Login on your Mac. Step 1: Press Command + Spacebar to open Spotlight Search, type System Settings, and press Return.
Step 2: Scroll down and click on Users & Groups.
Step 3: Click the drop-down menu next to ‘Automatically Log In As.’
Step 4: Select Off.
You might have to enter your Mac’s password again to confirm. After that, you will have to enter your Mac’s password or use Touch ID every time you boot your Mac and want to log in.
Log In Automatically On Mac
The Automatic login feature does save a few seconds and gives you a quick access to your Mac’s desktop. But for securing your data, setting a password or using Touch ID adds a layer of security and gives you peace of mind about your data on the Mac. However, there might be some scenarios when you forget your Mac’s password. It happens with the best of us. Read our post on what to do when you forget your Mac’s password. The above article may contain affiliate links which help support Guiding Tech. However, it does not affect our editorial integrity. The content remains unbiased and authentic.


