Instagram enriched the Explore page to make sense of all the content by delivering/showing it to relevant or suited users. This strode users from the overwhelming nature of the platform and catered to its enormous user base. But how does the Explore tab work, and how can you reset it? Let’s find out.
How Does the Instagram Explore Page Work
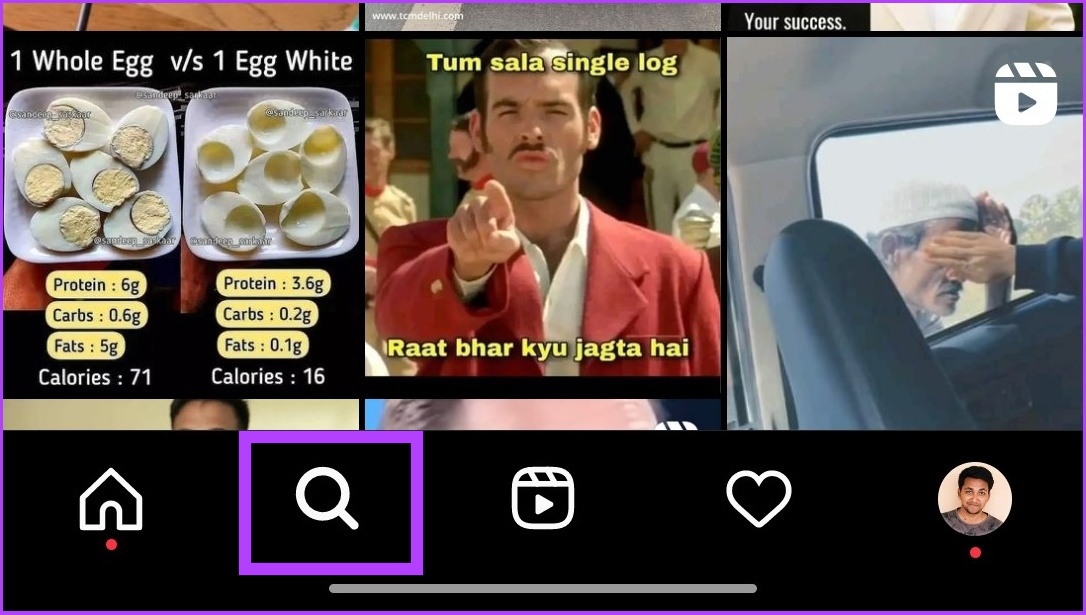
Launched in 2012 as ‘Popular,’ Instagram Explore was a tab displaying the most popular content on the platform. This feature allowed users to discover new content and see trending photos and videos. Due to the changing content consumption pattern and for better content discoverability and diversity, Instagram renamed it Explore. The Explore page uses an algorithm to show you the content it thinks you’ll be interested in and interact with the most. Now, you must be wondering how does it know your interest? As per Instagram, the algorithm takes into account several factors, including the number of likes, comments, and shares a post receives, as well as who you follow and what you’ve liked in the past. The algorithm creates a personalized experience for each user, and it is constantly updated with new content. Instagram is continually tweaking the Explore algorithm to show users the most relevant and exciting content. However, many users have reported that their Explore page showed the same content. If you’re sailing in the same boat, we suggest you reset it.
Things to Know Before Resetting Instagram Explore Page
Resetting the Instagram Explore Page is a way to refresh the content that Instagram suggests based on your past interactions. Here are some things you should know before resetting it: Now, let’s get into the steps and methods.
How to Change Your Instagram Explore Page on Android and iPhone
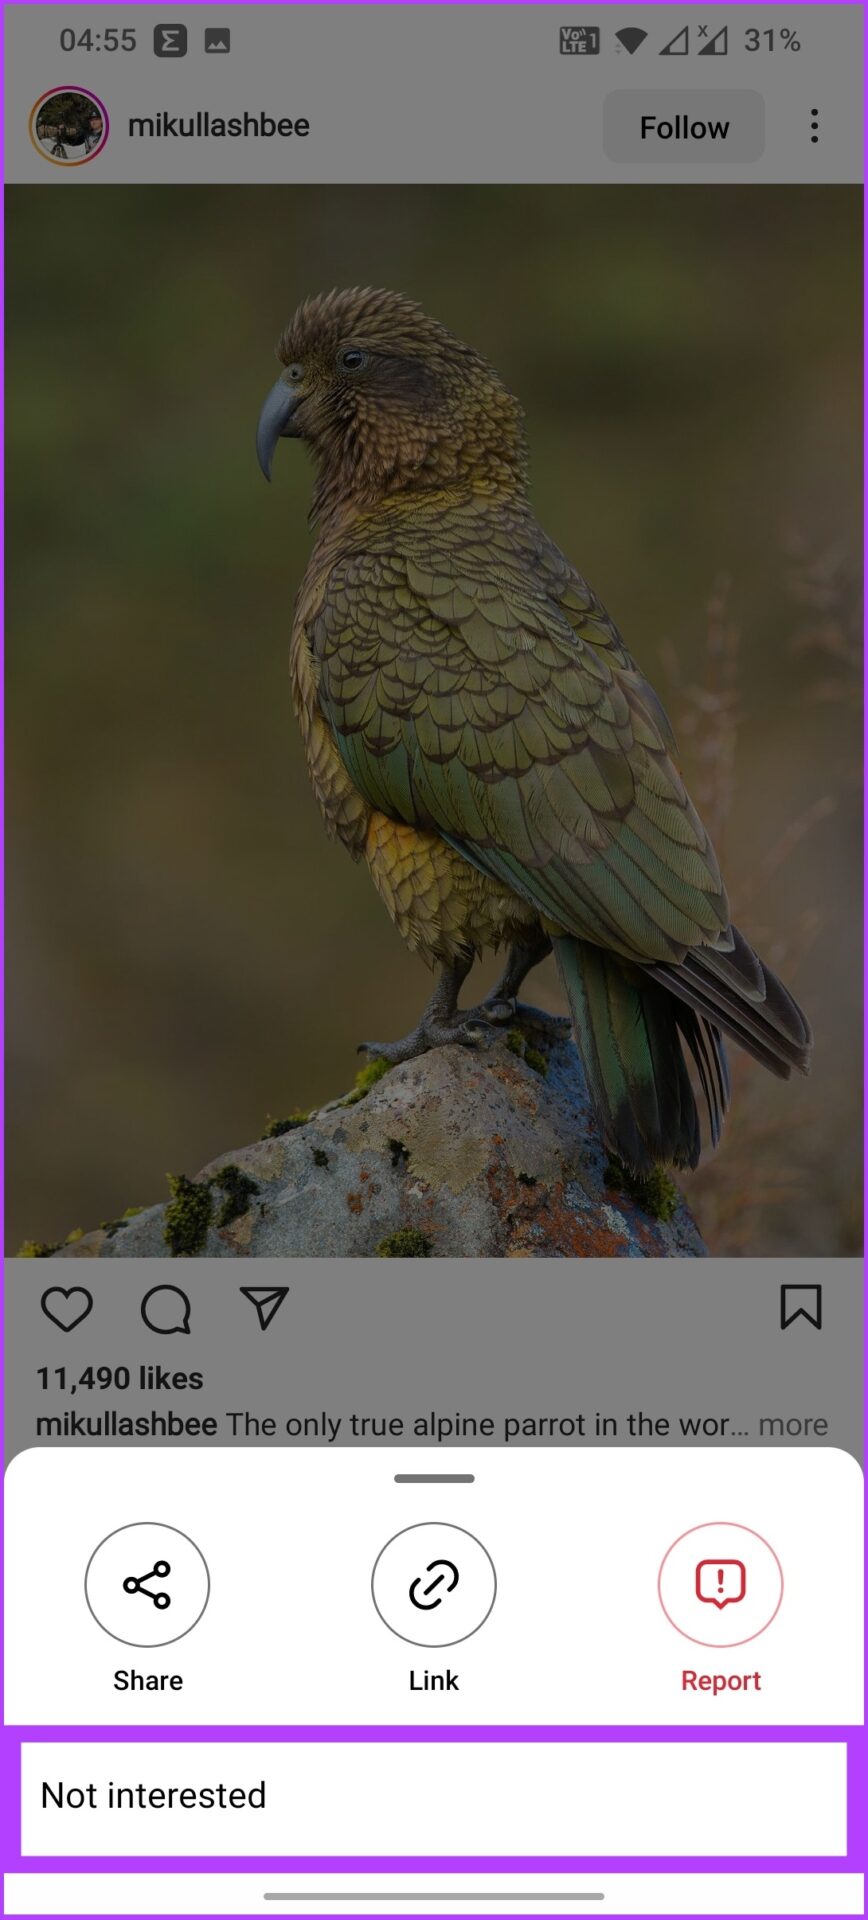
If you’re unhappy with a few posts, following this method to change the Explore page is more suitable. This approach might be long and repetitive, but it reaps good results without breaking your core Instagram interest. Moreover, Instagram’s algorithm is shrewd in quickly implementing the changes. In this method, you will have to individually remove posts you don’t like. Let me show you how. Note: We used OnePlus 7T running Android 11 and iPhone 12 running iOS 16 to build this guide, but you can follow the same steps on your iOS or Android device. However, some steps and screenshots might look different. Step 1: Open the Instagram app and go to the Explore page. Step 2: Now, open the post you don’t like and click on the three-dot menu at the upper right. Step 3: Select Not interested. This will remove the post from your suggestion, and it will never appear, provided you don’t show interest in this type of content. And, yes, you need to repeat this process every time you see some irrelevant content or something you don’t like. However, if you want to change your Instagram feed, your only option is to reset Explore Page.
How to Reset Explore Page in the Instagram App: 2 Ways
There are 2 ways of resetting your Instagram Explore page – clearing your search history or deleting the cache. You can follow any or both methods to see how your Explore feed changes.
1. Clear Search History
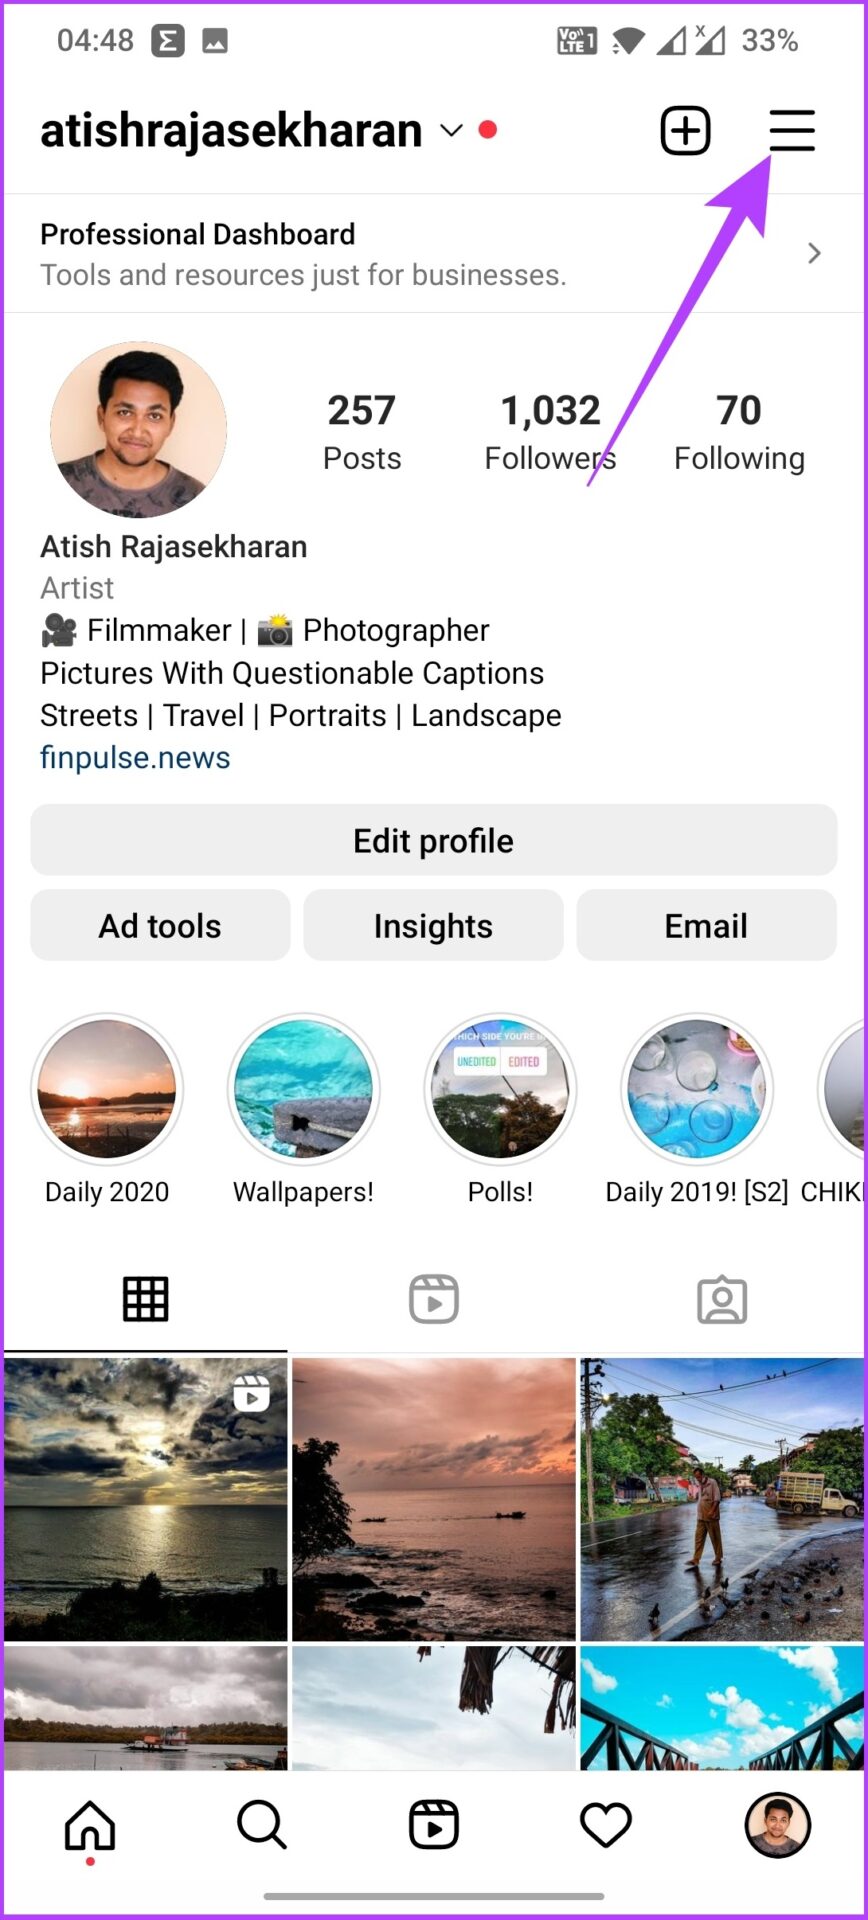
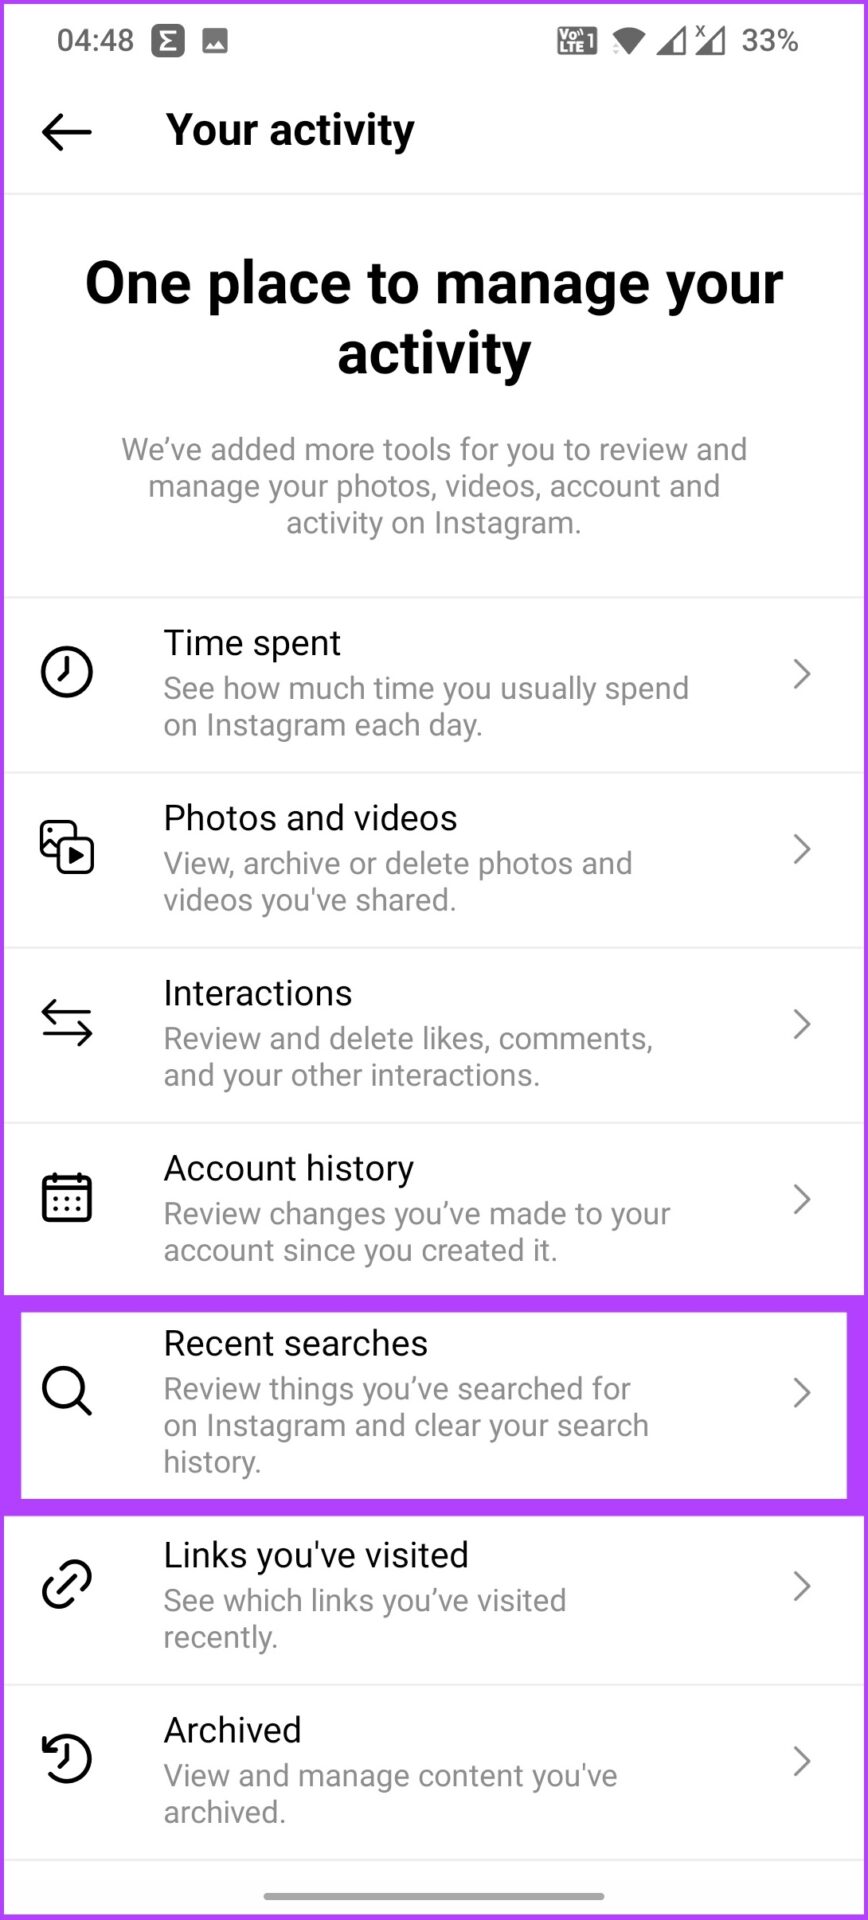
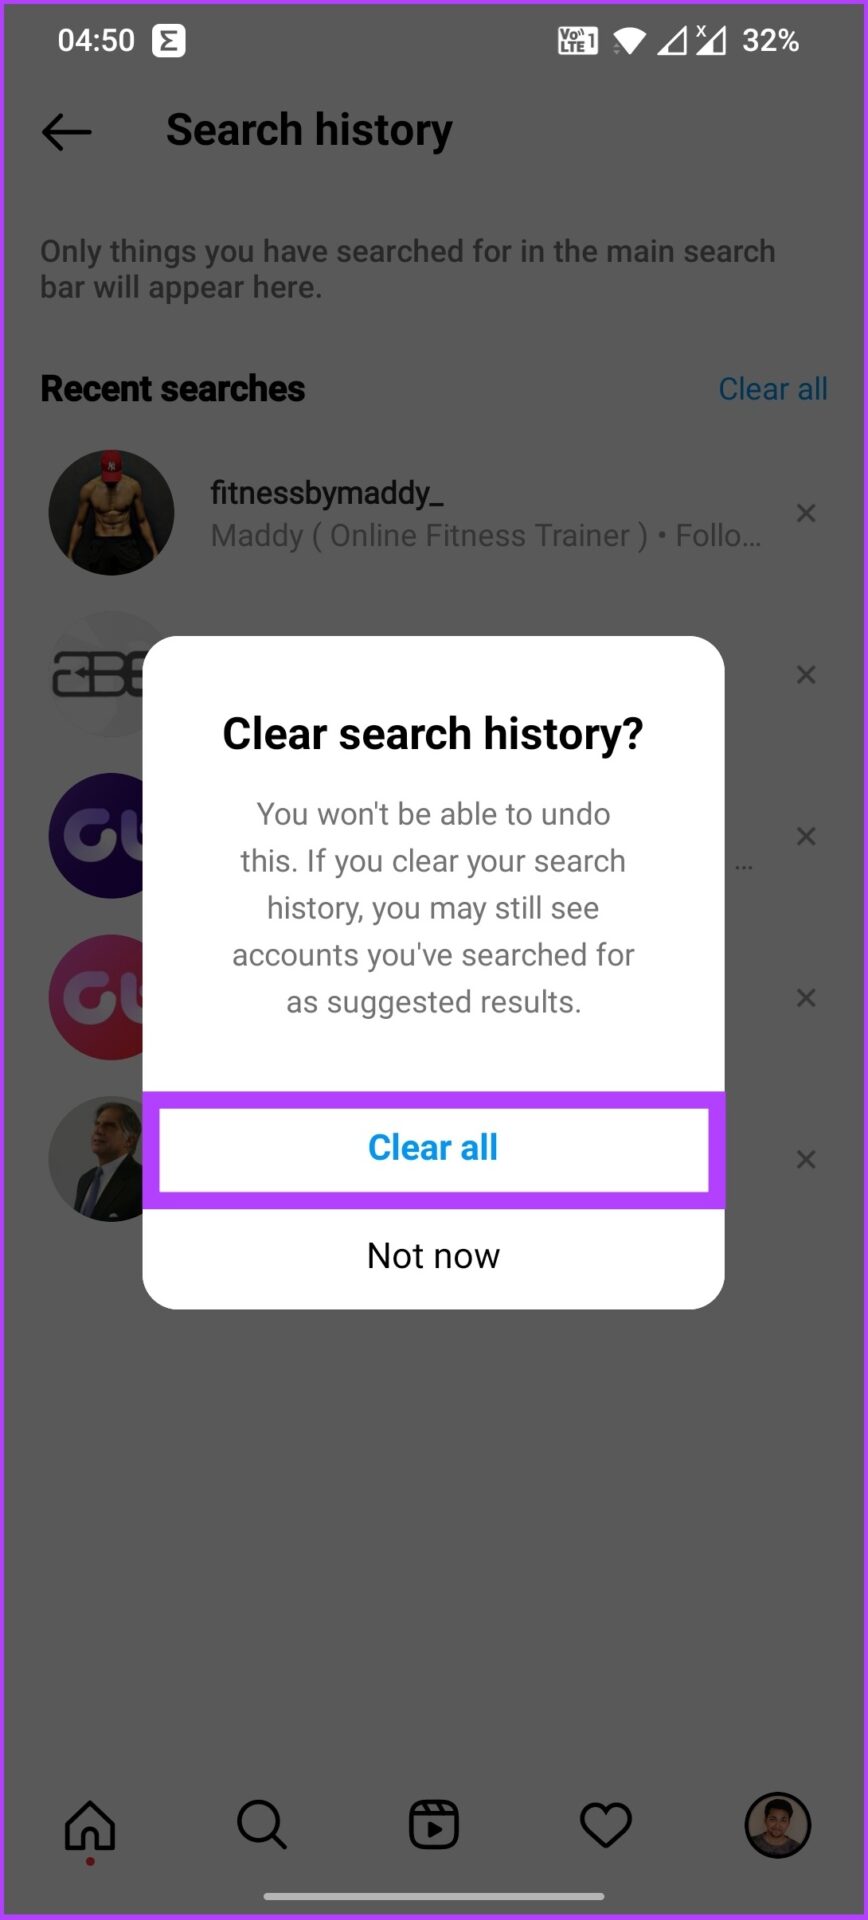
The Search History plays a good part in determining the kind of account, hashtags, posts, videos, or reels you like. This method is effective and pretty straightforward to reset the Explore page. Follow the steps on your Android or iOS device. Step 1: Open the Instagram app and tap on your profile at the bottom right. Step 2: Tap on the three-line icon at the upper right and select Your Activity. Step 3: Select Recent searches and tap Clear all. Step 4: Select Clear all in the prompt to confirm. By clearing the search history, you are flushing out your potential interest as per Instagram’s algorithm and resetting your Explore page with something you could be really interested in.
2. Clear Instagram Cache
Whenever you open Instagram, it stores all the data on your device, from the content you view to the profiles you visit. This makes it easier to display familiar content the next time without fetching it from its servers. So, clearing the cache will delete that data, thus, altering your Explore page. There are different steps for Android and iPhone. We have included both below. Note: Removing the cache removes data from Instagram stored on your phone. So, before you go ahead with the steps, check our detailed guide explaining what happens when you delete the Instagram cache.
Clear Instagram Cache on Android
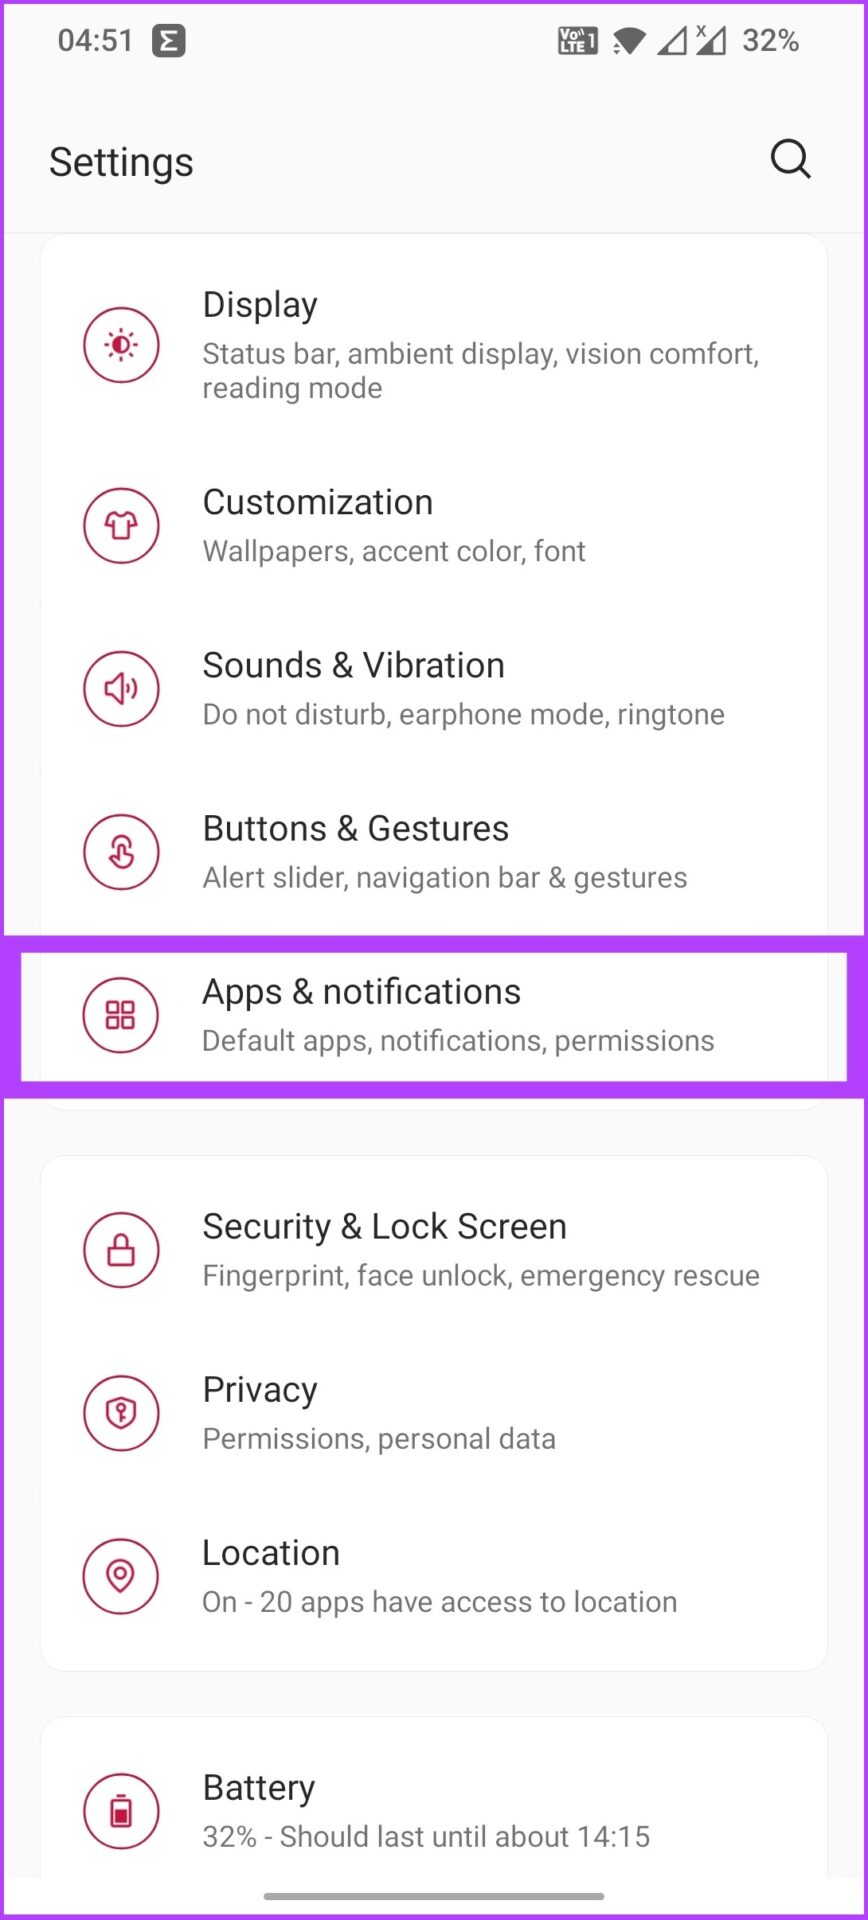
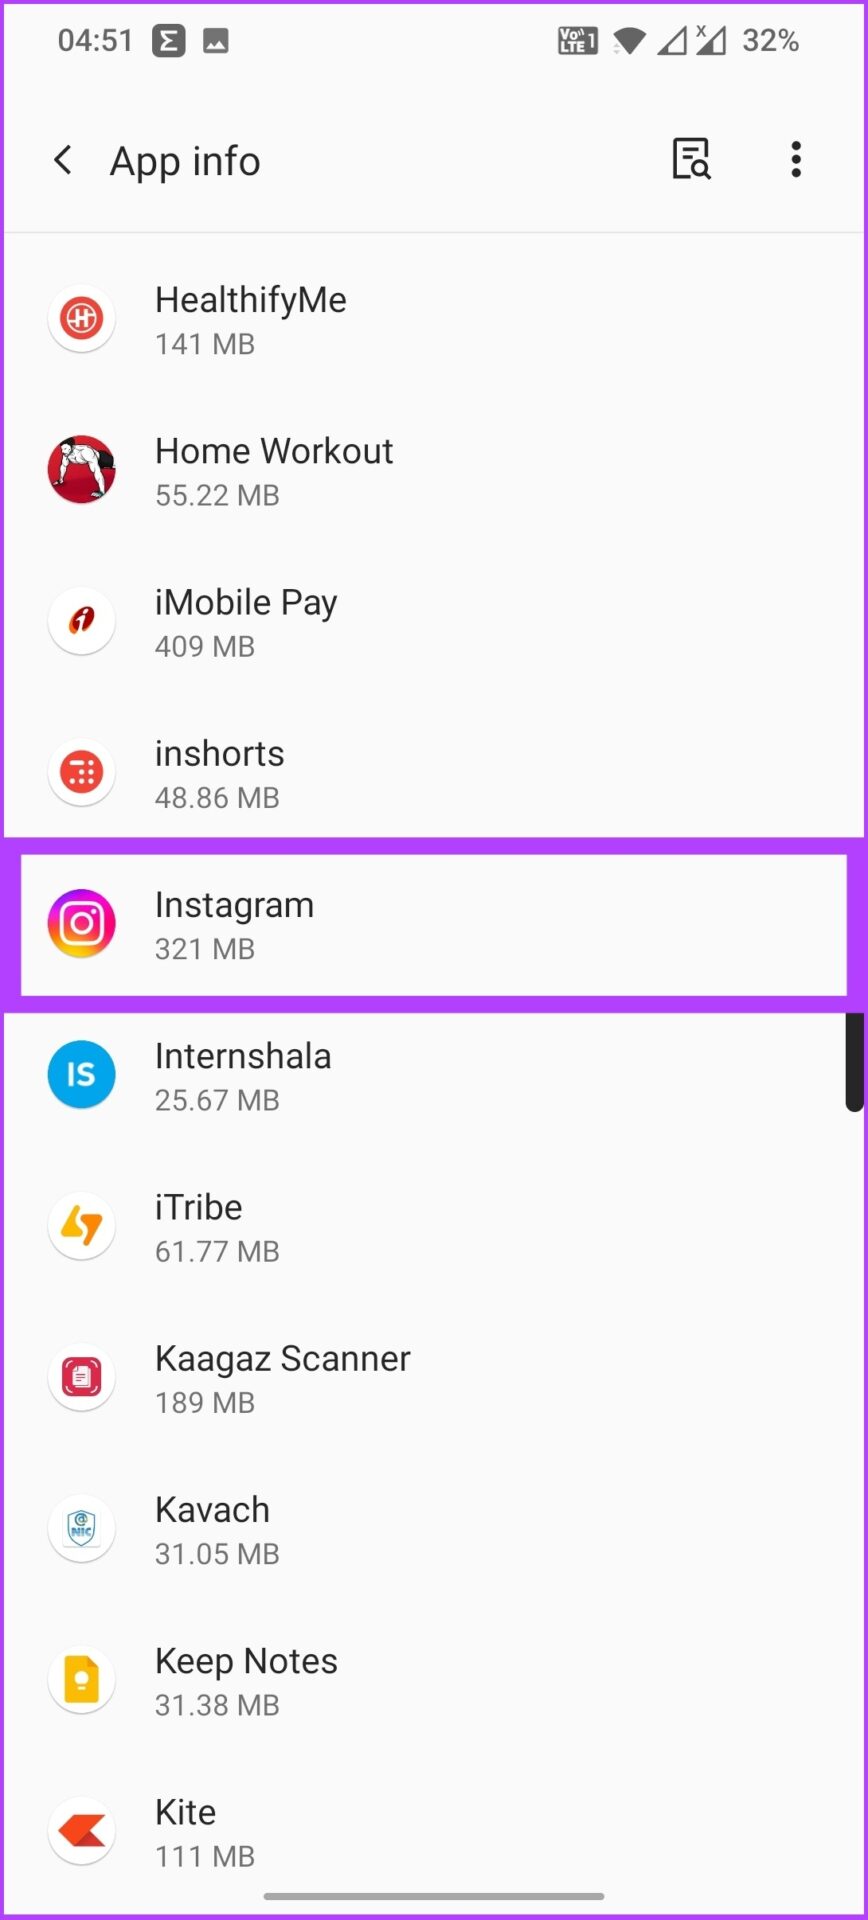
Step 1: Open phone Settings and go to ‘Apps & notifications.’ Note: Every Smartphone has an ‘Apps & Notifications’ option; however, they might be named differently. Step 2: Go to See all apps and select Instagram. Step 3: Tap on ‘Storage & Cache’ and select Clear Cache. That’s it. You have successfully cleared the Instagram cache on Android. If this method doesn’t work out, try clearing storage.
Delete and Re-install Instagram on iPhone
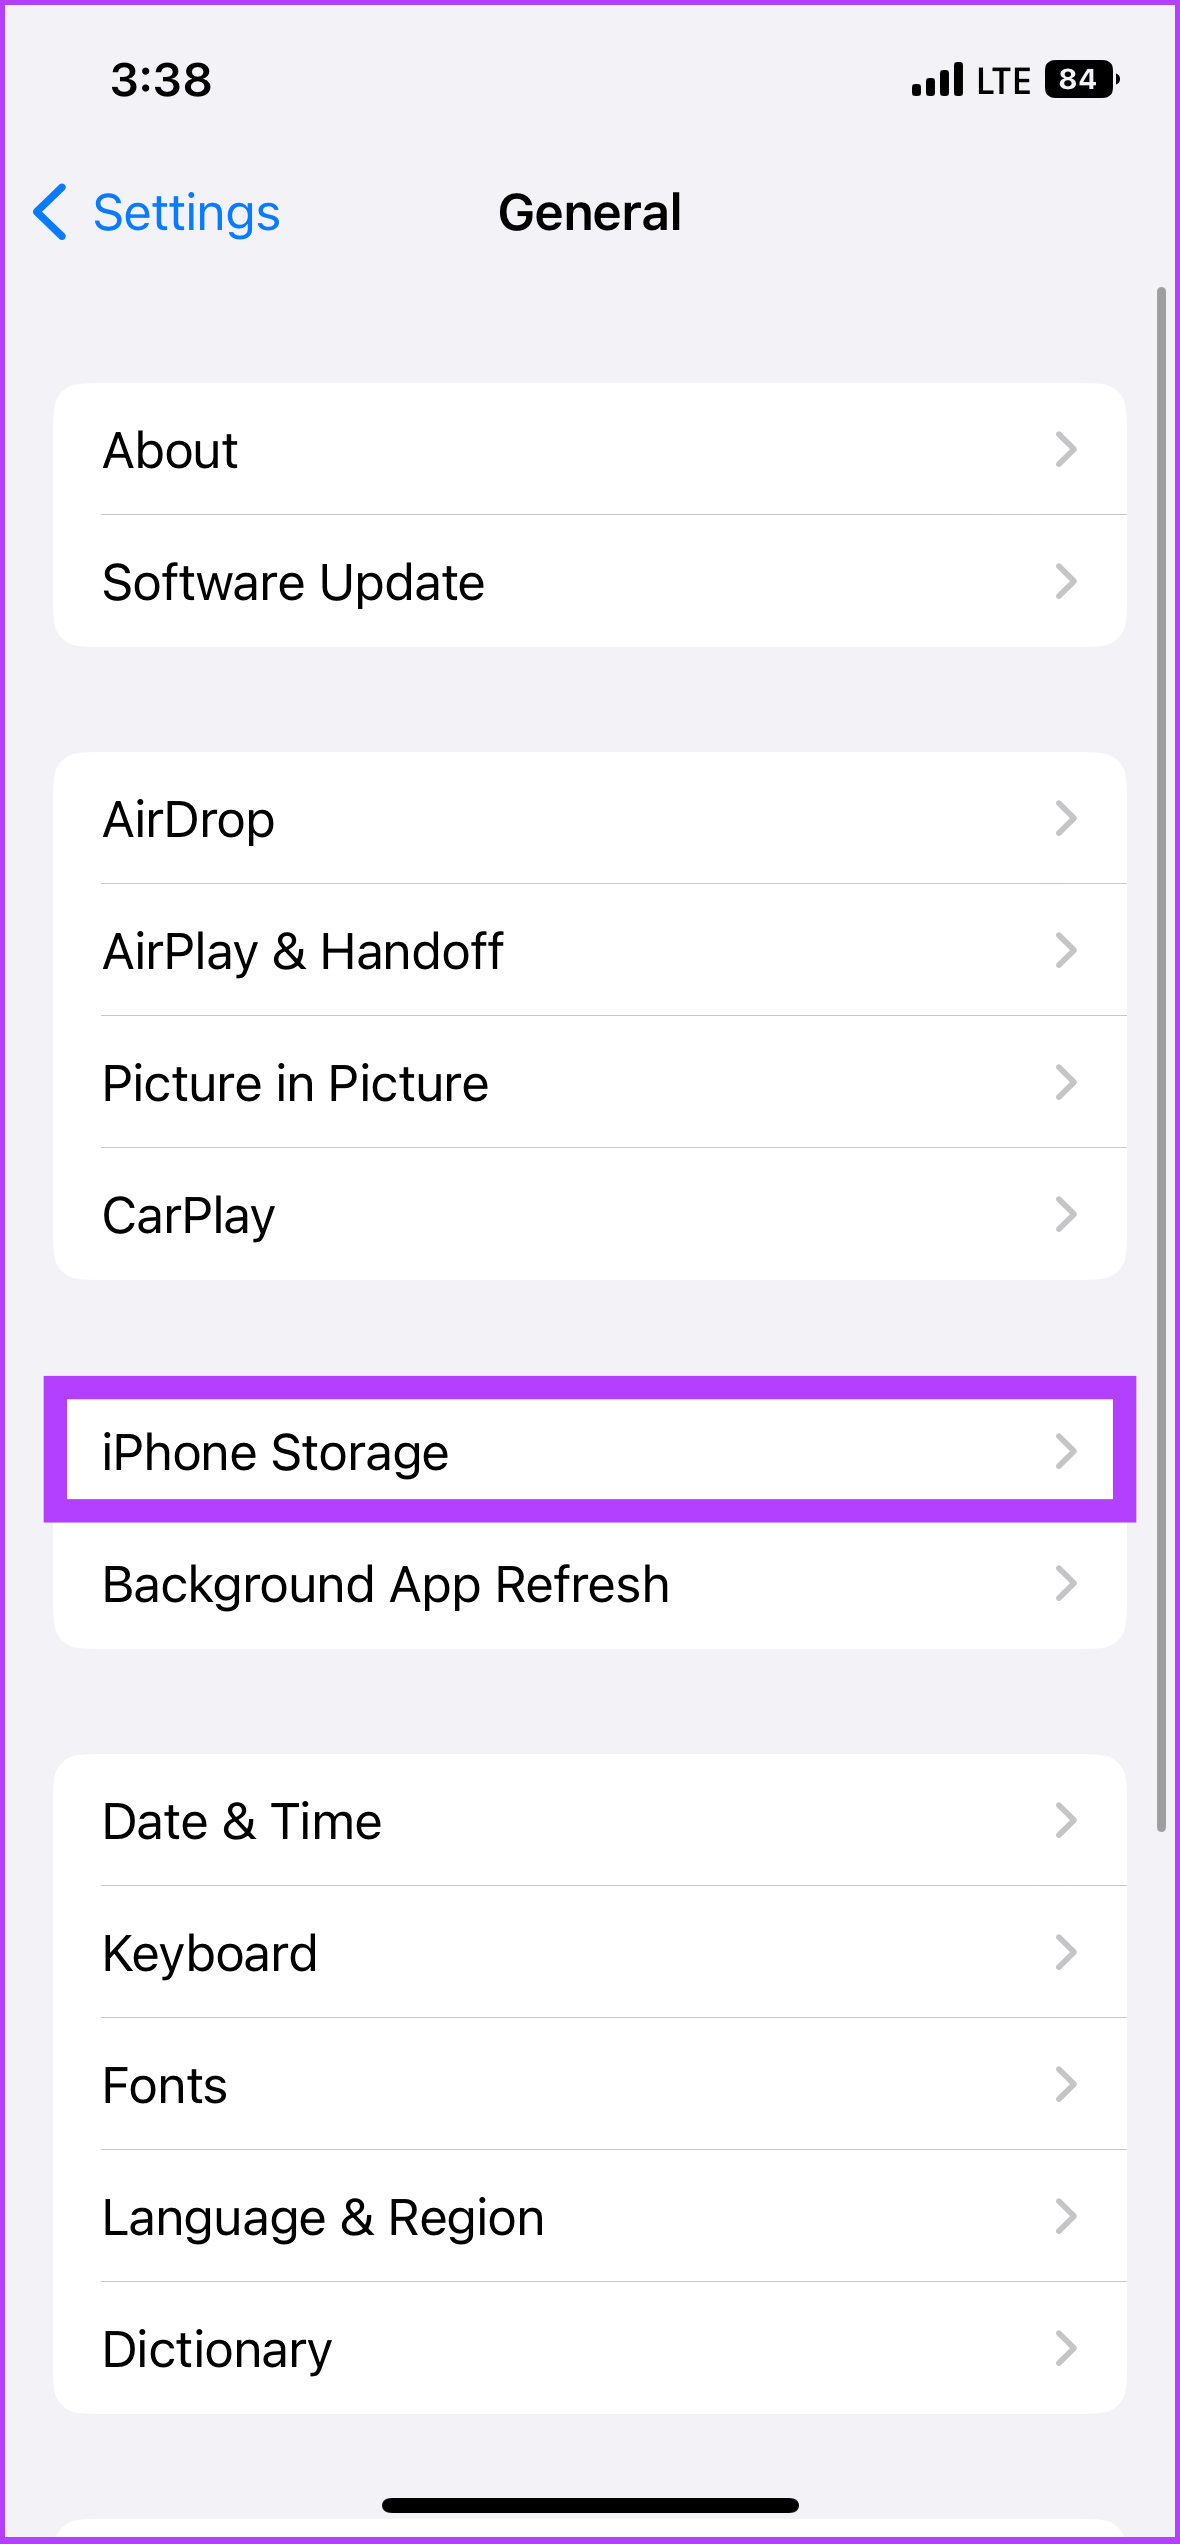
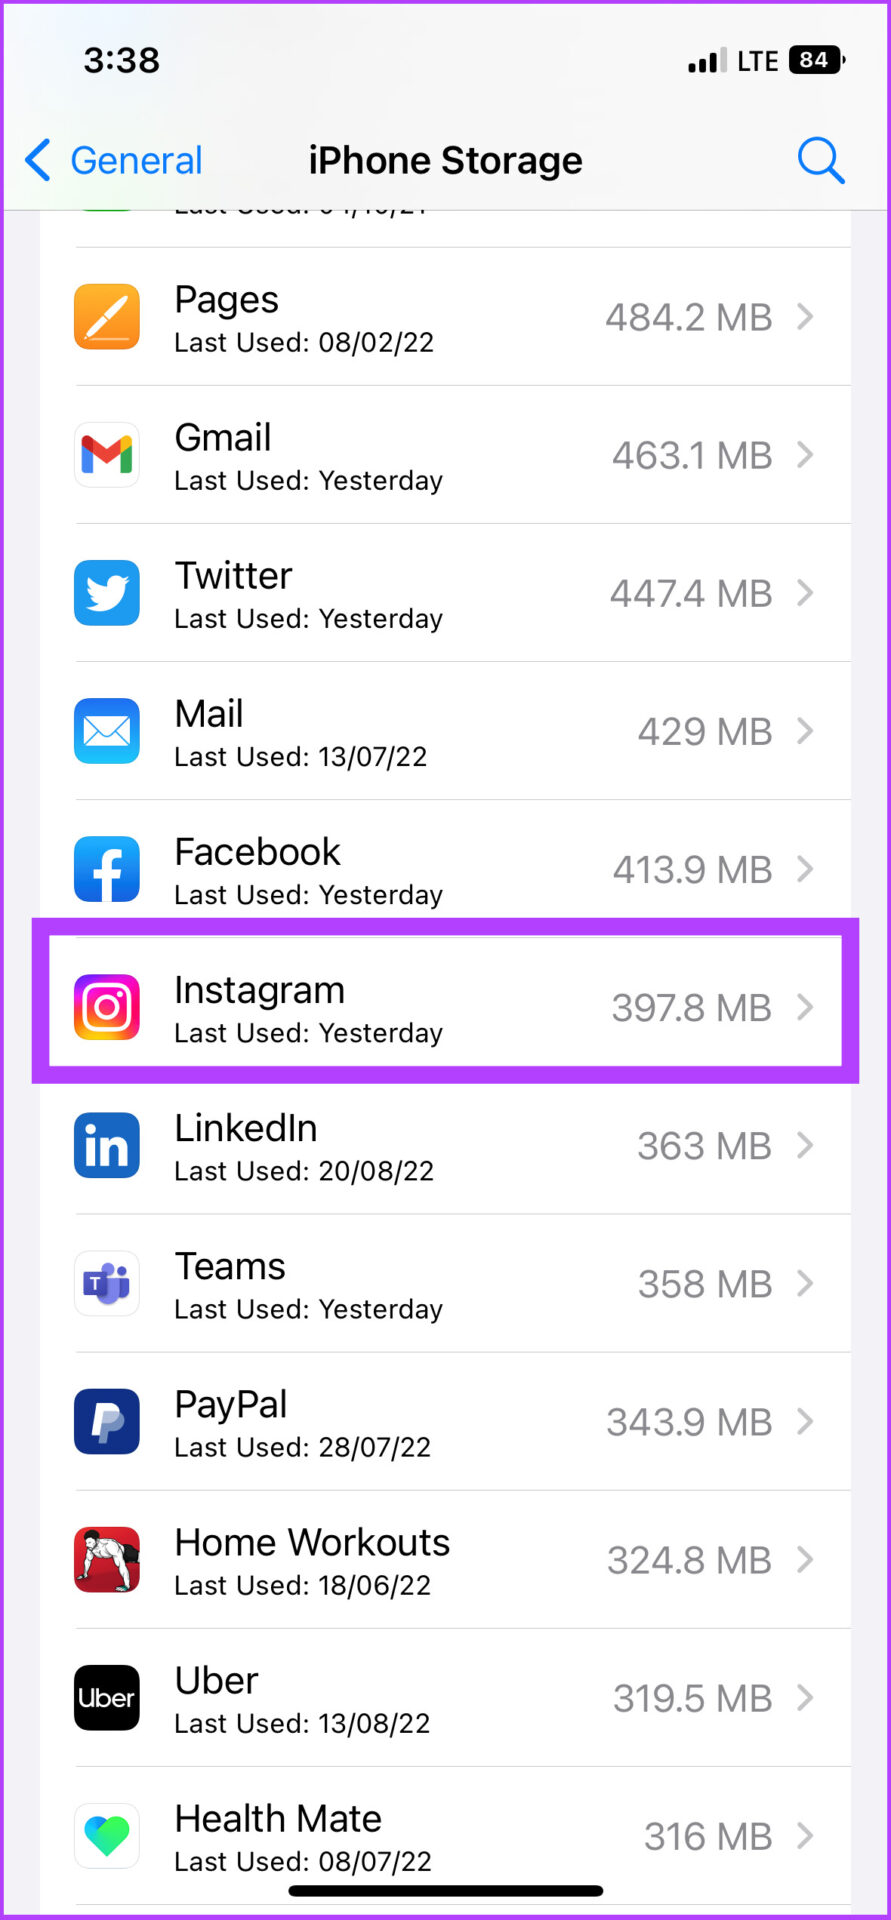
There’s no way to clear the cache on iPhone. So, to clear the Instagram app’s cache, you need to delete the app altogether and then reinstall it from the App Store. Yes, it is a tedious method, but it is what it is. Step 1: Go to iPhone Settings and tap on General. Step 2: Now, go to iPhone Storage, scroll down, and select Instagram. Step 3: Lastly, tap on Delete App. While there is an Offload app option, it simply deletes the app while storing its documents and data locally on the iPhone. Hence, deleting the app is your only option. Once done, reinstall Instagram to find a refreshed Explore page.
Change What Appears on Your Instagram Explore Page
Social media apps, like Instagram, do a lot of work in the background to determine which content you want to interact with. Besides, Instagram’s algorithm is becoming increasingly savvy, throwing content recommendations influenced by the accounts you follow, posts you like, similar content you interact with, and posts you save in your collection. So, it becomes almost impossible to reset the Instagram algorithm to change your explore page quickly. However, we hope this guide helped you in changing or resetting the Instagram Explore page content. Let us know which method yielded the best results in the comments section below. The above article may contain affiliate links which help support Guiding Tech. However, it does not affect our editorial integrity. The content remains unbiased and authentic.














![]()


