You can click a picture of that moment using your iPhone. But won’t it be better to share a picture with a pristine quality? Unfortunately, you can’t directly take screenshots on Apple TV 4K for there’s no button combination that allows that. That’s possible if you connect a Mac to your Apple TV 4K to take screenshots. In this post, we will show you how to take screenshots on Apple TV 4K using your Mac.
Before Getting Started
We recommend updating the software on your Apple TV 4K and Mac. This feature of wirelessly connecting your Apple TV 4K and Mac using AirPlay was introduced with tvOS 11 and macOS High Sierra respectively. Here’s how to check and update the software version of your devices.
Update tvOS
Step 1: Go to Settings on the home screen of your Apple TV 4K.
Step 2: Scroll down and select System.
Step 3: Select Software Updates.
Step 4: Select Update Software.
Step 5: If an update is available, click Download and Install.
Update macOS
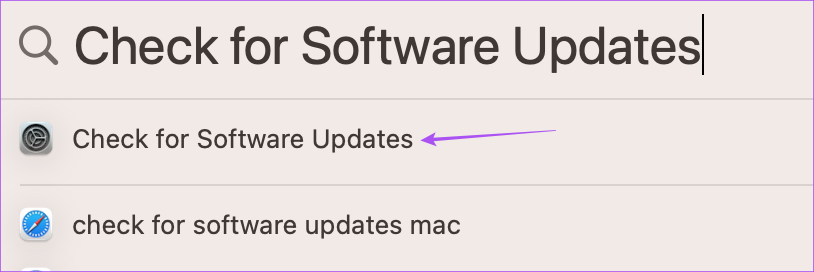
Step 1: Press Command + Spacebar to open Spotlight Search, type Check For Software Updates, and press Return.
Step 2: If an update is available, download and install it.
How To Take a Screenshot on Apple TV 4K
After the you install updates, you’ll need to check whether your Apple TV 4K and Mac are connected to the same Wi-Fi network. On your Mac, click the Wi-Fi icon at the top-right corner on the menu bar to check the network name. Here’s how to check the Wi-Fi network name on your Apple TV 4K. Step 1: Open Settings from the home screen of your Apple TV 4K.
Step 2: Scroll down and select Network.
Step 3: Under connection, check the name of your Wi-Fi network.
After you confirm that both devices are connected to the same network, here’s how you can take your screenshots: Step 1: Press Command + Spacebar to open Spotlight Search, type QuickTime Player, and press Return.
Step 2: Click on File at the top-left corner on the menu bar.
Step 3: Select New Movie Recording from the list of options.
Step 4: When a recording bar opens, click the down arrow icon next to the Record button.
Step 5: Select the name of your Apple TV 4K as the Screen input.
Step 6: Enter the AirPlay code that appears on your TV screen.
You will see your the Apple TV 4K screen mirrored wirelessly using AirPlay on your Mac.
Step 7: Open app to choose the frame which you want to capture. Step 8: Press Command + Shift + 3 keys on your Mac to take a screenshot. You can also take cropped screenshots on your Mac. Press the Record button to start a screen recording which will be saved on your Mac. To stop capturing the screen of your Apple TV 4K, you can switch back to the FaceTime HD Camera in the QuickTime Player window.
What All Can Be Captured Using Screenshots on Apple TV 4K
It seems that Netflix, Prime Video, Mubi, and Apple TV Plus allow taking screenshots of their interface. The moment you start content playback, the screen goes black on your Mac. However, this is not applicable to Disney+ and YouTube as they both let you take screenshots while any content plays. You can also take screenshots while games like Asphalt 8: Airborne on your Apple TV 4K.
Share Your Favorite Moments
The ability to take screenshots of Apple TV 4K on your Mac makes it convenient for you to share those amazing moments in films and TV shows with your buddies. But if you face any problems while taking screenshots on your Mac, you can refer to our post suggesting the best fixes for screenshots not working on your Mac. The above article may contain affiliate links which help support Guiding Tech. However, it does not affect our editorial integrity. The content remains unbiased and authentic.


