By default, Windows already runs a few essential apps and services every time your PC starts, but you can always add more apps to that list. In this post, we’ll talk you through a few different ways you can run apps at startup on Windows 11. So, without further ado, let’s check them out.
1. Modify In-App Settings
Probably the simplest way to run an app at startup is by tweaking its in-app settings. Several apps like Spotify, Telegram, Microsoft Teams, and such carry in-app settings that you can configure to launch them at startup.
If your favorite app doesn’t carry such a setting, you can always use the methods below to run them at startup.
2. Use Settings App
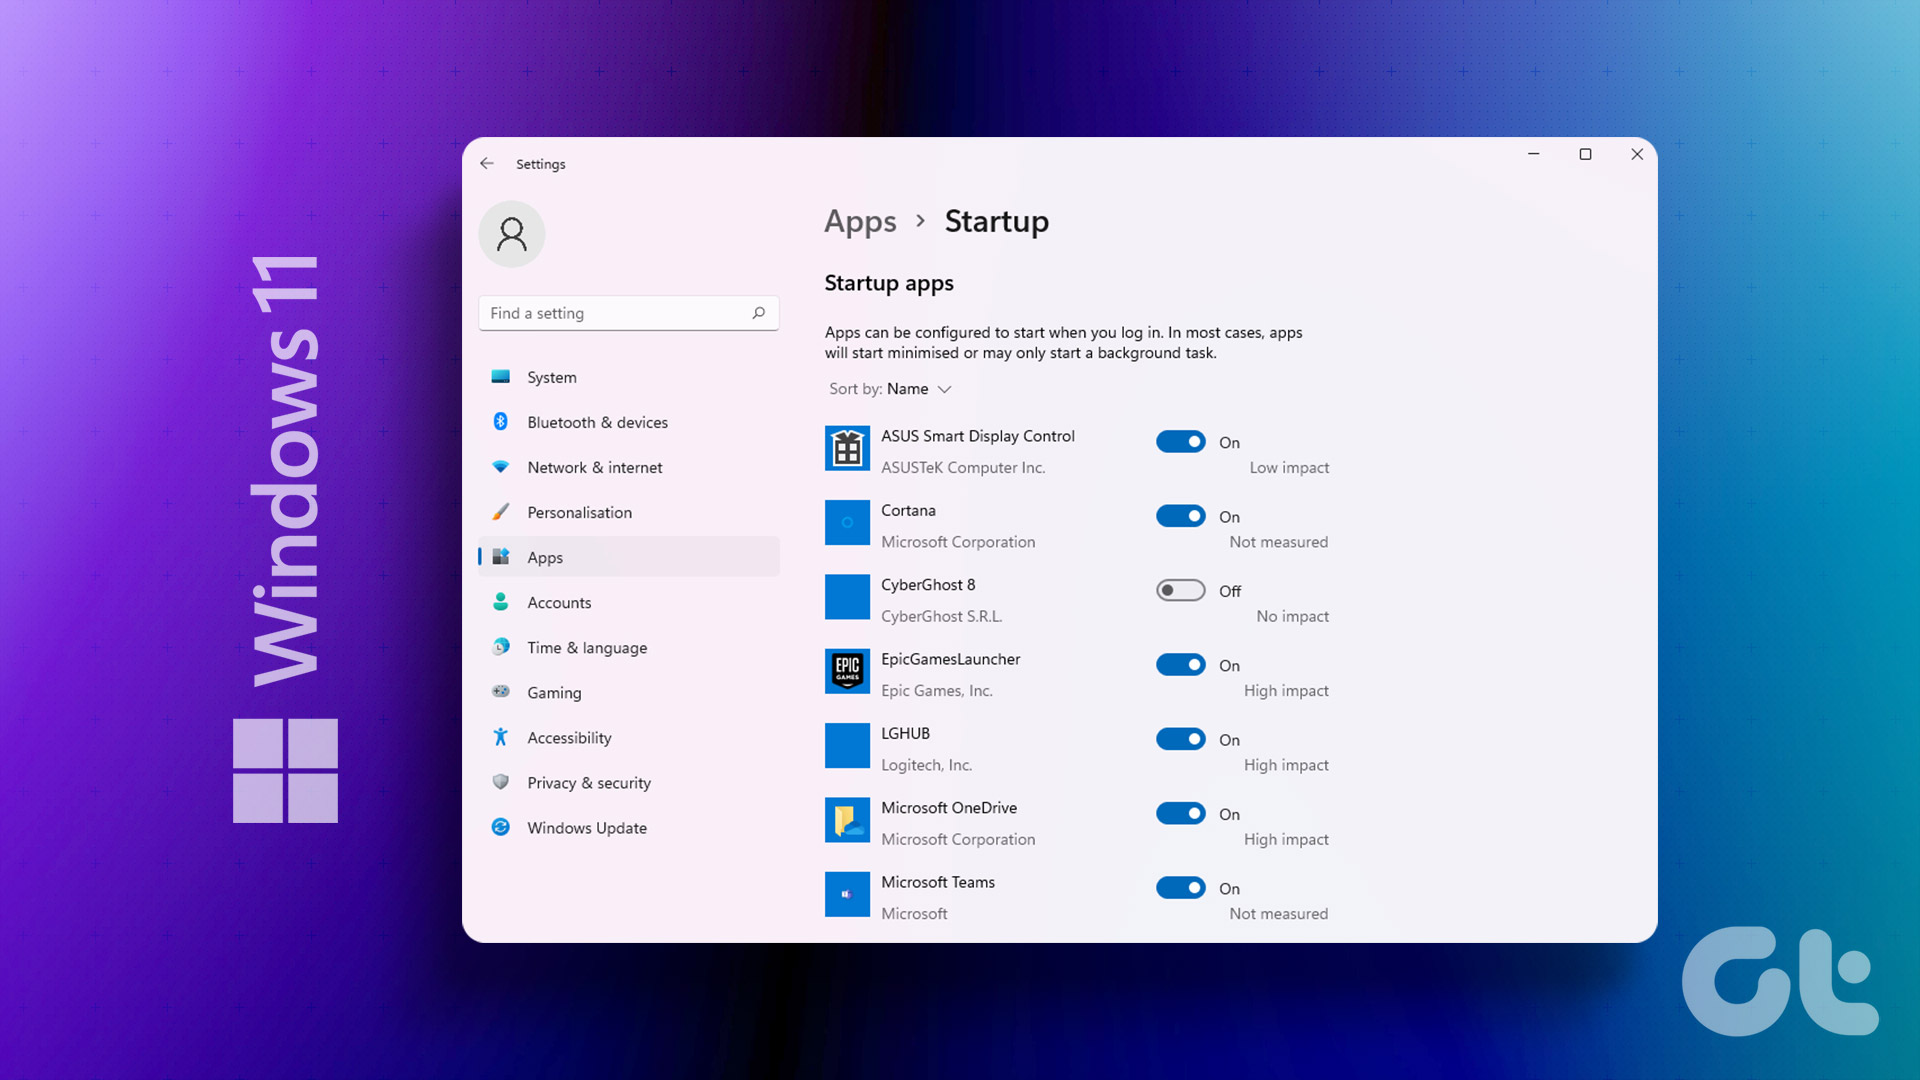
Another way to enable an app to run at startup is via the Settings app on Windows 11. This method can be useful if you want to change startup behavior for multiple apps at once. Here’s how to do it. Step 1: Open the Start menu and click on the gear icon to open Settings. Alternatively, you can use the Windows key + I shortcut to quickly launch the Settings app.
Step 2: Use the left pane to navigate to the Apps tab and click on Startup.
Step 3: Turn on the switch next to an app to configure it to run at startup.
Make sure not to run too many apps at startup as this could lead to issues like slower boot times or faster battery drain on Windows 11. To get a good sense of how a Startup app will impact Windows 11, try sorting the apps based on their Startup Impacts. Consider avoiding apps with higher impact for an optimal experience.
3. Use Startup Folder
The Startup folder is a utility that comes with most versions of Windows. You can use it to launch programs, run scripts, and more. Here’s how. Step 1: Press Windows key + R to launch the Run dialog box. In the Open field, type shell:startup and press Enter.
Step 2: Click on the New menu in the top left corner and select Shortcut from the list.
Step 3: Use the Browse button to locate and select the executable file of a program you wish to launch. Then hit Next.
Step 4: Write a suitable name for the shortcut and click on Finish.
Alternatively, you can also drag and drop the app shortcut in the Startup folder.
4. Use Task Scheduler
Task Scheduler is arguably the most underappreciated utility on Windows. Whether you want to empty the recycle bin on a regular basis, shut down your PC on schedule, or launch a program at startup, Task Scheduler can help automate almost any task on your computer. Here’s how to use Task Scheduler on Windows 11 to run apps at startup. Step 1: Open the Start menu, type in task scheduler in the search box, and select the first result that appears.
Step 2: Right-click on the Task Scheduler Library folder on your left and select the New Folder option. Give a suitable name to that folder, such as ‘Startup Apps.’
Step 3: Select the newly created folder and open the Actions menu at the top to select ‘Create Basic Task.’
Step 4: Enter a name and a short description of the task. Then hit Next.
Step 5: You’ll be asked to set a trigger for the task. As we want the apps to run at startup, select When the computer starts and click Next.
Step 6: In the Action tab, select the Start a program option and hit Next.
Step 7: Use the Browse button under Program/script to select the executable file of a program you wish to launch. Then click on Next.
Step 8: Finally, review the task details before hitting Finish.
That’s it. Windows will launch the app every time your PC starts. You can repeat the same steps above to create more tasks and launch other apps at startup.
Automate Windows
Enabling apps to run at startup can help you get to work straight away. While this may not sound like much, this can relieve you from the mundane task of opening the same apps every day. So, which of the above methods did you like the most? Share your thoughts in the comments below. The above article may contain affiliate links which help support Guiding Tech. However, it does not affect our editorial integrity. The content remains unbiased and authentic.
