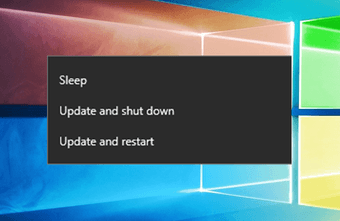
Troubleshooting the randomly popping ‘Shut Down Windows’ box can be challenging if you don’t know where to look. There could be multiple reasons like to complete installing Windows Updates or after effect of installing a third-party software. We’ve compiled solutions to help you fix the random shutdown box pop-ups on Windows 11.
1. Run System Maintenance Troubleshooter
Windows packs troubleshooters built into the settings to automtically diagnose and fix several issues. In this case, you’ll need to run the System Maintenance troubleshooter to identify and fix common system maintenance issues and see if that helps. Step 1: Click the search icon on the taskbar, type in control panel, and press Enter.
Step 2: In the Control Panel window, use the drop-down menu at the top-right corner to change the view type to Large icons, and then click on Troubleshooting.
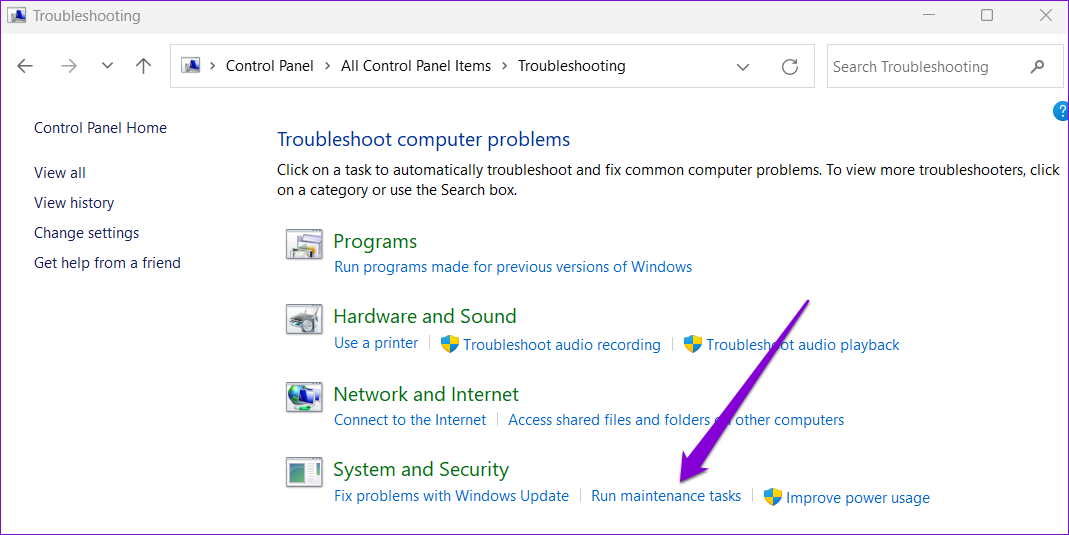
Step 3: Under System and Security, click the Run maintenance tasks option.
Follow the on-screen instructions to run the troubleshooter and then restart your PC. After that, see if the shutdown box pops up again.
2. Run SFC and DISM Scans
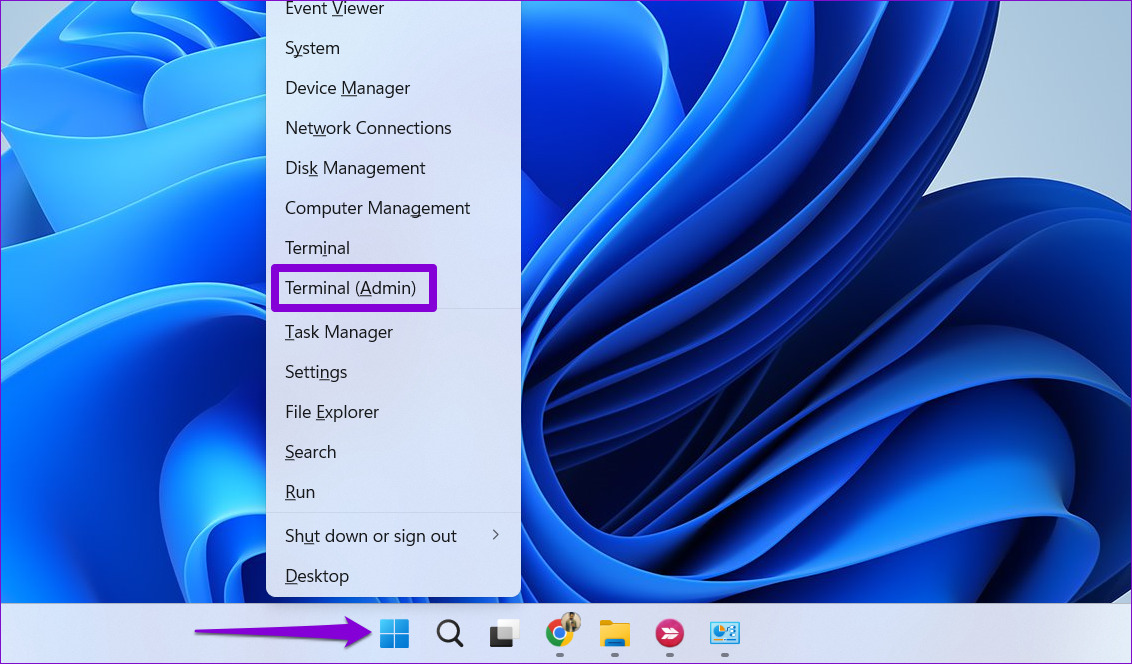
Your Windows PC relies on its system files to operate smoothly. If some files are corrupt or missing, you may notice unusual behavior, such as the shutdown box appearing randomly. An easy way to fix damaged system files is by running the SFC (System File Checker), and DISM (Deployment Image Servicing and Management) scan on your computer. Here are the steps for the same Step 1: Right-click on the Start icon and select Terminal (Admin) from the list.
Step 2: Select Yes when the User Account Control (UAC) prompt shows up.
Step 3: Paste the following command in the console and press Enter to run the SFC scan:
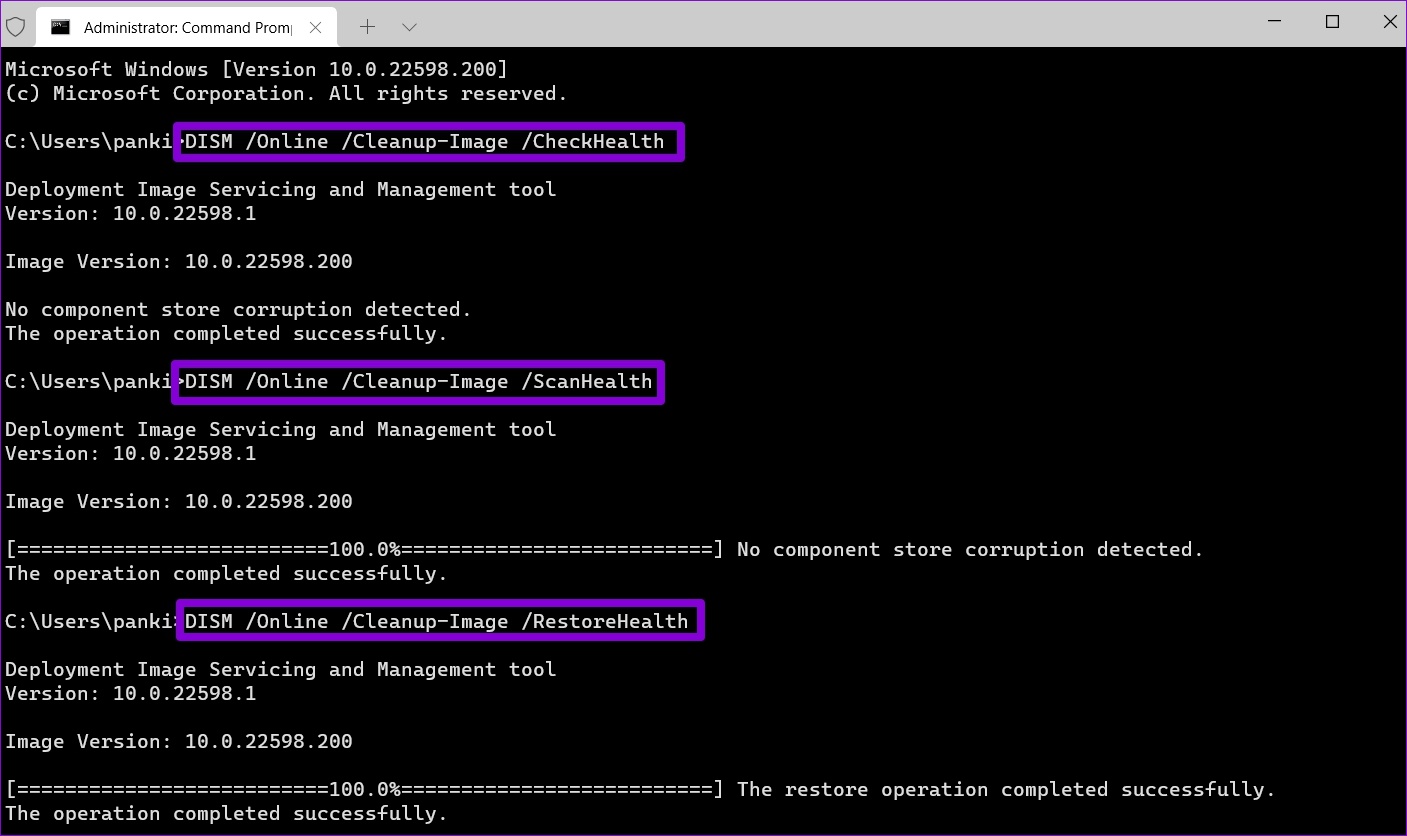
Step 4: Type the following commands one by one and press Enter after each command to run the DISM scan:
The scanning process might take a while. After the scan completes, restart your PC and check for the issue.
3. Complete Windows Updates Installation
Another reason the shutdown box may keep appearing on your PC is if you have any downloaded Windows updates awaiting for installation. If that’s the case, finishing the Windows update installation will resolve the issue. Press the Windows key + I shortcut to open the Settings app. In the Windows Update tab, click the Install all button to initiate the installation process.
Allow Windows to restart and complete the update installation. Following that, the shutdown box should not appear.
4. Scan for Malware
The presence of malware on your PC can also affect Windows operations and cause problems such as this one. To enssure that, you can perform a full system scan on your PC. If you already have a third-party antivirus program installed, use that to scan your system thoroughly. Otherwise, you can rely on the built-in Windows Defender to perform a quick scan.
5. Try Clean Boot
Starting your PC in a clean boot state allows Windows to run with only a basic set of programs and drivers. This can help you determine whether a third-party app or process running in the background is causing the shutdown box to appear repeatedly. To boot Windows in a clean boot state: Step 1: Press the Windows key + R shortcut to open the Run dialog, type in msconfig.msc, and press Enter.
Step 2: Under the Services tab, tick the checkbox that reads ‘Hide all Microsoft services’ box and then click Disable all button.
Step 3: Switch to the Startup tab and click on Open Task Manager.
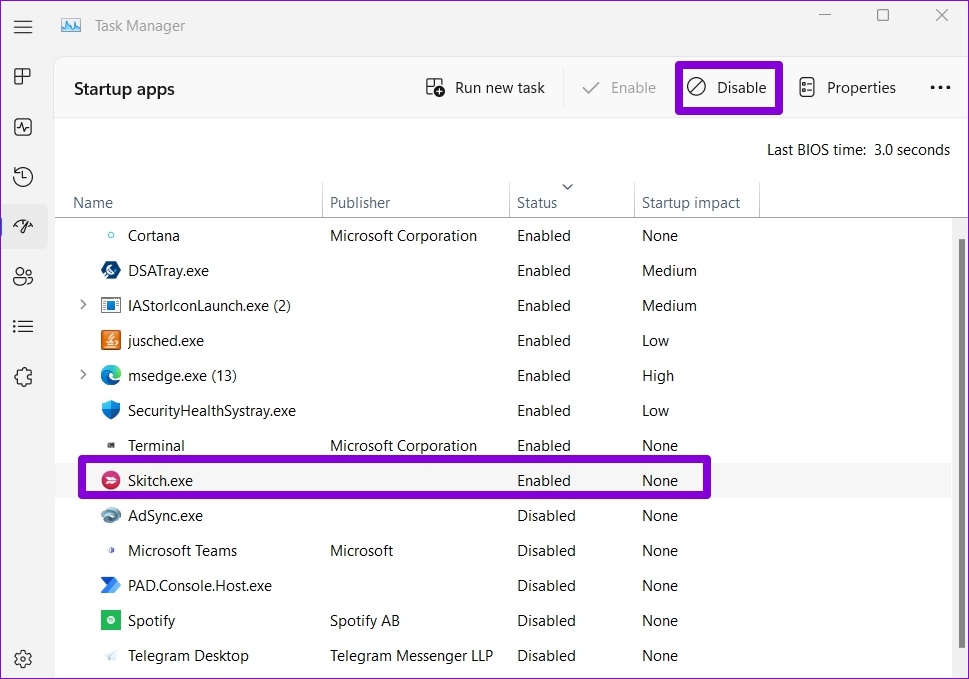
Step 4: In the Task Manager window, select a third-party app or program and click the Disable button at the top. Repeat this step to disable all startup apps and programs one by one.
Restart your PC to boot it without any third-party apps and services. If the issue does not appear in the clean boot state, you’ll need to look through any recently installed apps and programs and remove them to resolve the issue for good.
6. Perform System Restore
There’s a chance that a recent change in the system settings or a faulty update is causing Windows 11 to display the shutdown box randomly. If you can’t figure out what’s causing the problem, performing a system restore should help. Doing so will allow you to undo any recent changes that may have caused the problem. Step 1: Click the Windows Search icon on the taskbar, type in create a restore point, and press Enter.
Step 2: Under the System Protection tab, click the System Restore button.
Step 3: Click Next to continue.
Step 4: Select a restore point before the issue first appeared and then hit Next.
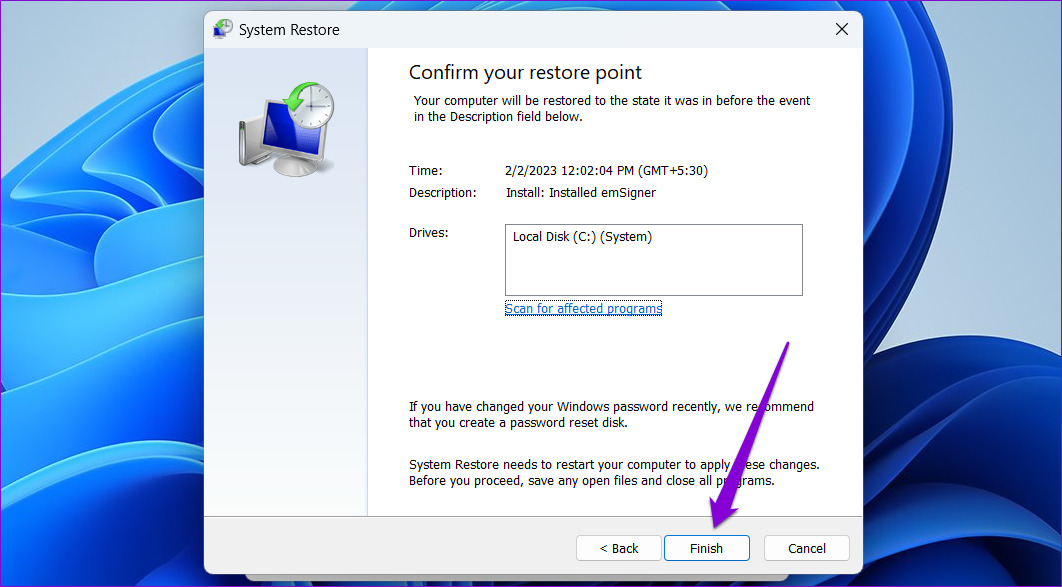
Step 5: Click Finish and allow Windows to restore to the specified restore point.
Say Goodbye to Annoying Pop-Ups
Frequent occurrences of the shutdown box in Windows 11 can interrupt your workflow and keep you busy all day. Hopefully, fixing the issue wasn’t too difficult with the steps outlined above. Let us know which of the above fixes worked for you in the comments below. The above article may contain affiliate links which help support Guiding Tech. However, it does not affect our editorial integrity. The content remains unbiased and authentic.
