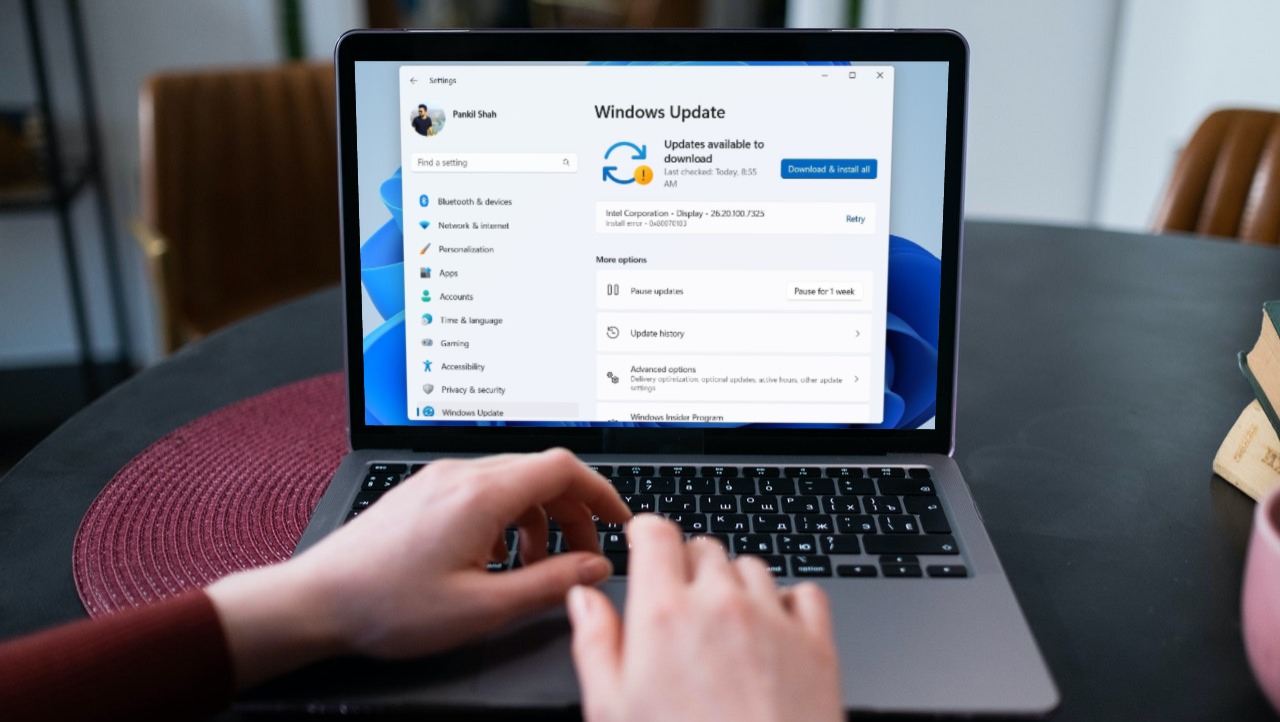
If you’ve already ruled out any internet issues and restarted your PC a few times, it’s time to dig deeper. Below are some troubleshooting tips that should help you resolve Windows 11 updates not downloading or installing issues with ease. So, let’s check them out.
1. Run Windows Update Troubleshooter
Windows 11 includes a dedicated troubleshooter that can automatically scan, detect and fix any issues with Windows Updates. It’s a good idea to run this tool first before trying anything else. Step 1: Open the Start menu and click on the gear-shaped icon to launch the Settings app.
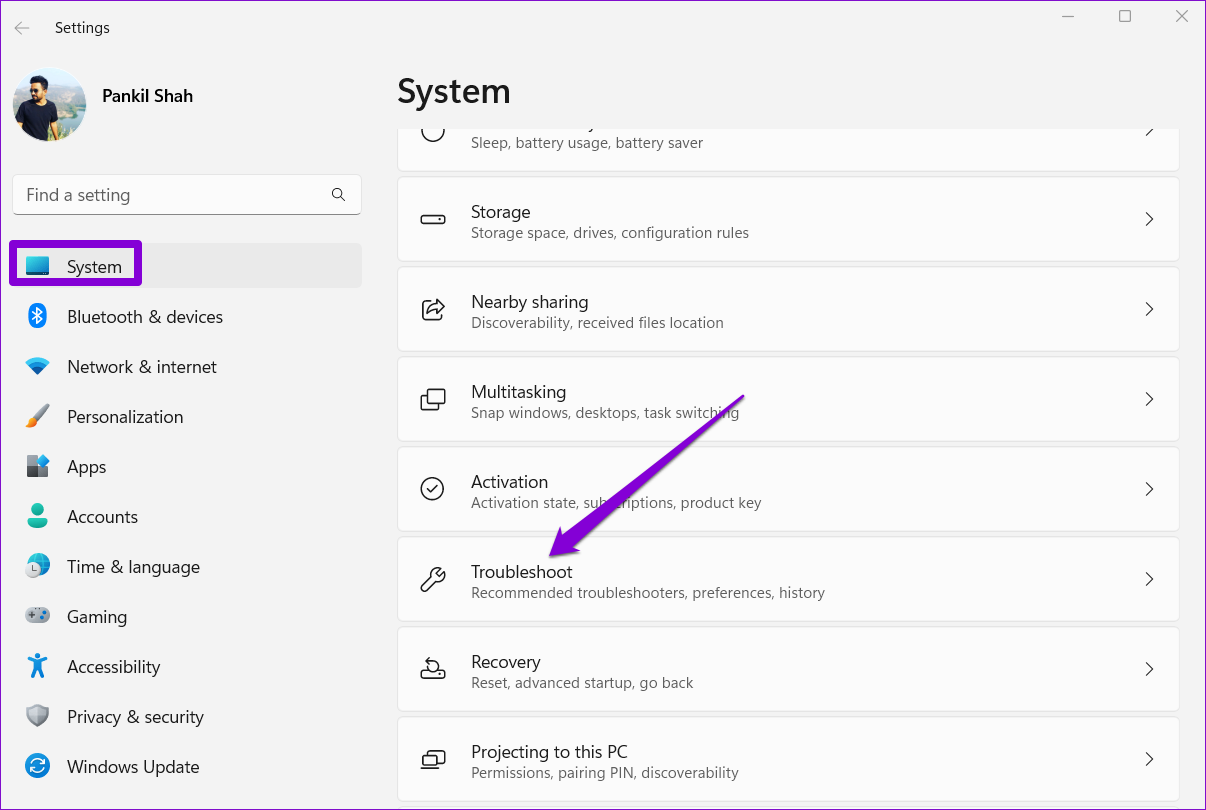
Step 2: In the System tab, scroll down to click on Troubleshoot.
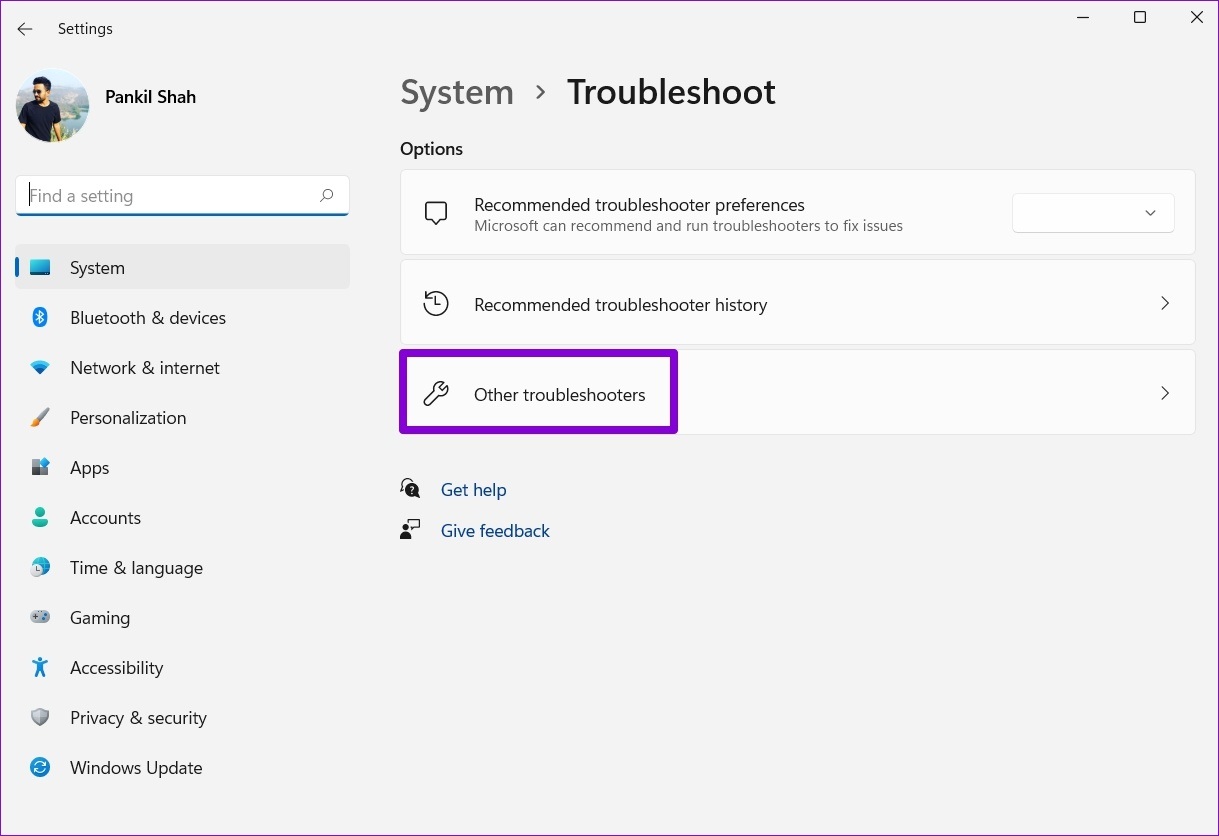
Step 3: Go to Other troubleshooters.
Step 4: Click on the Run button next to Windows Update.
The tool will start scanning your system for any problems and fix them.
After running the troubleshooter, check to see if you can install Windows updates.
2. Check Services Related to Windows Update
Another reason Windows 11 may fail to download or install updates is if some of the services related to Windows updates are not running. Specifically, Windows Update and Background Intelligent Transfer Service (or BITS) are the two services running in the background for Windows updates to be applied. Step 1: Press Windows key + R to launch the Run dialog box, type in services.msc, and press Enter.
Step 2: In the Services window, locate the Windows Update service. Double-click on it to open its Properties.
Step 3: Change the Startup type to Automatic. Then, hit Apply.
Step 4: Next, locate and double-click on the Background Intelligent Transfer Service.
Step 5: Change the Startup type to Automatic and click on Apply to save changes.
Restart your PC after this and try downloading Windows updates to see if they work.
3. Check Storage Space
Windows requires at least 20GB of free storage to install updates smoothly. So, if your PC is running low on storage space, Windows may fail to download or install new system updates. You can free up storage space quickly by removing unused large files or transferring some of your data to the cloud. After freeing up storage space, try downloading Windows updates again.
4. Disable Metered Connection
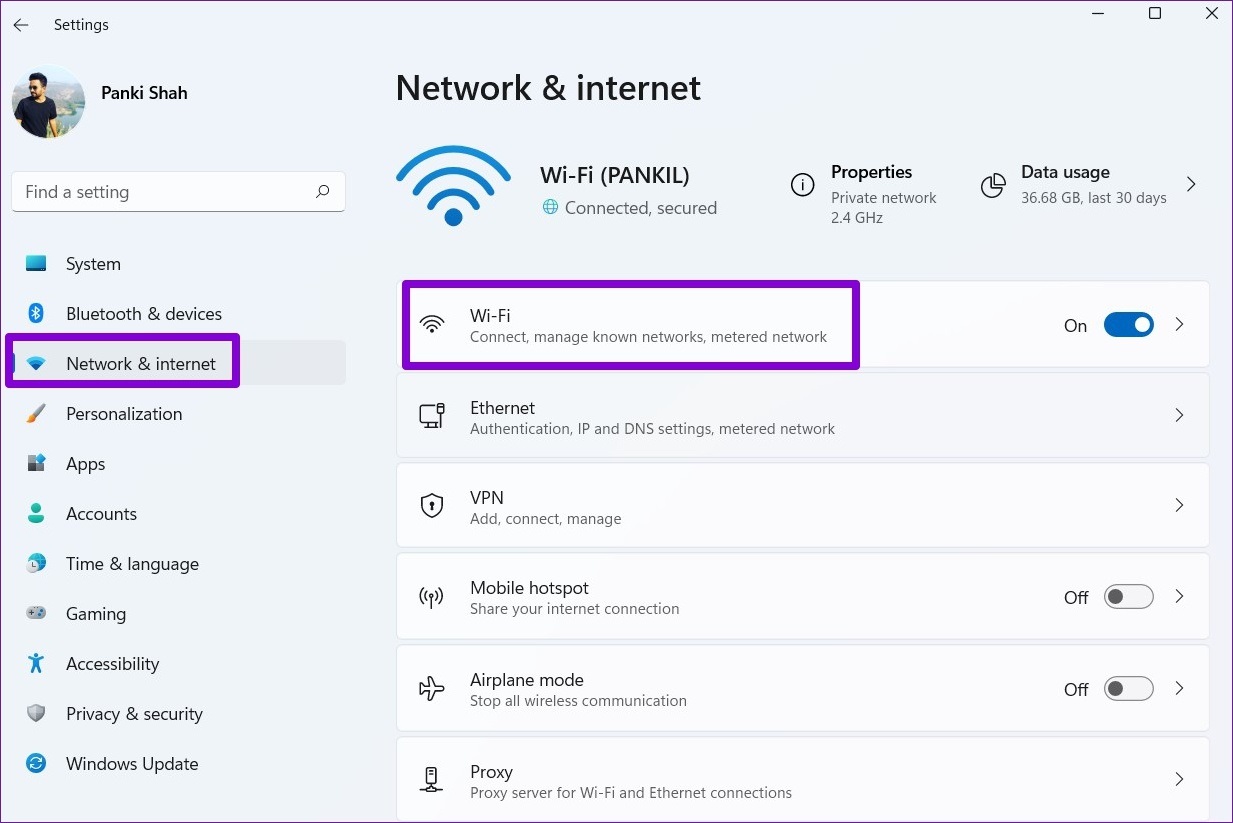
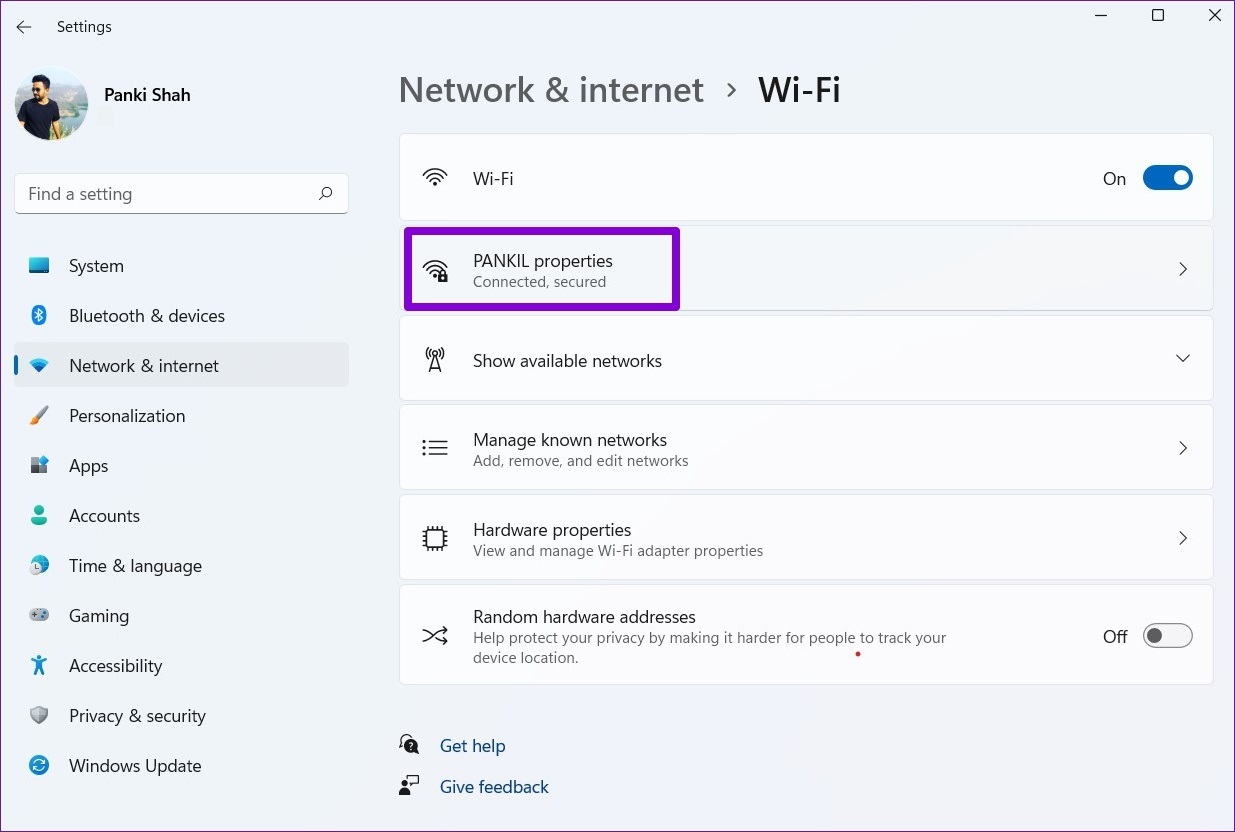
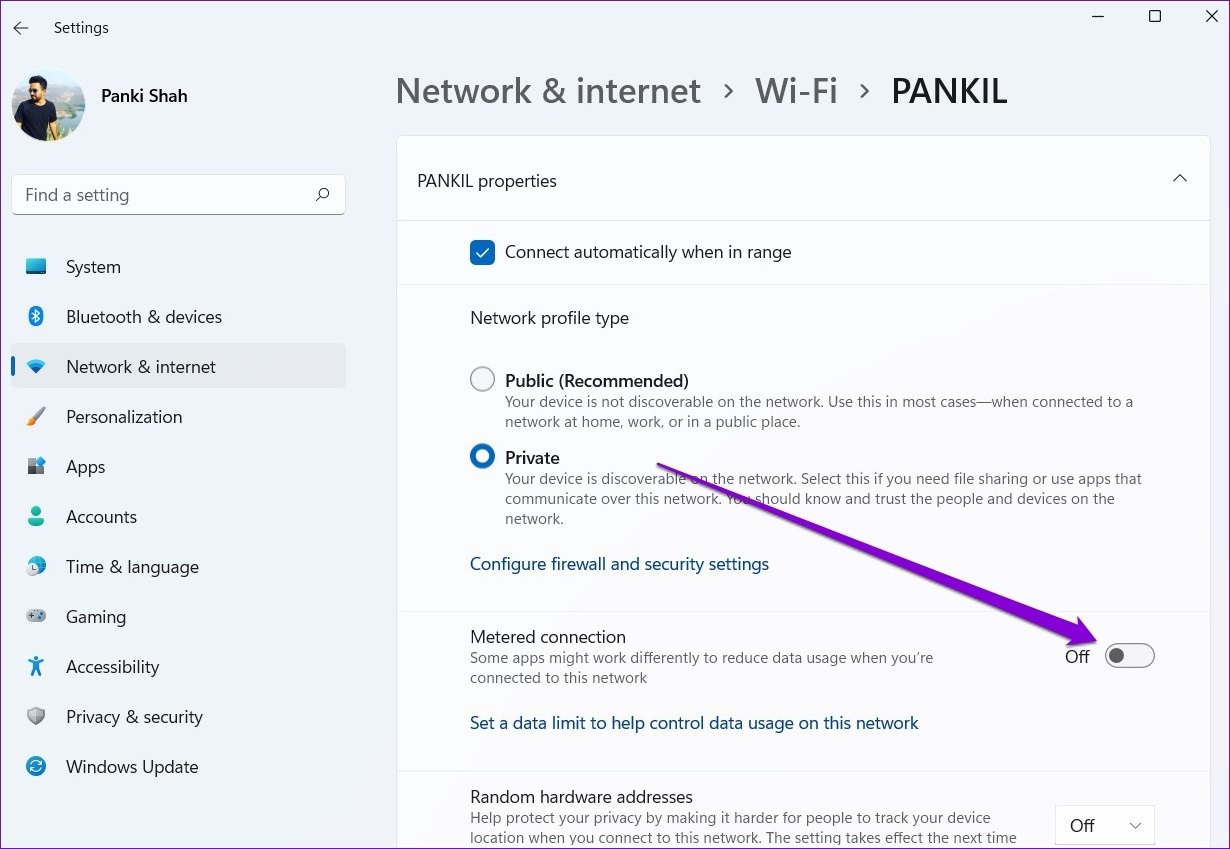
If you’re on a limited data plan, you may have set your Wi-Fi as the metered connection to reduce data consumption. If that’s the case, Windows will fail to download large update files unless you disable the metered connection option. Step 1: Press the Windows key + I to launch the Settings app. In the Network & internet tab, click on Wi-Fi.
Step 2: Click on your Wi-Fi network to open its properties.
Step 3: Disable the switch next to Metered connection.
5. Delete Existing Update Files From SoftwareDistribution Folder
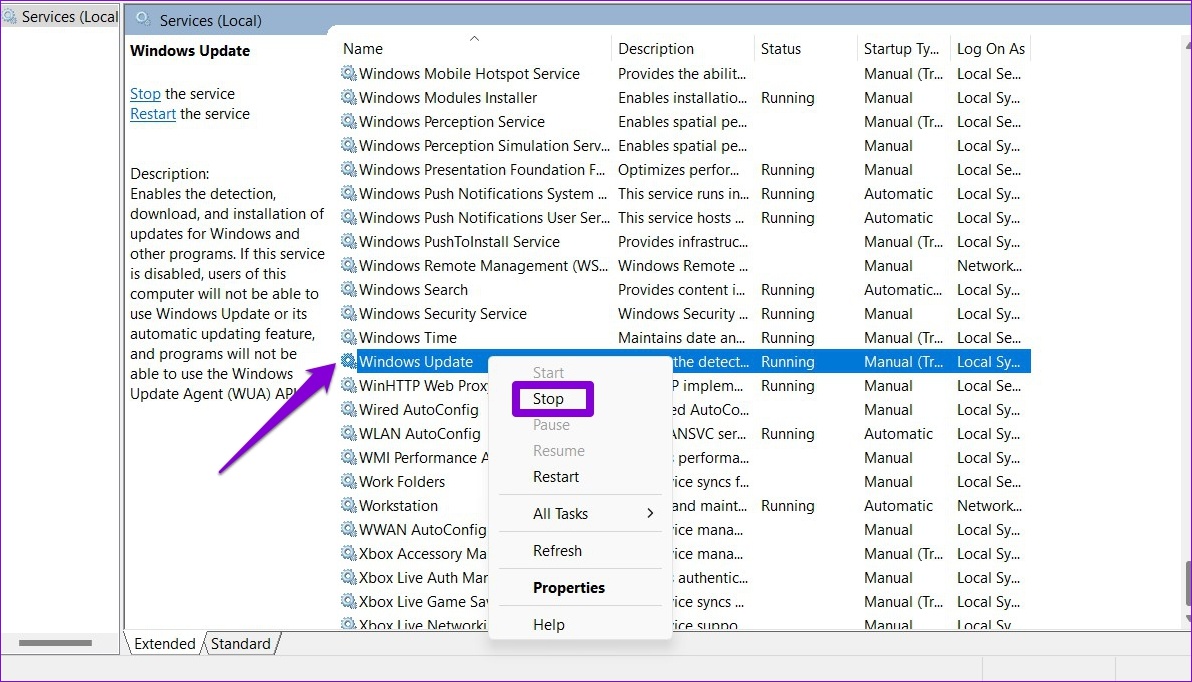
If the Windows 11 update appears stuck, there could be an issue with the downloaded update files. To fix it, you can delete the existing update files from the SoftwareDistribution folder and start afresh. Step 1: Click on the search icon on the Taskbar, type services in the box, and select the first result that appears.
Step 2: Locate the Windows Update service. Right-click on it and select Stop.
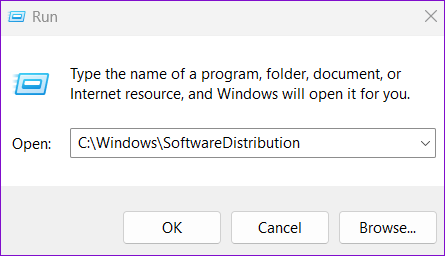
Step 3: Next, press the Windows key + R to launch the Run dialog box. Type C:\Windows\SoftwareDistribution, and press Enter.
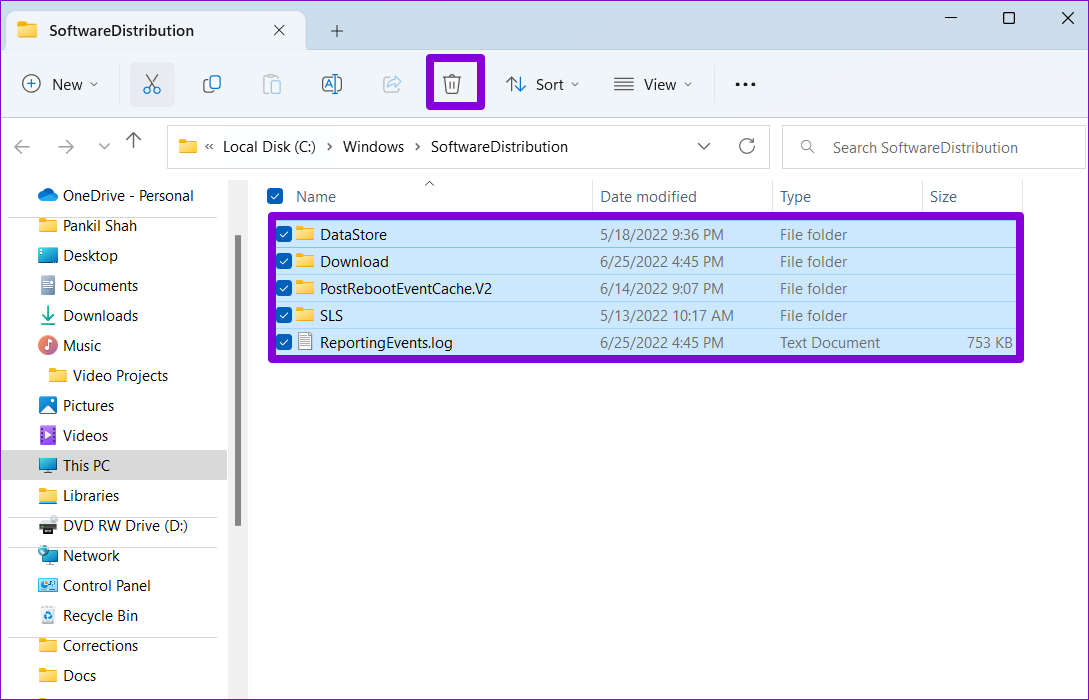
Step 4: Select all files in the SoftwareDistribution folder and click on the trash icon at the top to delete them.
Step 5: Head back to the Services window, right-click on Windows Update and click Start.
Try downloading and installing the update again from the Windows Update section.
6. Check System Files and Disk
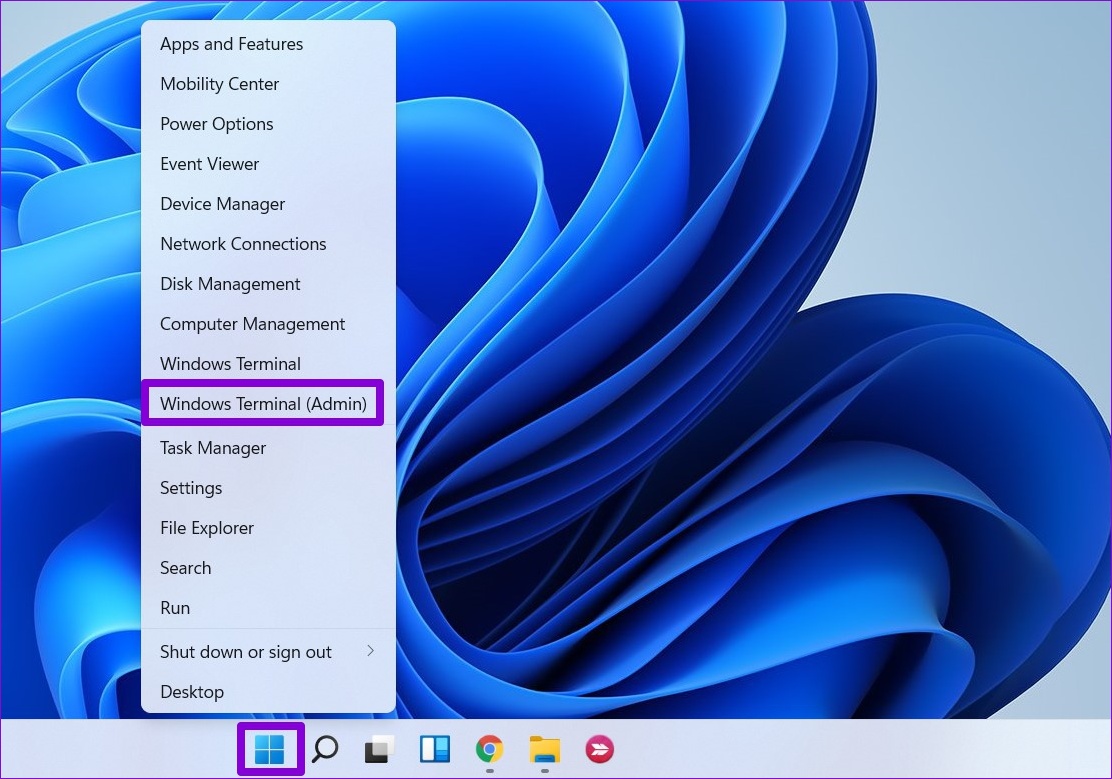
Issues with the system files on your PC can also affect the Windows update process. To rule this out, you can run an SFC (System File Checker) scan to repair corrupted or missing system files on your PC. Here’s how. Step 1: Right-click on the Start button and select Windows Terminal (Admin) from the list.
Step 2: Paste the following command in the console and press Enter.
After running the command, you’ll see a message conveying if the SFC scan found and fixed any issues.
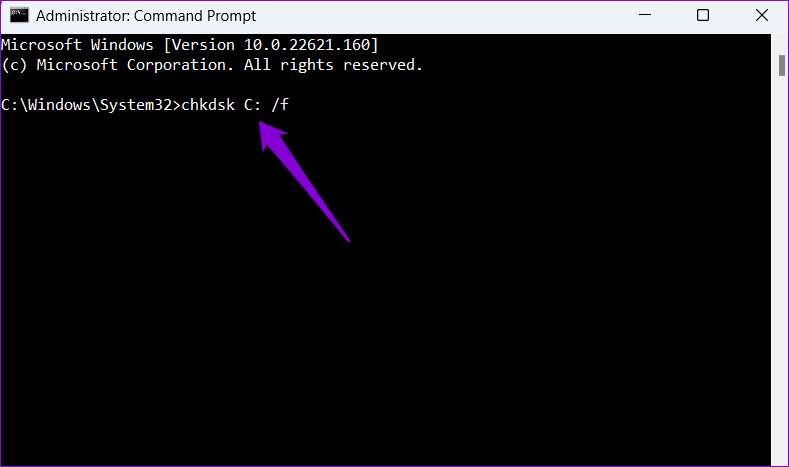
If the scan detects any problems and manages to resolve it, restart your PC and try running the Windows update again. If not, run the following command:
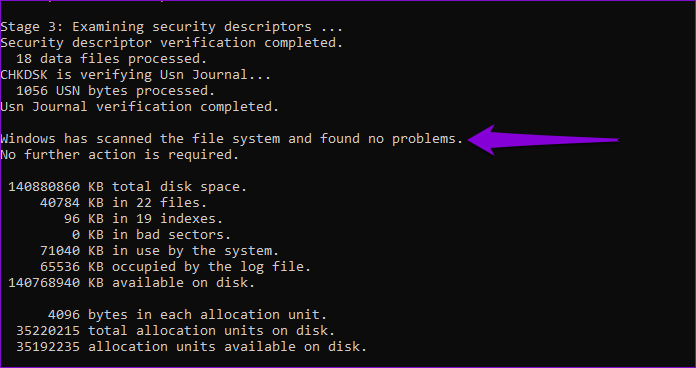
It will detect and repair any issues with your primary drive. After that, reboot your PC one more time and try updating Windows.
7. Check Device Manager for Errors
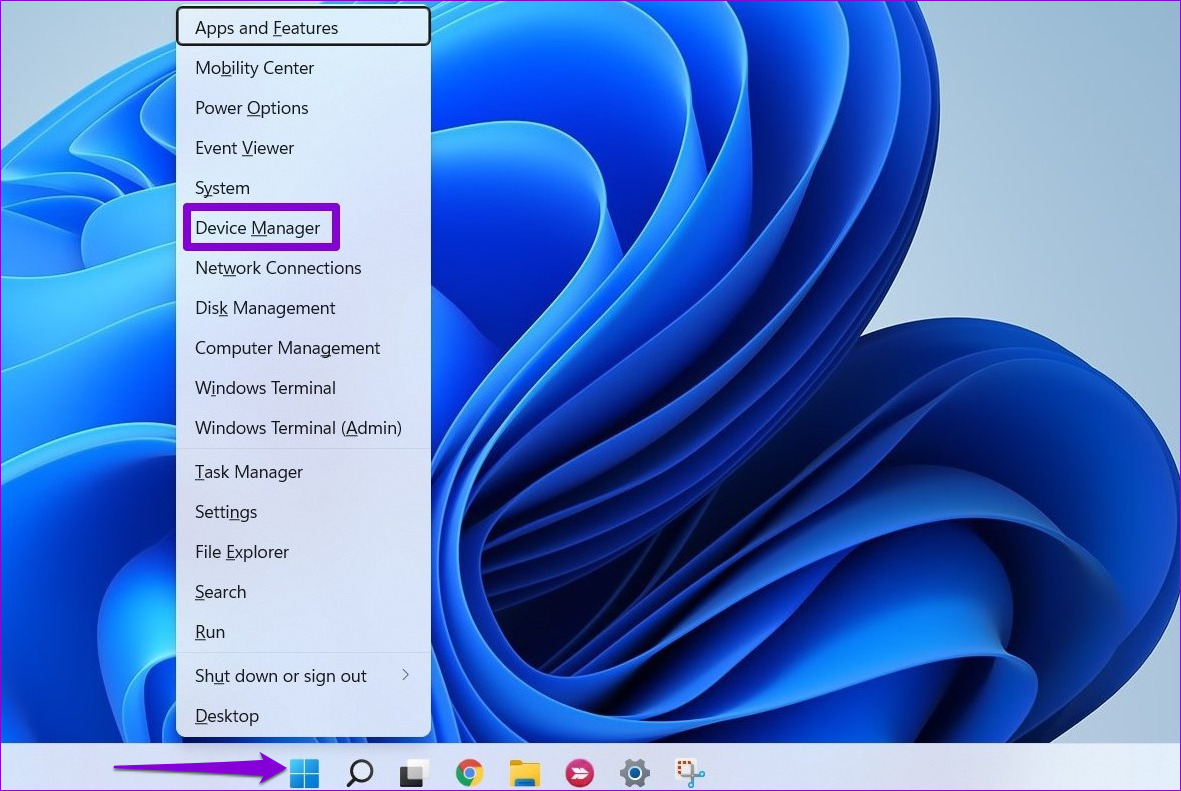
Third-party drivers on your PC can also interfere with Windows processes at times. If there’s an issue with one of the drivers on your PC, you must fix it first by employing the steps below. Step 1: Right-click on the Start icon and select Device Manager from the list.
Step 2: Scroll through the list and see if any drivers have a yellow exclamation sign. If found, right-click on it and select the Update driver option.
Follow the on-screen instructions to finish updating the driver. Once updated, check to see if Windows can install updates.
8. Try Clean Boot
If nothing works, you can try booting Windows in a clean boot state. This will load your PC without third-party apps and programs and prevent them from interfering with the update process. To boot Windows in a clean boot state, follow the steps below. Step 1: Press the Windows key + R to open the Run dialog box, type msconfig, and press Enter.
Step 2: Under the Services tab, mark the box that reads ‘Hide all Microsoft services’ box. Then, click the Disable all button.
Step 3: Next, switch to the Startup tab and click on Open Task Manager.
Step 4: Select a third-party app or program and click on the Disable button at the top. Repeat this step to disable all the third-party apps and programs.
Restart your PC to enter the clean boot state, and you should be able to install any pending Windows updates without a problem.
Stay Updated
Over the years, Microsoft has attempted to streamline the Windows Update experience. Still, you may encounter an issue or two on occasion. Thankfully, there’re enough troubleshooting tools you can deploy to fix such issues with Windows 11 updates. The above article may contain affiliate links which help support Guiding Tech. However, it does not affect our editorial integrity. The content remains unbiased and authentic.
